
The first Nether trip changes a survival world. Brewing, blaze powder, Eyes of Ender, nether wart, and the road toward the End all sit on the other side of one purple portal. The problem is that the Nether can punish a small mistake much faster than the Overworld. One exposed bridge, one missing coordinate, or one ghast fireball can turn a useful expedition into a long recovery job.
A safer trip is not about carrying the most expensive gear. It is about giving every part of the journey a clear job: protect the portal, mark the route, find a fortress, collect the materials you came for, and return before curiosity empties the inventory into lava.
Prepare Before Lighting the Portal
Iron armor is enough for a first visit if it is in good condition. Add a shield, iron sword, bow, arrows, pickaxe, plenty of cooked food, torches, and several stacks of blocks. Cobblestone is especially useful because it gives the portal and exposed paths better protection from ghast explosions than netherrack does.
- One gold armor piece: gold boots are the cheapest common choice. Regular piglins will usually leave a player wearing gold alone, although opening their containers, mining nearby gold, or meeting a piglin brute can still start a fight.
- Spare flint and steel: keep it in the inventory even if the portal is already lit. A ghast can extinguish the portal on the Nether side, and the easiest solution is the tool you almost left at home.
- Two stacks of building blocks: use them for walls, stairs, bridges, route markers, and emergency cover. A one-block-wide bridge over lava is quick until a ghast notices it.
- A written coordinate: record the Overworld portal before entering. The Nether side needs its own coordinate as soon as the area is safe.
- An inventory with empty space: leave diamonds, rare tools, and unrelated loot at home. The first trip should have room for blaze rods, nether wart, soul sand, and fortress chest items.
A water bucket belongs in many survival kits, but it will not save a player from fire inside the Nether. Placed water disappears there. Beds are worse: trying to sleep makes them explode. Fire Resistance potions make later visits much easier, but the first brewing stand and its fuel both depend on blaze rods, so the opening trip has to work without them.
Build a Portal You Can Find Again
The smallest standard Nether portal uses a four-by-five outer frame. The corners can be left empty, bringing the total to 10 obsidian, and flint and steel lights the open space inside. Build it near a familiar base route instead of hiding it at the bottom of a mine where the return journey is already inconvenient.
Write down the Overworld X, Y, and Z before stepping through. Horizontal travel is compressed in the Nether: moving one block there covers roughly eight blocks in the Overworld. That makes the dimension useful for long-distance travel, but it also explains why two portals can connect in unexpected ways when several frames are built near each other.
Give the Overworld side a chest with spare food, armor, blocks, and another flint and steel. If the first visit ends badly, the replacement kit should be waiting beside the portal instead of scattered across the main storage room.
Secure the Nether Side First
Do not sprint away as soon as the new dimension loads. Check the floor, ceiling, nearby lava, and any open line where a ghast could fire at the frame. Some portals arrive in a quiet wall. Others place the player beside a drop that would be dangerous even without enemies.
Build a small stone room around the portal with a door or narrow entrance, then write the Nether coordinates on a sign or outside note. Keep the frame visible from inside the shelter. If several portals eventually share the same tunnel network, label each room with its Overworld destination.
A respawn anchor can set a spawn point in the Nether once it is charged with glowstone. It is useful for a permanent base, not a reason to treat the first expedition casually. Dying beside a fortress still leaves the replacement player at the anchor without the equipment needed to cross the route again.
Search Without Losing the Portal
Choose one direction and keep it until the terrain forces a deliberate change. Mark every turn with a block that stands out against the biome, and place markers on the same side of the route. When the return trip begins, those markers should form a readable trail instead of a collection of random towers.
Nether Wastes and Soul Sand Valleys often offer long sightlines, which can reveal fortress bridges across lava or open ground. Basalt Deltas are much slower to cross because uneven columns and hidden lava pockets interrupt almost every route. Crimson forests can also become confusing when the same red vegetation fills every direction.
Build covered paths when the route crosses open lava. A low wall on both sides prevents a small mistake from becoming a fatal fall, while a roof gives ghast fireballs something to hit before they reach the player. Stop occasionally and look backward. A path that seems obvious while building can disappear against netherrack from the other direction.
Coordinates are more reliable than memory here. Record the portal, any safe junction, and the fortress once it appears. A normal compass spins in the Nether unless it has been linked to a lodestone in the same dimension.
How to Recognize a Nether Fortress
A Nether fortress is made from dark red Nether bricks. Long bridges, square towers, fenced walkways, stair rooms, and corridors can stretch across lava or disappear into surrounding netherrack. A bastion remnant looks darker and rougher, uses blackstone, and is occupied by piglins. Bastions hold valuable loot, but they do not replace the fortress when the goal is blaze rods.
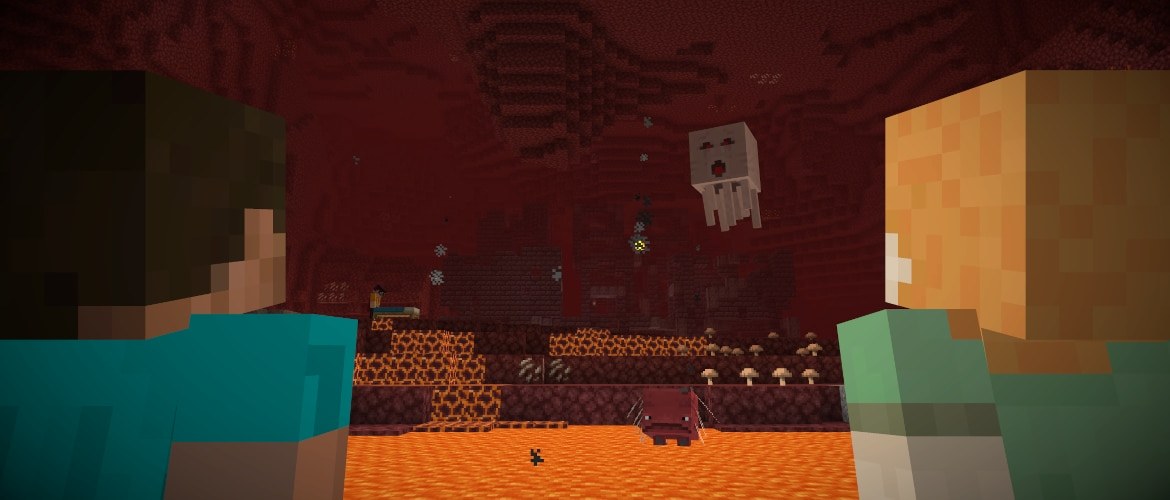
Approach from solid ground when possible. If the fortress is above or across lava, build a staircase or bridge with rails instead of stacking straight upward beneath enemies. Mark the exact entry point with bright blocks. Fortress corridors repeat, and the doorway that felt impossible to miss can vanish after three turns.
Some sections generate inside netherrack. A visible bridge may lead to buried corridors, or the first wall may hide a much larger structure. Mine carefully around the edges rather than digging straight ahead with no idea what waits on the other side.
Take More Than Blaze Rods From the Fortress
Blaze rods are the main target, but the fortress can solve several progression problems at once. Nether wart grows on soul sand in some staircase rooms. Take both the wart and enough soul sand to start a farm at home. The wart blocks found in crimson forests cannot be broken back down into Nether wart, so they are not a substitute for the crop.
Fortress chests can hold useful materials and equipment. Wither skeletons also appear along the structure and may eventually provide the skulls needed to summon the Wither. That hunt belongs to a later trip. On the first visit, a wither skeleton is mostly a tall enemy with a dangerous status effect and a habit of appearing while the player is already watching for blazes.
Mark a blaze spawner instead of breaking it. The spawner is a renewable source of rods and experience, and a future player with Fire Resistance, stronger armor, and better weapons can turn the area into a controlled farm. Destroying it trades a useful long-term location for a few quiet minutes.
Fight Blazes From Cover
Blaze spawners often sit on open fenced platforms where knockback and fire are as dangerous as the mob itself. Before fighting, connect the platform to a covered corridor or build a small shelter close enough to retreat into. A corner gives the player time to eat, lower the fire timer, and wait for the next attack without standing above lava.
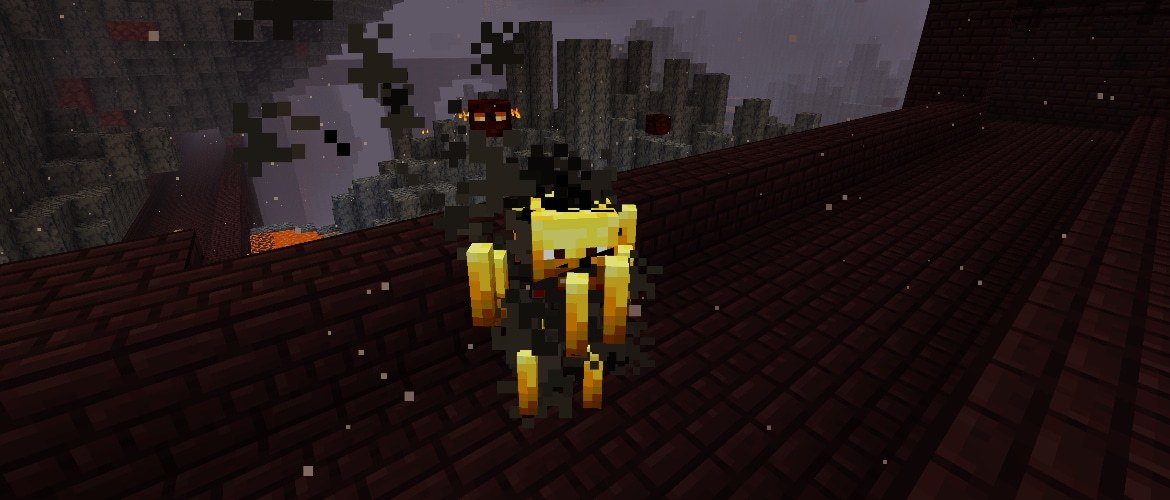
A blaze becomes brighter before firing. Raise the shield or move behind a wall during the volley, then close the distance while it pauses. A bow helps when the blaze floats away from the bridge, but melee attacks are faster when solid cover keeps the fight under control.
Do not chase a blaze into open air. Let it return toward the platform or use the bow. Falling rods can land on lower bridges or disappear into lava, and the player risks following them. Looting on a sword improves the haul when that enchantment is already available, but a normal iron sword can complete the first run.
Two or three blazes can overwhelm an exposed player very quickly. Fight from the edge of the spawner area, collect each drop when the floor is safe, and retreat before low health turns the next volley into a death screen.
How Many Blaze Rods Should You Bring Home?
Keep at least one blaze rod intact for the brewing stand. The recipe uses one rod with three suitable stone blocks. Each additional rod can be crafted into two blaze powder. The powder fuels brewing, and one piece can power up to 20 brewing operations.
Blaze powder also combines with Ender pearls to make Eyes of Ender. An End portal can need as many as 12 eyes, although some frames may already be filled, and eyes thrown while searching for a stronghold can break. Returning with only two rods usually means another fortress trip before the End becomes realistic.
Eight to 10 blaze rods is a comfortable first target. That leaves one for the brewing stand and enough powder for early potions, stronghold searches, and the portal with some luck. Players planning a large potion room or an immediate dragon run may want more, but the safe number is the amount that reaches the Overworld. A perfect stack is worthless at the bottom of a lava lake.
Leave Before the Trip Becomes a Rescue Mission
Once the rods and Nether wart are secured, follow the marked route home. Store the fortress coordinates outside the game and add the entry point if the structure is large. Future trips become much easier when they begin with a known path instead of another search.
Use the spare flint and steel if the portal has gone dark. If that tool is gone too, a fire charge can relight the frame, but crafting one inside the Nether requires blaze powder, coal from a wither skeleton, and gunpowder from a ghast. Possible does not mean pleasant.
The Nether will still have bastions, ancient debris, striders, biomes, and long-distance tunnel projects after the first mission. Bring the rods home. Brew Fire Resistance. Repair the route. The second trip can afford to be adventurous because the first one did its job.
A Simple First-Nether Route
- Before entering: wear iron armor with one gold piece, carry a shield, bow, food, blocks, pickaxe, and spare flint and steel, then record the Overworld portal.
- At the Nether portal: check the surroundings, build a stone shelter, and record the new coordinates before exploring.
- During the search: pick a direction, mark turns, protect bridges, and save the coordinates of useful junctions.
- At the fortress: mark the entrance, find cover near a blaze spawner, collect Nether wart and soul sand, and preserve the spawner.
- Before leaving: keep one rod for the brewing stand and aim for eight to 10 rods in total.
- Back at home: store the rods, wart, and fortress coordinates before deciding what the next Nether trip should become.