For a copy-and-paste Roblox RIVALS setup, use Manual graphics at 3–5 on a slower PC, a clean crosshair, low camera shake, and a mid-range FOV. On mobile or controller, copy the visibility and crosshair choices, then calibrate sensitivity on your own device so aim stays repeatable.
Last updated August 27, 2026. The official RIVALS listing supports desktop, phones, tablets, Xbox, and PlayStation 5, but settings tabs and input options can differ. Use the quick preset below as a starting point, then confirm the live menu after an update.
Copy the structure, not someone else's muscle memory: sensitivity still has to match your device and input.
Best RIVALS settings to copy and paste
Use these as a balanced copy-and-paste preset. If a label does not appear on your device, skip it instead of forcing a PC setup onto mobile or controller:
- Graphics Mode: Manual
- Graphics Quality: start at 3 to 5 on a slower PC; raise it one step at a time only while frame pacing stays stable
- Camera Shake: Off
- Hide Muzzle Flashes: On
- Damage Flashing: Outline
- Damage Numbers: On
- Padded HUD: On
- Projectile Smoothing / Smooth Projectiles: compare both positions and keep the one that makes shots easiest to read
- Auto Sprint: On if you use crouch or slide often
- Easy Slide: On if normal slide inputs feel inconsistent
- FOV: use 97 as a midpoint, then test roughly 90 to 105 before going wider or narrower
- Crosshair: Static small dot or simple cross
- Crosshair color: Cyan, bright green, or another color you can see on every map
- Crosshair outline: On and thin
- Show Crosshair While Aiming: On
- Music: Low enough that it never covers shots, footsteps, or reloads
- Sound Effects: High
This preset prioritizes clarity. Sensitivity still needs device-specific tuning because Roblox camera sensitivity, RIVALS sensitivity, mouse DPI or stick response, and scoped multipliers all change how the same number feels.
How to copy and paste a RIVALS settings code
RIVALS has three settings profiles and lets you share a whole profile or a single section, such as Crosshair. Use a different slot when trying a complete setup so you can compare it with your usual controls. The preset above is a manual checklist, not an import code.
- Open Settings. Find the numbered profile selector in the RIVALS settings menu.
- Choose a profile slot. Pick the slot that will hold the settings you are importing.
- Select Import. Use the import control for that settings profile.
- Paste the code. Paste the complete shared settings string exactly as it was provided.
- Confirm and test. Enter the Shooting Range before using the imported profile in a real match.
A complete imported profile can change sensitivity, camera behavior, aiming, keybinds, and crosshair values together. Compare it with the manual preset above, then adjust normal, aiming, and scoped sensitivity for your own mouse, controller, or touchscreen. On mobile, the three settings profiles are linked to the touch-button layout profiles, so also check where your buttons moved.
How to copy only a crosshair
If you only want another player’s reticle, ask them to share the Crosshair section instead of their entire profile. Import that section rather than replacing your full setup. Check the dot or cross, outline, color, and visibility while aiming before a match.
Best PC settings for stable FPS
For Roblox-wide graphics, open the in-experience menu, choose Settings, disable automatic graphics quality, and begin around level 3 to 5. Lower the quality when visuals stutter. RIVALS also has its own Video tab, so change one layer at a time.
Roblox separates network lag, graphics lag, and system lag because they need different fixes. Lowering graphics can help when the image stutters or the frame rate drops. It will not fix players teleporting, delayed hit registration, or a poor server connection.
Use this quick check:
- The game looks choppy but players move normally: lower graphics and close heavy background apps.
- Players teleport or hits arrive late: check ping, Wi-Fi, and the server region.
- The whole computer feels slow: close browsers, recorders, launchers, and other programs using memory or the GPU.
- Only one match feels bad: leave and test another server before changing every setting.
Do not replace Roblox files or download a mystery FPS tool. RIVALS is competitive, but a small performance gain is not worth risking an account or installing unsafe software.
Best RIVALS FOV setting
If you want one number to begin with, start at 97 FOV. It is a useful midpoint, not a universal best value: wide enough for nearby movement without immediately shrinking distant targets. Your screen size, device, motion comfort, and main weapons should decide where you finish.
- 90 to 95: a calmer view for 1v1, 2v2, and players who want larger targets on screen.
- 96 to 100: a balanced range for Ranked and mixed play.
- 101 to 110: a wider view for FFA, TDM, and larger fights where side awareness matters.
- Below 90: worth trying for distant targets or motion comfort, with less peripheral vision as the trade-off.
A wider FOV does not give free aim. It shows more of the map, but enemies appear smaller. If you keep losing close enemies at the edge of the screen, raise FOV slightly. If distant targets are hard to see, lower it.
Normal FOV and scoped FOV are separate
Use Field Of View Non-Scoped Weapons for your normal weapon view. Field Of View Scoped Weapons controls the separate scoped view; changing the non-scoped setting does not adjust it. Start by tuning the normal view, then aim through a scope and adjust its FOV separately. The ranges above are starting points, not values you need to copy into both controls.
Players who feel motion sickness should avoid jumping straight to a very wide view. Change by two or three points and test a full match.
How to find the best mouse sensitivity
There is no universal RIVALS sensitivity. The same in-game number can feel completely different at 400, 800, or 1600 mouse DPI.
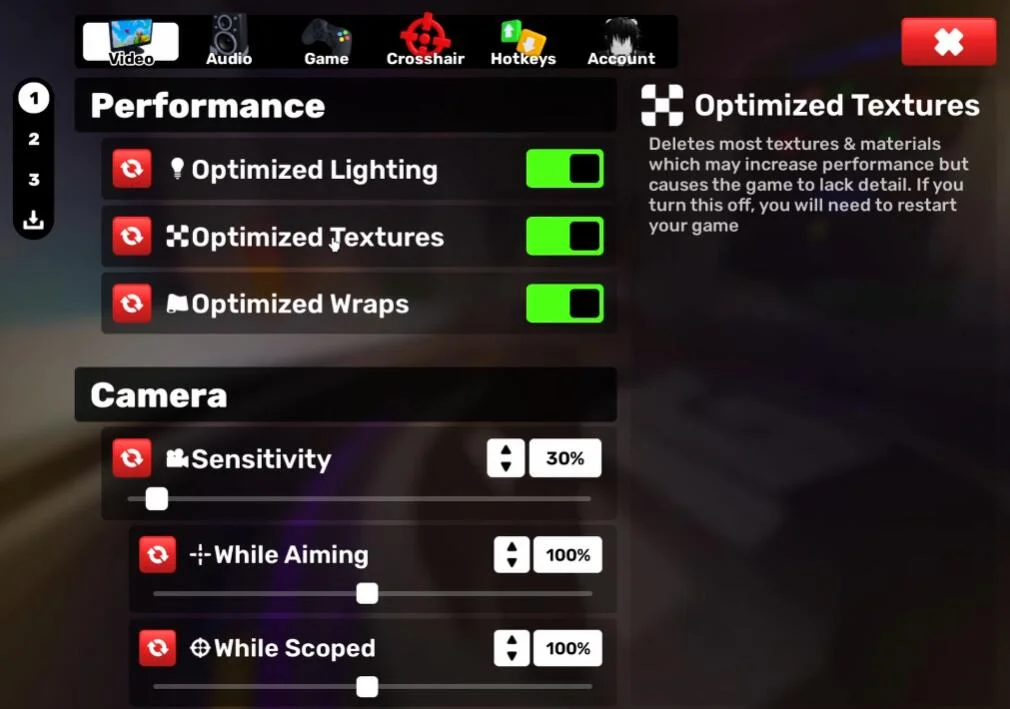
Before changing anything, write down Roblox camera sensitivity, mouse DPI, RIVALS Sensitivity, While Aiming, and While Scoped. The screenshot above shows the three RIVALS camera controls. A copied in-game percentage means little without the other values.
- Stand in the Shooting Range and begin from the values you already use.
- Place the mouse near one side of the space you can swipe comfortably.
- Swipe across that space and aim for a turn of about 180 degrees.
- Track a moving target for 30 seconds, then repeat the same route.
- Lower only the active sensitivity layer if the crosshair keeps passing the target.
- Raise it if close enemies move faster than you can turn.
Change only one of Roblox camera sensitivity, RIVALS Sensitivity, While Aiming, or While Scoped at a time. Play at least three matches before changing it again. One missed shot is not enough evidence that the setting is wrong.
Tune While Scoped after normal camera movement and While Aiming feel stable. While Aiming does not adjust scoped weapons; use While Scoped for that. Compare small changes at the same target distance instead of assuming 50% or 100% is correct.
Best controller settings
Begin with a controller camera speed that lets you turn around without losing small corrections. Tune normal aim first, then any aiming or scoped multiplier. Stick wear, screen size, aim assist, and controller model make copied numbers unreliable.
Use this routine:
- Push the stick fully left or right and check whether you can turn around without feeling trapped.
- Track a moving target with small stick movements.
- Lower camera sensitivity if the crosshair jumps past the target.
- Raise it if an enemy can circle behind you before you can react.
- Tune scoped sensitivity after normal camera movement feels comfortable.
- Keep the setting for several matches so your hands can learn it.
Place crouch, slide, melee, and Utility on buttons you can reach without taking both thumbs away from movement and aim. If you have back buttons, use them for movement actions before assigning less urgent menu controls.
Best mobile settings and button layout
Mobile players need a clear screen and buttons that can be pressed without covering the target. Open the layout editor and move the most important controls before changing sensitivity.
Start with these changes:
- Keep fire, jump, crouch or slide, reload, and Utility inside easy thumb reach.
- Move large buttons away from the center so they do not hide enemies.
- Reduce the transparency of buttons you often lose during a fight.
- Hide controls you never use.
- Leave enough space for a clean camera swipe.
- Use a static crosshair that stays visible behind touch controls.
Do not copy a tablet layout onto a small phone. Button size and spacing should match the screen. Test by moving, jumping, sliding, aiming, and firing in one sequence. If one action forces your hand to block the middle of the display, move that control.
Auto Shoot is a mobile comfort option, not a universal best setting. The community update history lists Enabled and Dynamic behavior plus a reaction-time control, while Ranked can enforce Dynamic and other limits. If those options appear in the current menu, practice with the same mode you plan to use in Ranked.
Best crosshair settings
A small static dot with a thin outline is the easiest all-around option. A simple cross also works if a dot is hard to see. The goal is to mark the center without covering a distant opponent.
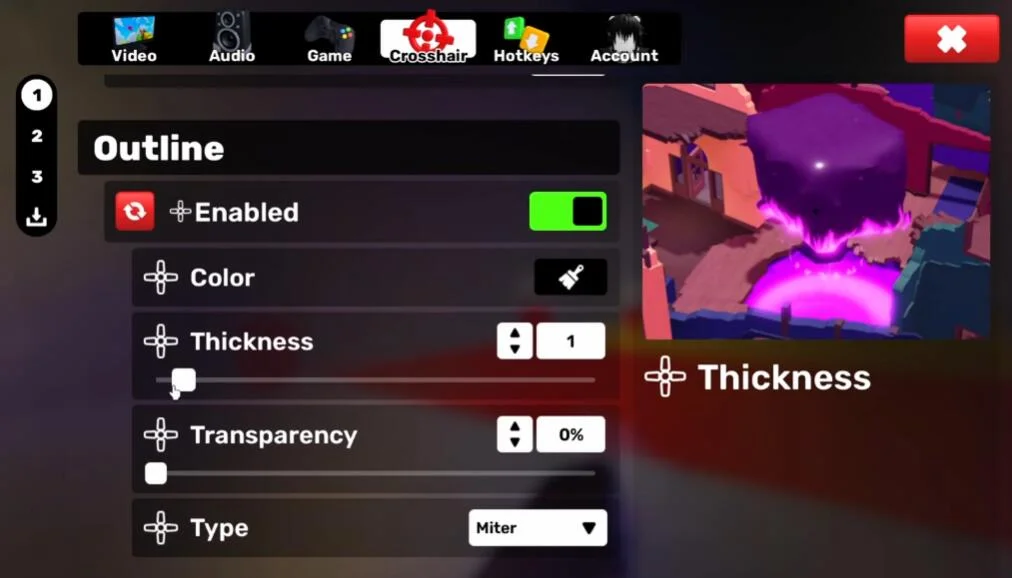
Try this starter crosshair:
- Style: dot or simple cross
- Dynamic movement: Off when animation distracts you; otherwise keep the default
- Color: cyan or bright green
- Outline: on, thin, and dark
- Opacity: high enough to stay visible
- Center gap: small or zero
- Show while aiming: on
- Special-weapon overrides: on only when a weapon needs a different spread reference
Test the crosshair against bright walls, dark corners, red effects, and blue effects. White can disappear on bright maps, while red may blend into damage effects. A thin outline helps the same color work in more places.
RIVALS supports special crosshairs and hitmarker controls. Keep the normal reticle simple first. Add a special version only when it gives useful information for a Shotgun, Sniper, Bow, or another weapon with unusual spread.
Visibility settings worth changing first
Camera shake and muzzle flashes can cover a target during the exact moment you need to track it. Turning Camera Shake off and Hide Muzzle Flashes on creates a calmer picture. Damage Flashing set to Outline gives feedback without filling as much of the screen.
Keep Damage Numbers on when they help confirm hits, and use Padded HUD when it makes health and ammo easier to read. Projectile Smoothing changes presentation rather than damage or hit registration, so compare it On and Off in the same range test instead of treating either position as mandatory.
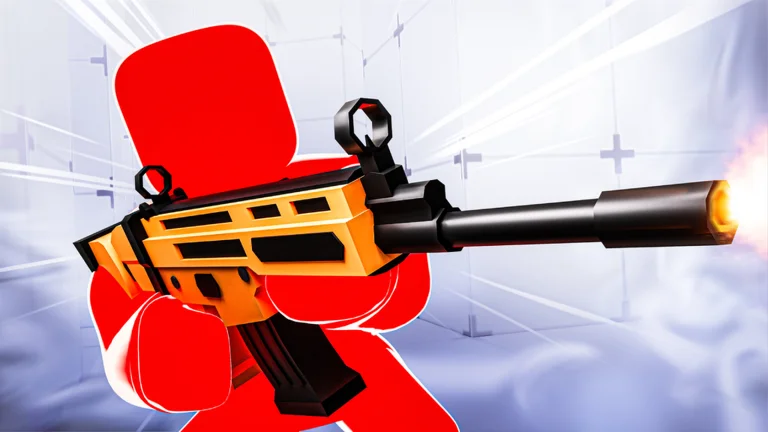
These options improve clarity, not weapon damage. Pair the setup with a loadout that fits your aim. The Roblox RIVALS Weapon Tier List explains strong primaries, secondaries, melee choices, and Utilities.
Best movement and keybind settings
Good keybinds let you move, slide, swap, and use Utility without twisting your hand or releasing normal movement keys.
On keyboard and mouse, useful starting choices include:
- Crouch or Slide: Left Shift when Auto Sprint is on
- Primary and Secondary: number keys or easy-to-reach Q and E binds
- Quick Melee: a mouse side button if available
- Utility: a second mouse side button or a nearby keyboard key
Keep Auto Sprint on if it makes slide movement smoother. Turn it off if it causes unwanted movement while you are trying to hold an angle. Easy Slide is helpful when the normal timing feels unreliable, but neither setting is required.
Movement matters even more in competitive matches. The Roblox RIVALS Ranked Guide covers ELO, ranks, team play, and the habits that make climbing more consistent.
Audio settings for hearing important cues
Keep sound effects high enough to hear shots, movement, reloads, and nearby abilities. Lower music until it cannot cover those cues. Headphones can make direction easier to judge, but high volume is not necessary and can become uncomfortable.
Test audio during a match, not only in the menu. If music or a cosmetic sound hides an opponent's reload, reduce that category. If everything is too loud, lower the master volume while keeping the balance between effects and music.
How to save and test a settings profile
Keep your working setup in one of the three profile slots before making a large change. Use another slot for a scoped-weapon setup, a different input device, or a practice experiment. Check the touch-button layout too when switching profiles on mobile.
Test settings in this order:
- Stabilize graphics and FPS.
- Choose an FOV.
- Tune normal sensitivity.
- Tune scoped sensitivity.
- Set the crosshair.
- Move important buttons or keybinds.
- Balance effects and music.
Changing one group at a time makes it clear what helped. If you replace graphics, FOV, sensitivity, and crosshair at once, a better match will not tell you which change worked.
After the setup feels comfortable, stop editing it every day. Consistency lets your hands learn the same turn distance and movement timing. Use the RIVALS Keys Guide when you want to unlock more gear, and the RIVALS game page for the main game details.
Quick fixes when the settings feel wrong
- Aim keeps passing enemies: lower normal sensitivity slightly.
- Sniper aim feels shaky: lower scoped sensitivity, not every aim setting.
- Close fights feel too slow: raise normal sensitivity or FOV a little.
- Enemies are too small: lower FOV.
- The screen is too busy: disable camera shake, hide muzzle flashes, and use Outline damage flashing.
- FPS drops during effects: lower Roblox Graphics Quality one step and close background apps.
- Shots feel delayed: test another server or connection before changing graphics.
- Crosshair disappears: choose a brighter color and enable a thin outline.
- Mobile buttons cover targets: reduce their size or move them away from the center.
Use the preset to get playable quickly, then change one variable and keep it for several matches. A stable setup you can reproduce is more useful than a popular preset that does not match your device.