

Pixel Twelve
How to Light and Upgrade the Campfire in 99 Nights in the Forest

How To

How to Light and Upgrade the Campfire in 99 Nights in the Forest

Find the campfire, cut a nearby tree, drag fuel into the right spot and read the fire's progress bar without mixing it up with crafting or days survived.

By Nova RainesGame: 99 Nights in the ForestVerified Oct 1, 2026
Add to list
Guide Type
How To
Last Verified
Oct 1, 2026

Guide details

Overview

Find the campfire, cut a nearby tree, drag fuel into the right spot and read the fire's progress bar without mixing it up with crafting or days survived.

1. Find the campfire, not the grinder

These steps use PC mouse controls in a standard forest run, after you leave the matchmaking lobby. Look in your starting clearing for several brown logs meeting in a pile, with pale stones around the base. That is the campfire. Orange flames show it is lit; the same log pile without flames is the place to relight it.

The red-orange tray beside the wooden workbench is the grinder. Putting a log there supplies crafting materials instead of feeding the fire. Keep the fire in sight while you gather the first fuel.
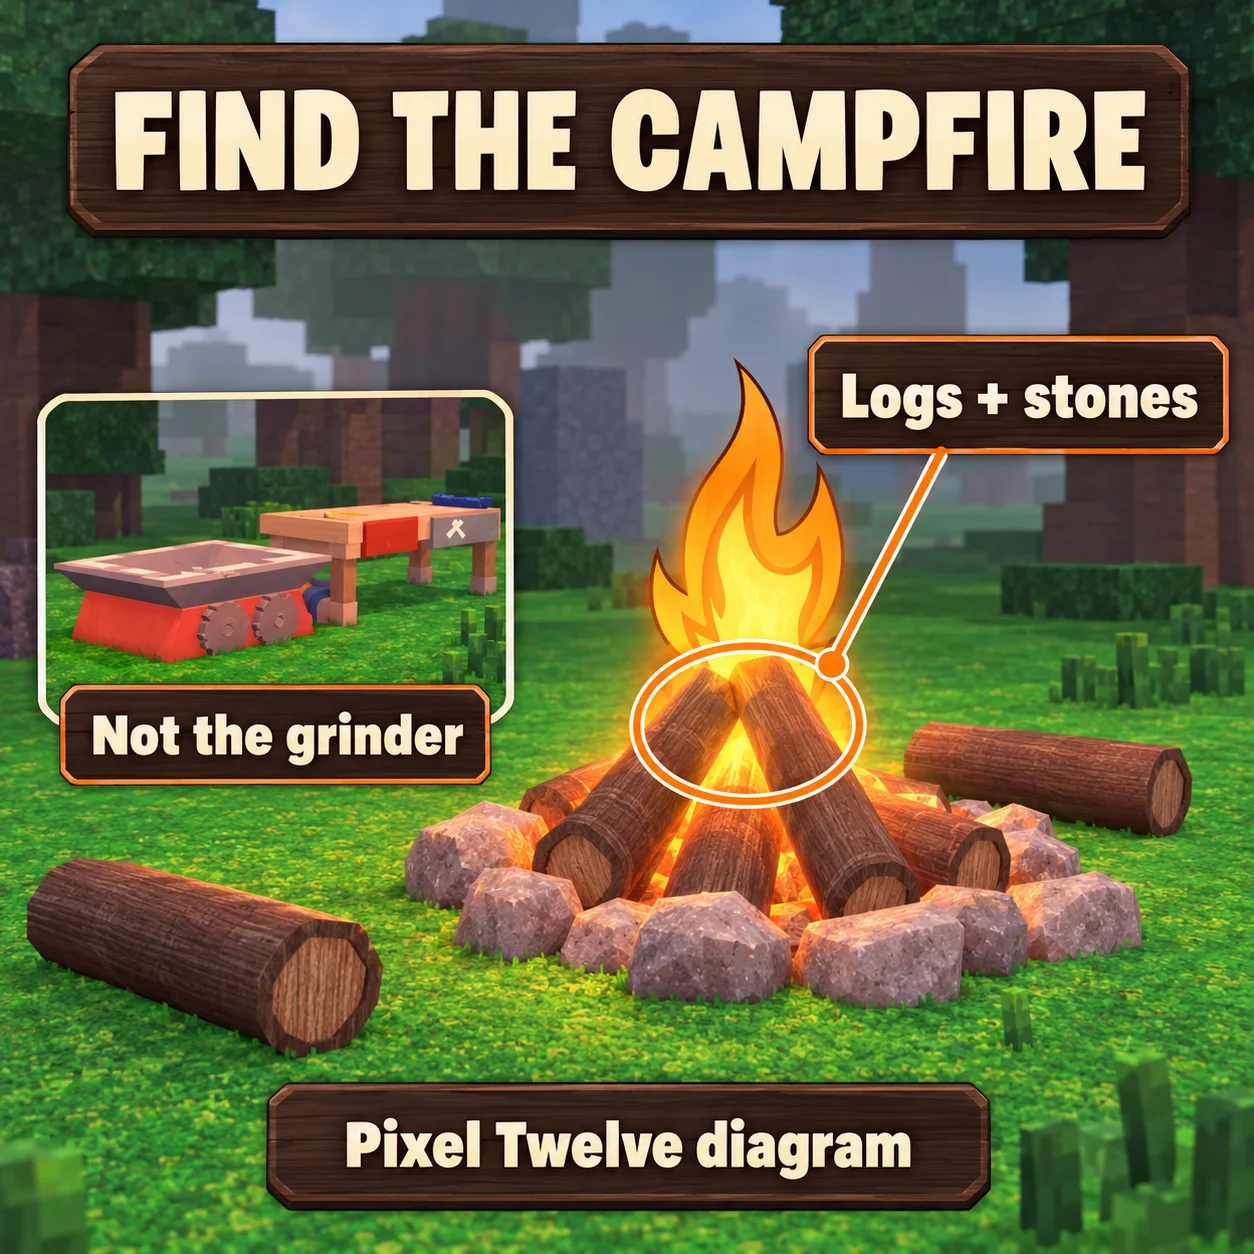
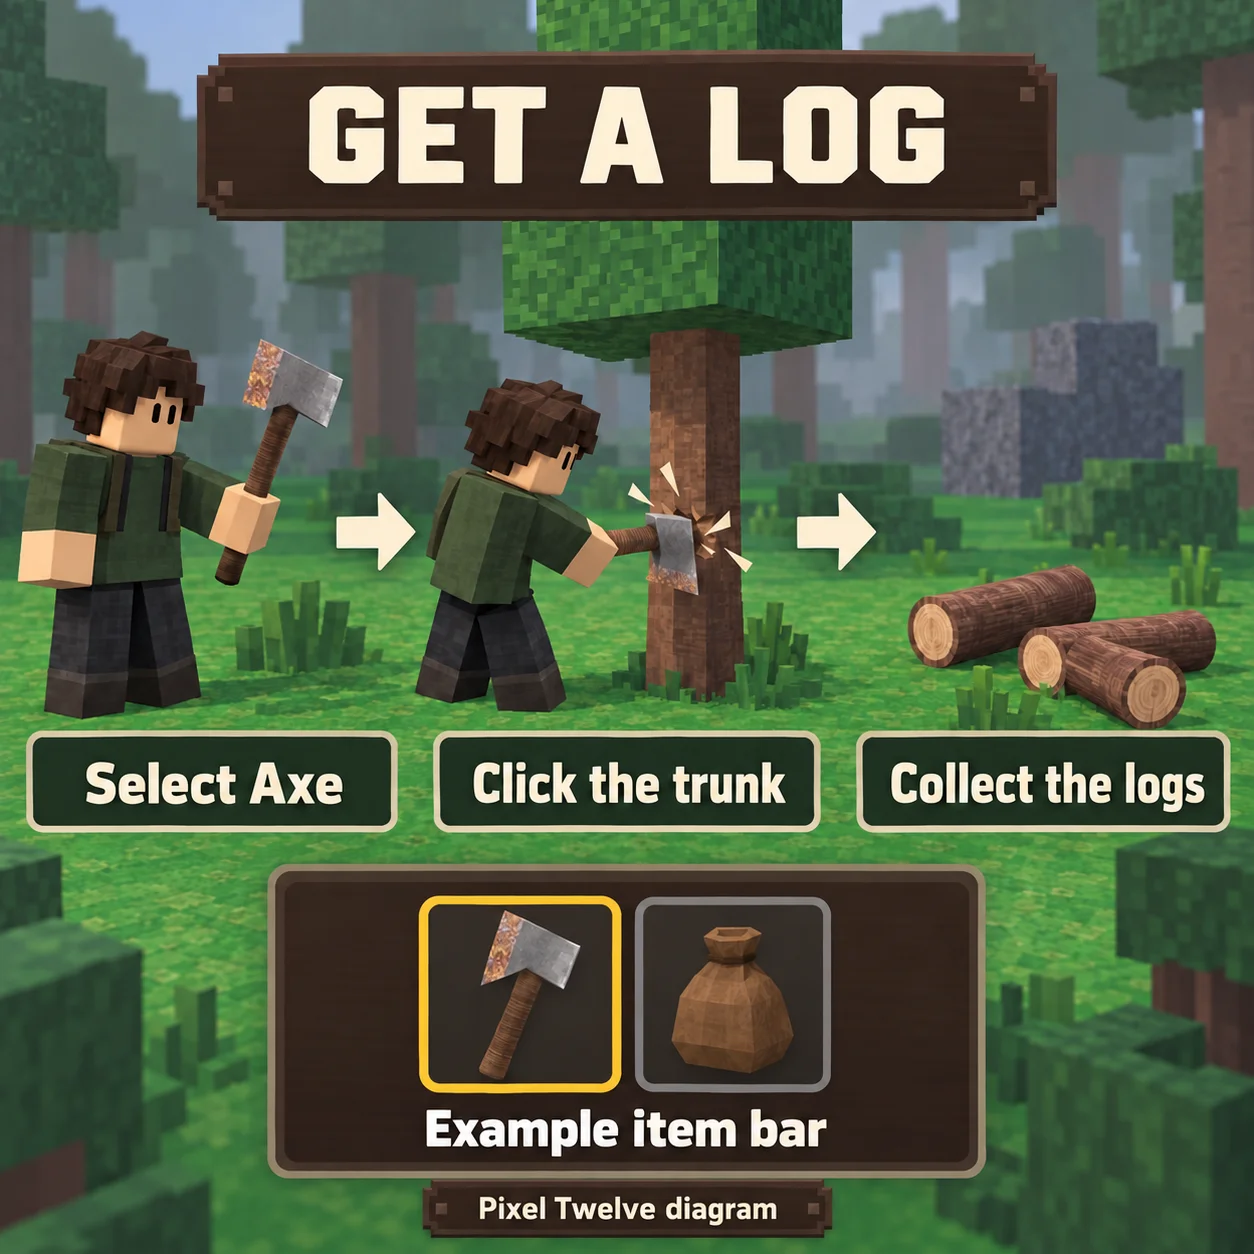
Diagram of the log-and-stone campfire beside the separate red-orange grinder in 99 Nights in the Forest.
Original Pixel Twelve diagram, not a screenshot: fuel belongs in the campfire’s log pile, not the grinder.

2. Get a loose log from a nearby small tree

Look at the item bar along the bottom of the screen. Select the Axe by its picture, not a fixed slot number. The starting Old Axe has a long brown handle and a broad gray metal head with a rusty edge. Check that your character now holds the axe.

Choose an ordinary narrow-trunk tree near camp, not one of the huge thick trees. Stand beside the trunk, aim at it and click the left mouse button to swing. Keep hitting until it falls. Look on the grass for short brown cylinders with pale round ends: these are Logs. A leafy little sapling is not the log you need.

Rusty Old Axe selected in an example item bar, followed by chopping a small tree and finding round logs.
Original Pixel Twelve action diagram: select the Axe by its picture, cut a nearby small tree and look for the fallen Logs. The item bar is an example, not a fixed slot layout.

3. Drag one log into the center of the fire

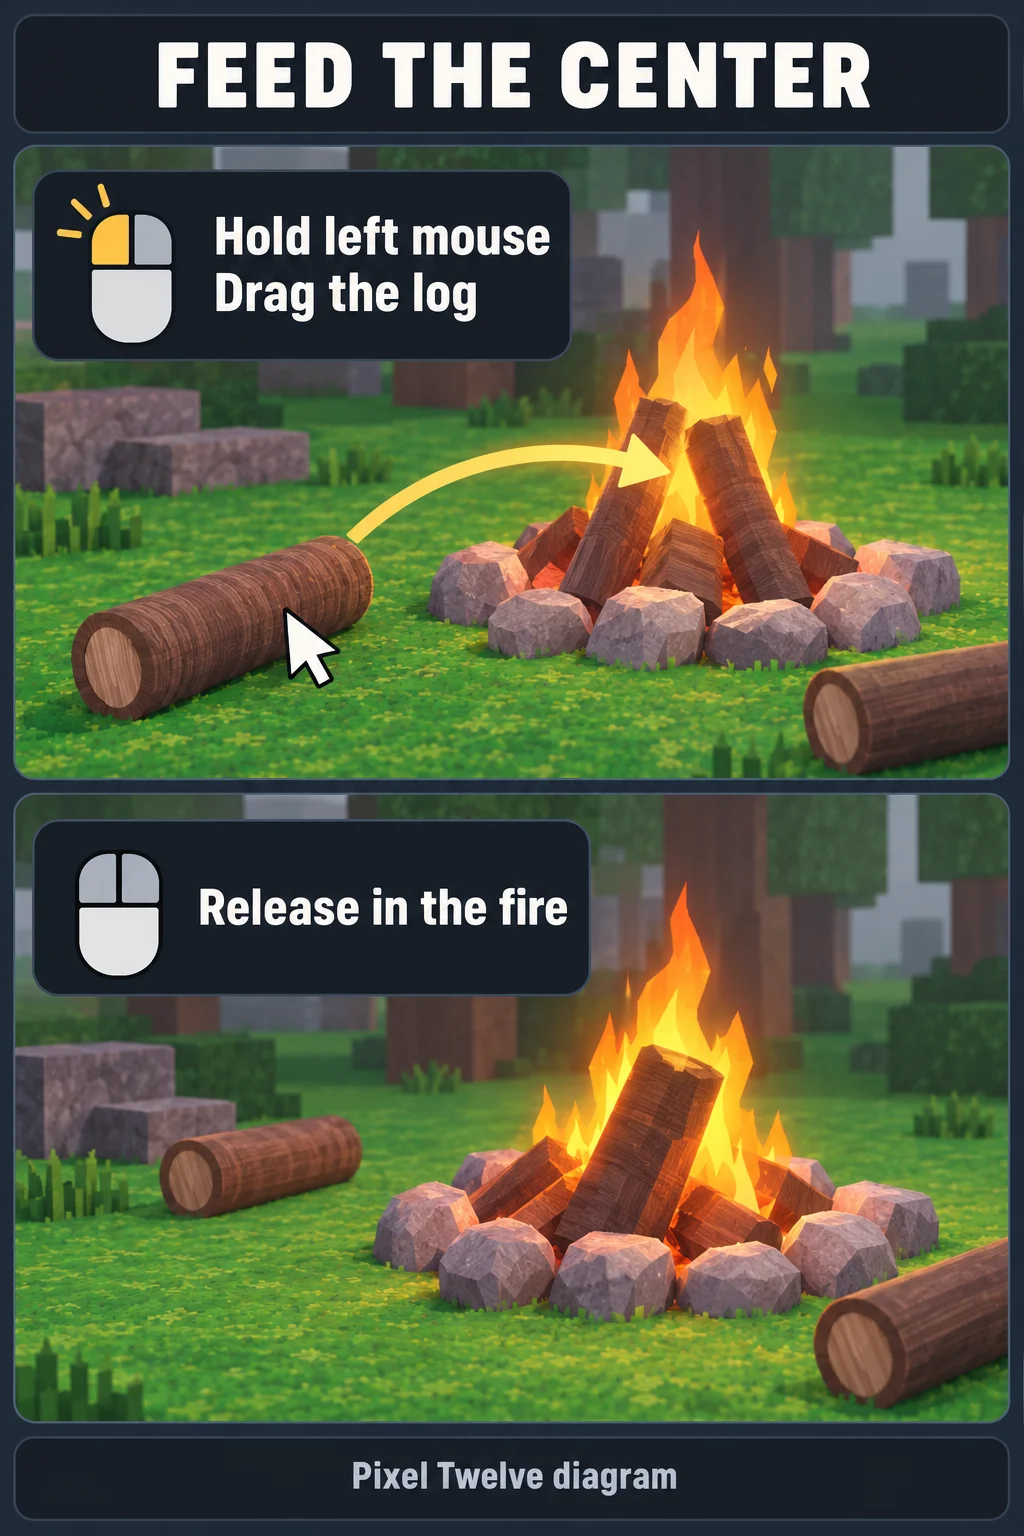
Walk close to a loose Log on the ground and point the cursor at it. Hold the left mouse button, keep holding while you move the log to the campfire, then release it inside the central log pile. Aim for the wood under the flames, not the outside of the stone ring.

The fuel must reach the fire itself. A log resting beside the stones has not fed it. This method uses a loose ground item: clicking an Axe or Sack slot does not put that tool into the fire.

Mouse left button held while dragging a loose Log into the campfire, then released at the central wood pile.
Original Pixel Twelve PC action diagram: hold the left mouse button on a loose Log, drag it into the center of the fire and release.

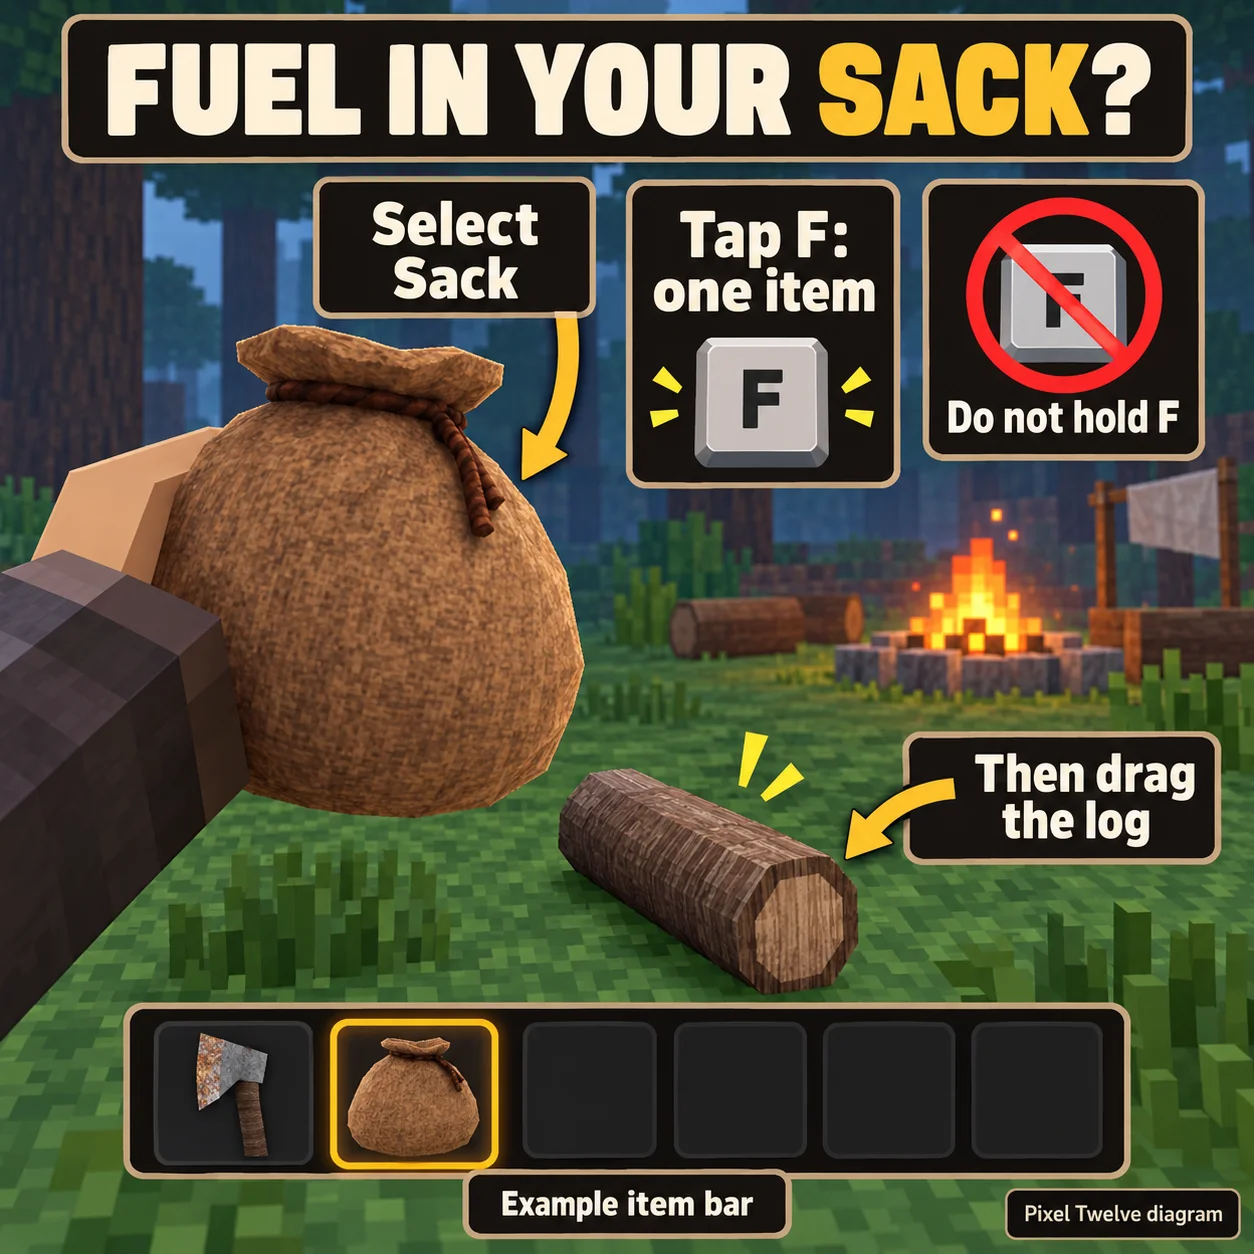
Fuel already inside the Sack? Select the brown bag in the bottom item bar and check that your character holds it. The Old Sack is a rounded light-brown cloth bag with a dark knot at the neck. Tap F to unstore one item onto clear ground first. The last stored item comes out first; holding F can empty the whole Sack. Once the loose fuel is on the ground, use the drag-and-drop step above.

The brown Old Sack selected in an example item bar, with a tap-F instruction and one loose Log on the ground.
Original Pixel Twelve optional-action diagram: select the Sack, tap F to unstore one item, then drag the loose fuel. Holding F can empty the Sack.

4. Check the progress display over the campfire

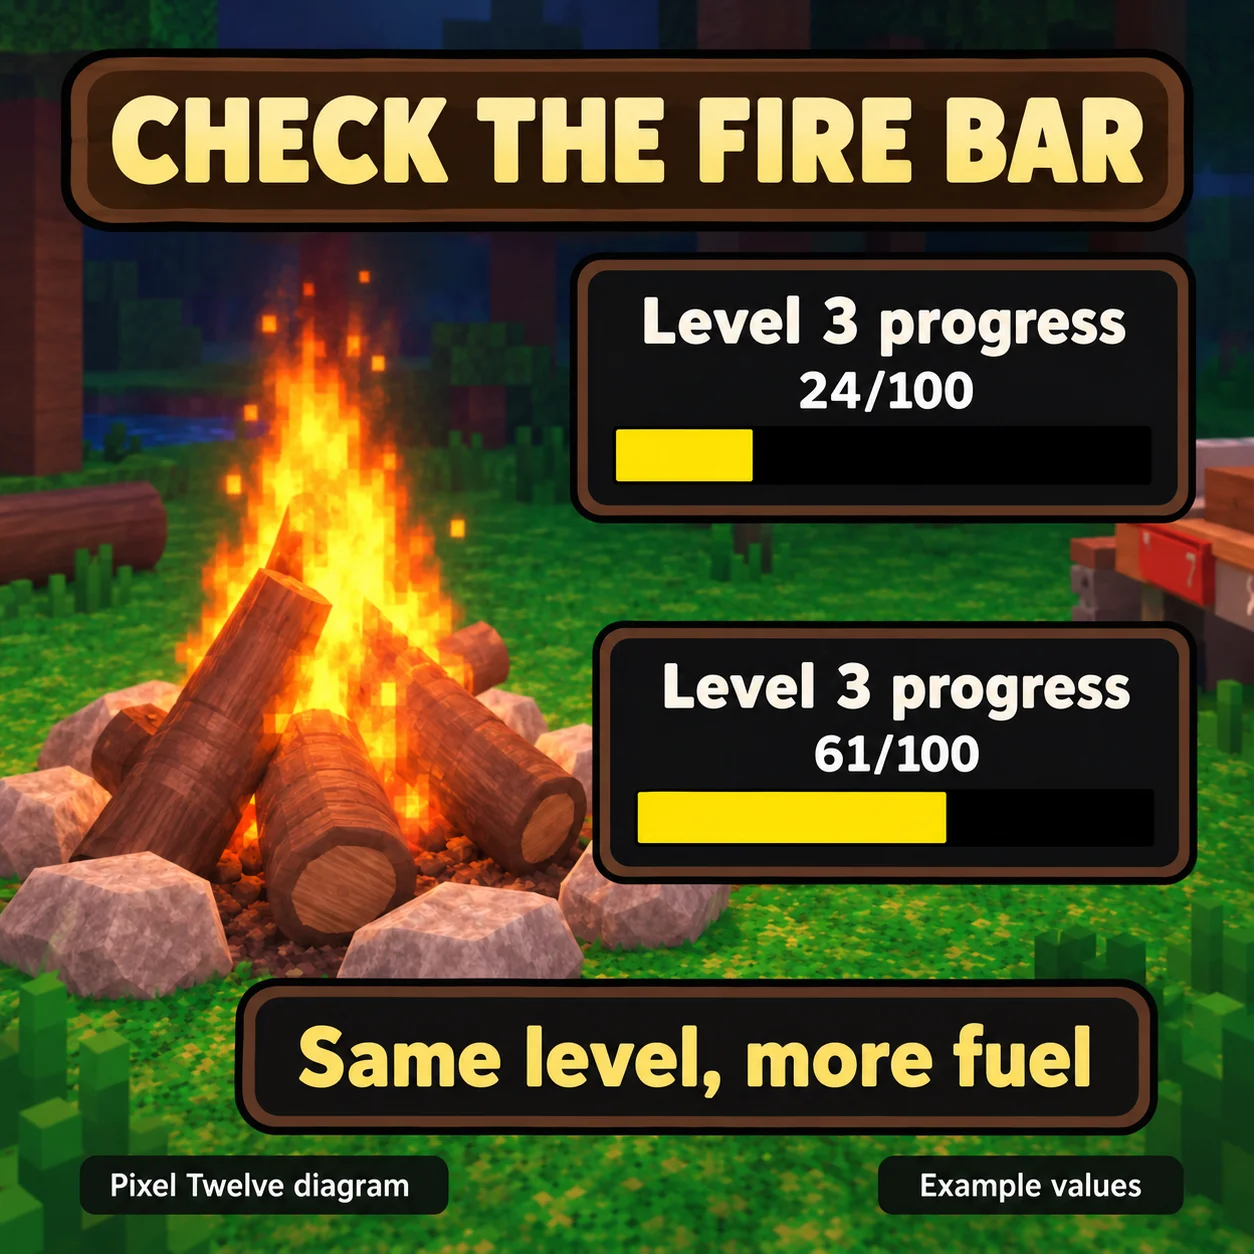
Move near the campfire and look for its level and progress display over the fire. The filled part of the bar should increase when usable fuel is consumed. If the fire was out, flames should return. Check those changes instead of assuming a dropped item worked.

The level and the number out of 100 mean different things. A change from 24/100 to 61/100 at Level 3 is more fuel at the same level, not 61 days survived. Those are example values, not a promised increase from one log. Filling the bar advances the fire toward the next level, up to Level 6, and higher levels open more of the forest. Level 6 still needs refueling.

Two example Level 3 campfire bars show 24 out of 100 and 61 out of 100, with different yellow fills.
Original Pixel Twelve comparison diagram: both examples are Level 3, but the second has more fuel. The values illustrate the display; they are not the reward from one log or a live screenshot.

5. Use better fuel as the run grows

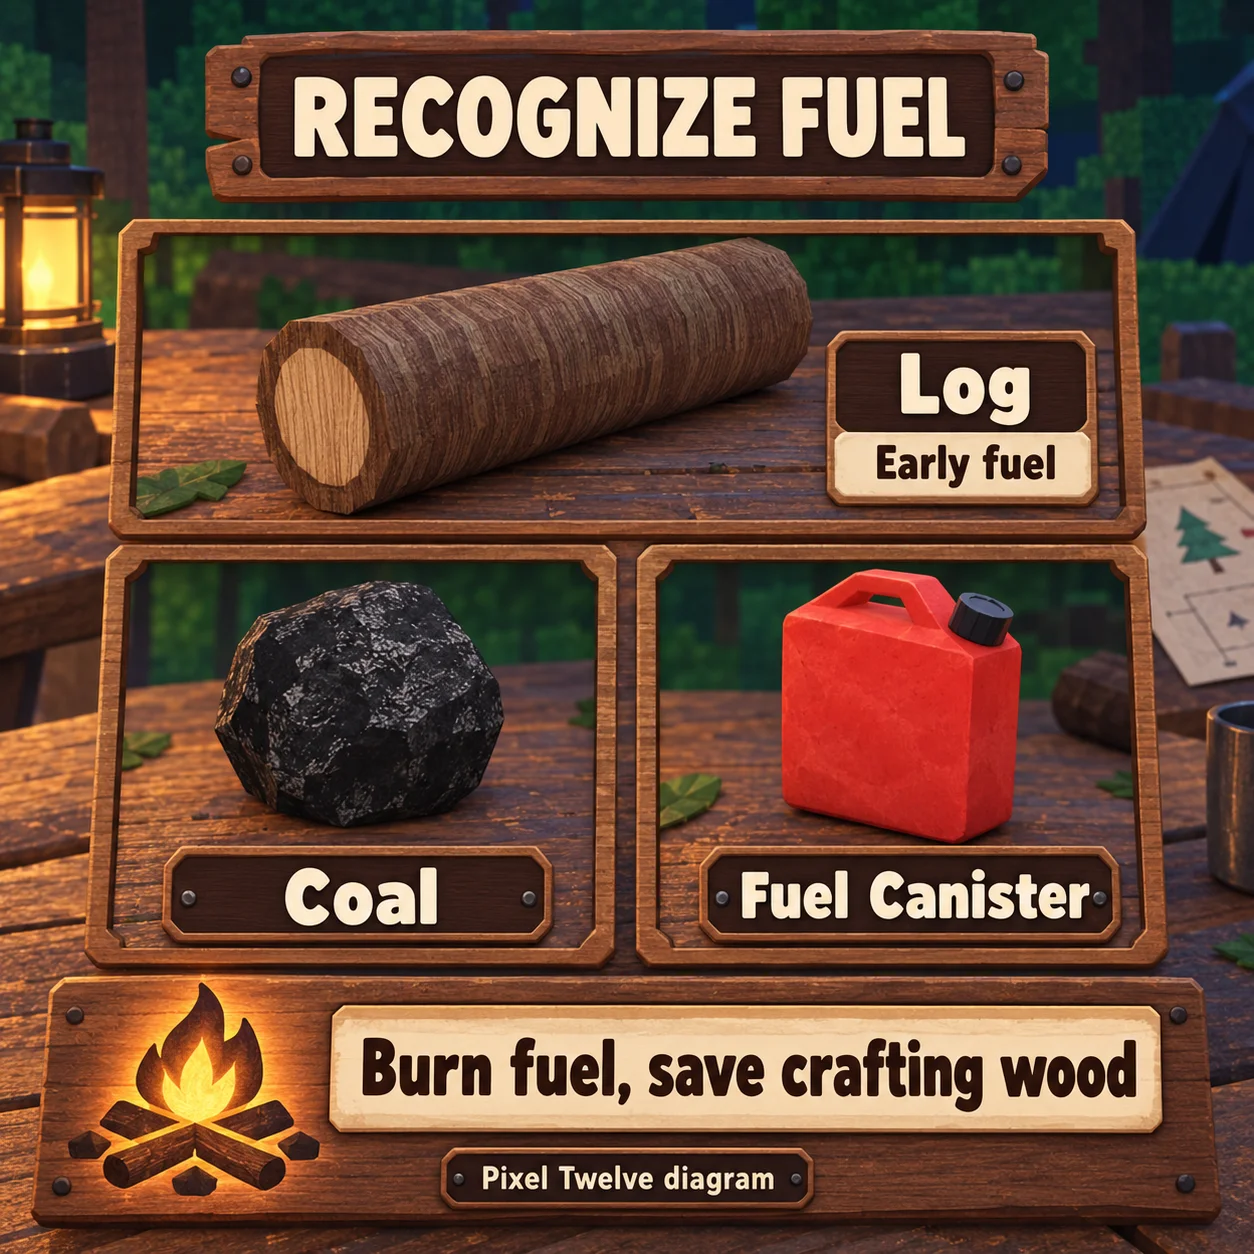
A Log is an easy first fuel. Coal looks like an uneven, almost-black lump; a Fuel Canister is a red rectangular container with a top handle and black cap. These are different from leafy saplings, food and pieces of scrap. If you find Coal or a Fuel Canister while searching buildings and chests, bring it home and use the same drag-and-drop target at the fire.

Higher fire levels need more fuel to fill the bar, so each ordinary log makes less progress. Save some logs for the grinder and crafting instead of burning every piece. The exact amount needed also changes with the party size; follow your run's bar rather than a fixed log count.

A brown round Log, black uneven Coal lump and red Fuel Canister with top handle and black cap.
Original Pixel Twelve item-recognition diagram: match the fuel’s shape before putting it into the fire.

If the fire keeps going out

Fuel lies outside the central pile: move it onto the logs in the middle and check the bar again. If the item stays unchanged and the bar does not rise, it was not accepted as fuel.

The fuel is still in the Sack: select the brown bag, tap F to bring one item onto the ground, then drag the loose fuel. Do not unload every supply into the flames.

Rain or a blizzard is active: the fire loses fuel faster. Keep a fuel reserve near camp and check more often. Leveling the fire improves its resistance, but does not remove the need to refill it.

The campfire is lit, but an attacker enters camp: the fire is not a wall against every enemy. Cultists can still enter, and attacking wild animals can make them follow you in. Keep the team ready to defend the clearing.

More help for your first run

For camp, food and exploration priorities, read the 99 Nights beginner guide.

If someone falls while gathering fuel, use the teammate revival guide.

The 99 Nights game hub keeps the related walkthroughs together.

Get Pixel Twelve's biggest stories first.

Add as a preferred source on Google