Pixel Twelve
Five Nights at Freddy's First Night: Cameras, Doors and Power

How To

Five Nights at Freddy's First Night: Cameras, Doors and Power

A visual PC first-night guide to CAM 1A, CAM 1C, office lights and doors, and power management.

By Nova RainesGame: Five Nights at Freddy'sVerified Sep 30, 2026
Guide Type
How To
Last Verified
Sep 30, 2026

Guide details

Overview

A visual PC first-night guide to CAM 1A, CAM 1C, office lights and doors, and power management.

1. Read the office before moving the mouse

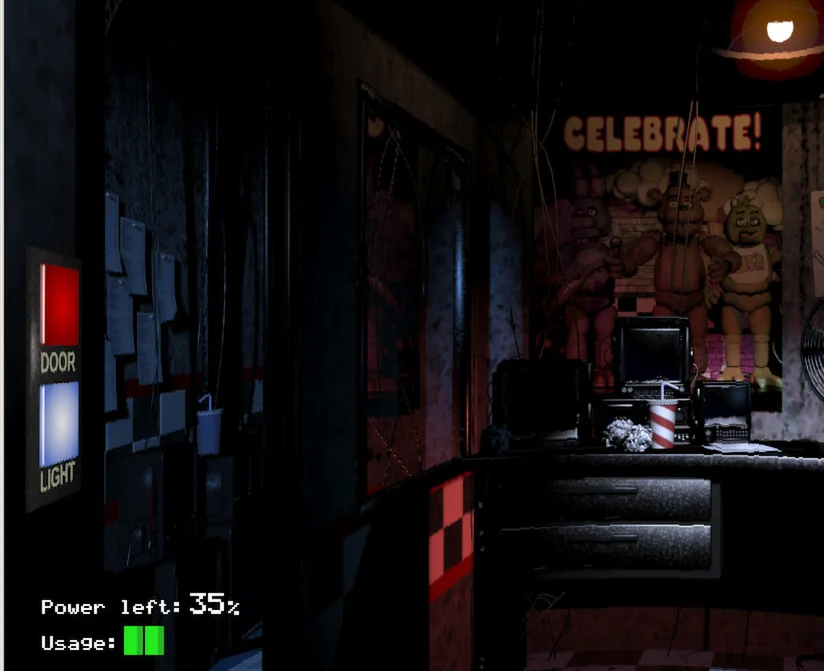
This walkthrough uses the original Windows game and its mouse interface. You remain in the office from 12 AM until the shift ends at 6 AM. The upper-right clock tells you how far you have progressed. At bottom left, Power left is the remaining electricity and Usage is the number of active power bars. The image shows the left half of the office with the DOOR and LIGHT buttons; move the pointer toward the other edge to pan to the right side.
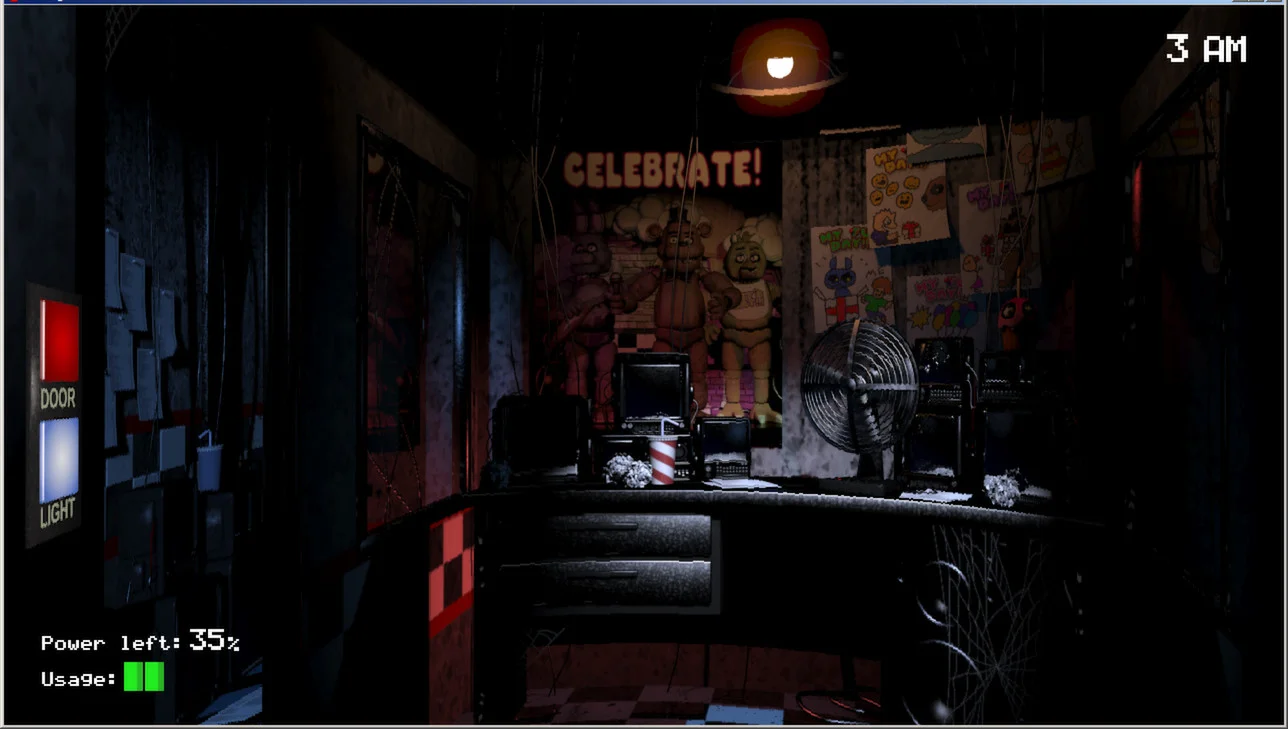
Original FNAF office screenshot: 3 AM at top right; left DOOR and LIGHT buttons beside the hall; Power left and Usage at bottom left.
The time, power and two left-door controls are already on the play screen.

This office screenshot was captured during a different shift at 3 AM. Its controls have the same labels you need on Night 1, but its 35% power figure is an example, not a target. Console and mobile versions use different input methods.
2. Raise the monitor at the bottom edge

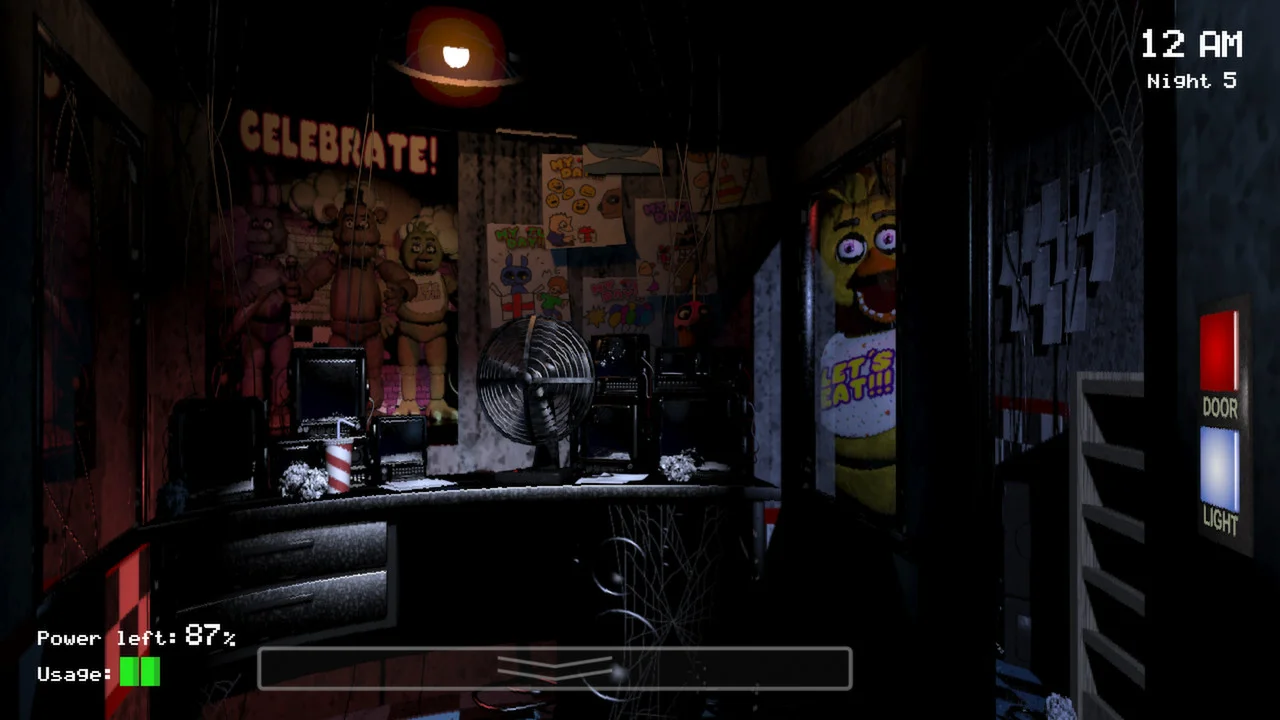
On PC, move the pointer to the bottom-center monitor handle marked by double chevrons. The panel rises into the camera map; move the pointer to the bottom edge again to lower it. In the office example, the handle is directly below the desk. The right-side DOOR and LIGHT buttons are also visible, but do not press either just to check a camera.

FNAF office with bottom-center double-chevron monitor handle, right DOOR and LIGHT controls, and Chica near the doorway.
The monitor handle is at the bottom center. This interface capture is from a later night, not a Night 1 sequence.

Raising the monitor uses power. Look at a camera, take the information you need and lower it; keeping it raised is not a free way to wait.

3. Click CAM 1A to establish the starting positions

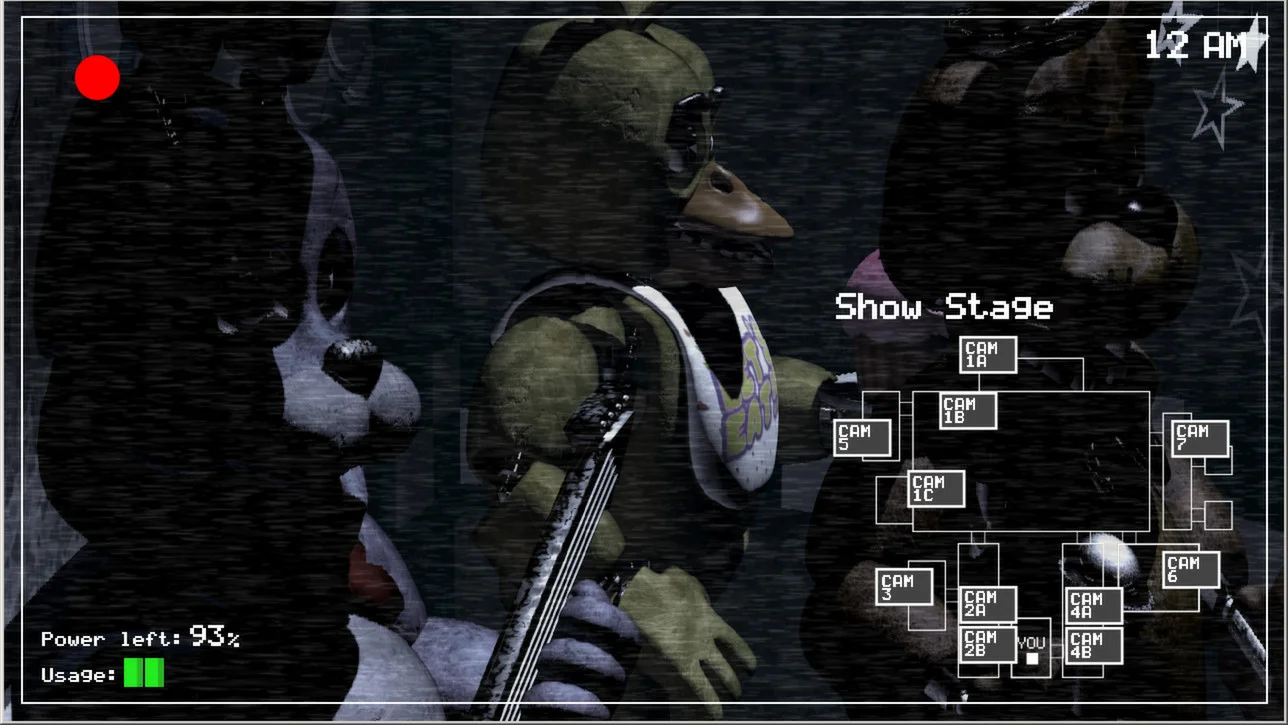
With the monitor up, find the small map on the right and click CAM 1A at the top. The feed is labeled Show Stage. Use it as a baseline for Freddy, Bonnie and Chica; if someone is missing on a later glance, use the map to check nearby rooms rather than assuming they reached a door. The green highlighted camera box tells you which feed is active.

FNAF Show Stage with three animatronics; CAM 1A highlighted on the right map; 12 AM clock and power display visible.
CAM 1A is at the top of the map. The highlighted box is the selected camera.
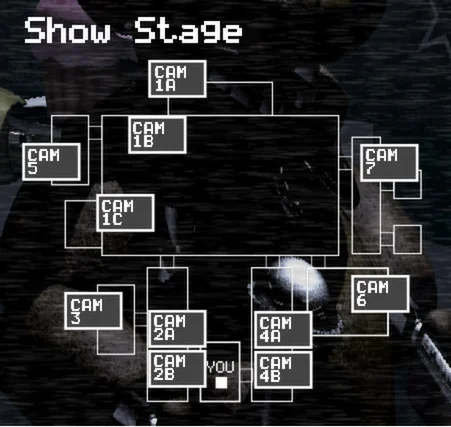
Enlarged original FNAF camera map: CAM 1A is the top box, CAM 1C lies to the left and CAM 2A is below center.
Map close-up: find CAM 1A at the top, CAM 1C to the left and CAM 2A below center. The original screenshot is directly above.

The camera examples in this guide come from separate official screenshots. They teach the interface and are not a claim that these exact character positions occur in one Night 1 run.

4. Follow a missing character with the map

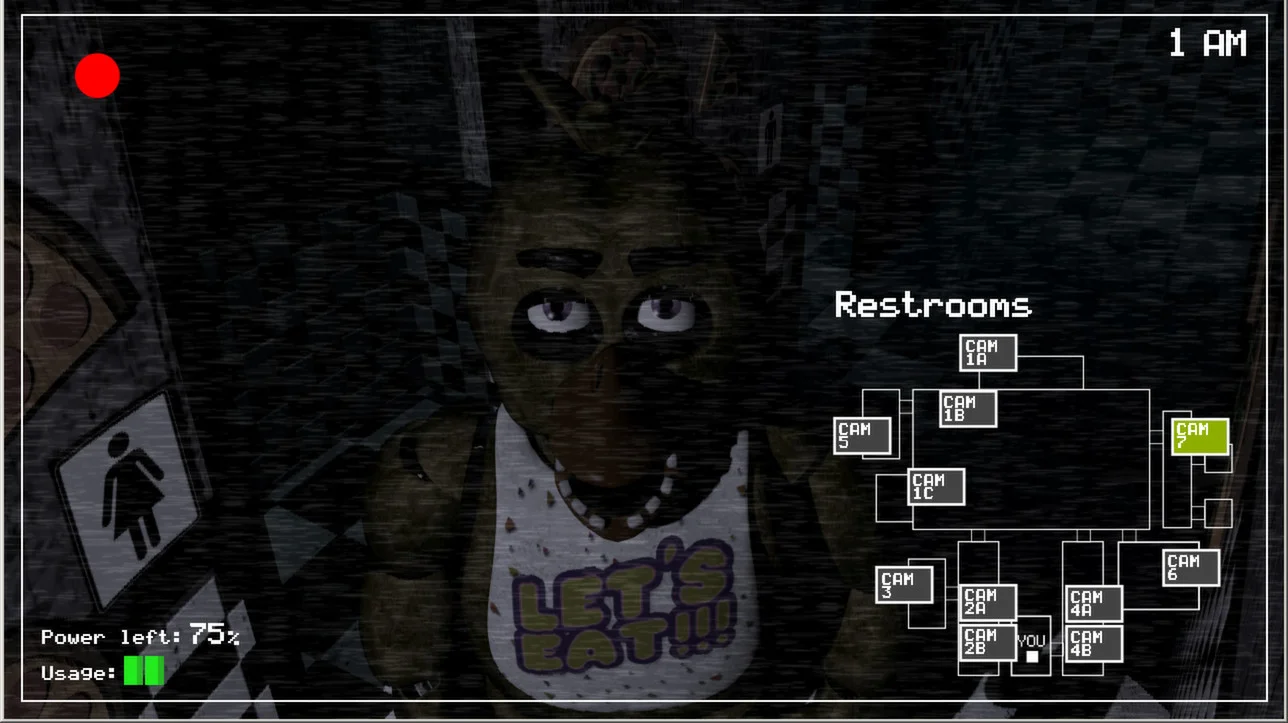
The map is a set of clickable room labels, not a live arrow to a moving character. If Chica is no longer on CAM 1A, click another labeled feed and read the location name. The example below has CAM 7 selected and says Restrooms while Chica appears in the feed. Do not memorize that as her required Night 1 route; movement varies.

FNAF monitor showing Chica in Restrooms, CAM 7 highlighted, Power left and Usage at bottom left.
CAM 7 is a room label you can select; the highlighted box and title confirm where you are looking.

After a quick check, lower the monitor and return to the office. If the map shows nobody at an immediate threat point, leave both doors open and save electricity.

5. Check the doorway with LIGHT, then use the matching DOOR if needed

From the office, move the pointer to the side you want to inspect. Click LIGHT under that side’s DOOR button to illuminate the blind spot; click it again to turn the light off. The left panel is pictured here. If an animatronic is visibly at that doorway, click the DOOR button above that same LIGHT button, confirm that side closes, and keep watching power. Do not close both doors just because the cameras look unsettling.

Closer view of the left office control panel labeled DOOR and LIGHT, with the power meter below.
Left side: LIGHT is the lower button; DOOR is the upper one.

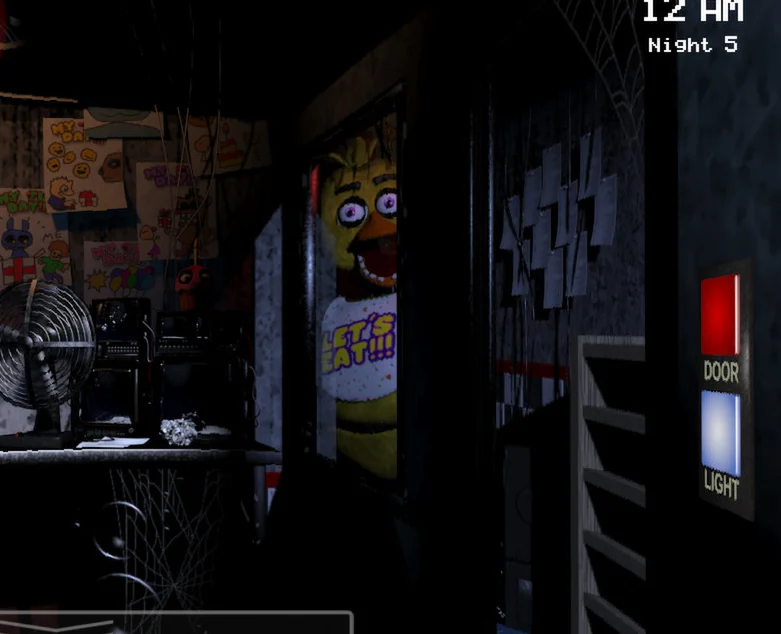
The right side works the same way. The second screenshot shows Chica beside the right doorway and the matching LIGHT and DOOR labels. It is a Night 5 interface example, not an event that must happen on Night 1. Once a threat has moved away, reopen a closed door rather than paying its power cost indefinitely.

Right office doorway with Chica visible and DOOR above LIGHT on the control panel.
Right side: use the controls on the same wall as the threat; screenshot from Night 5.

6. Locate Pirate Cove and the left hall without keeping the monitor up

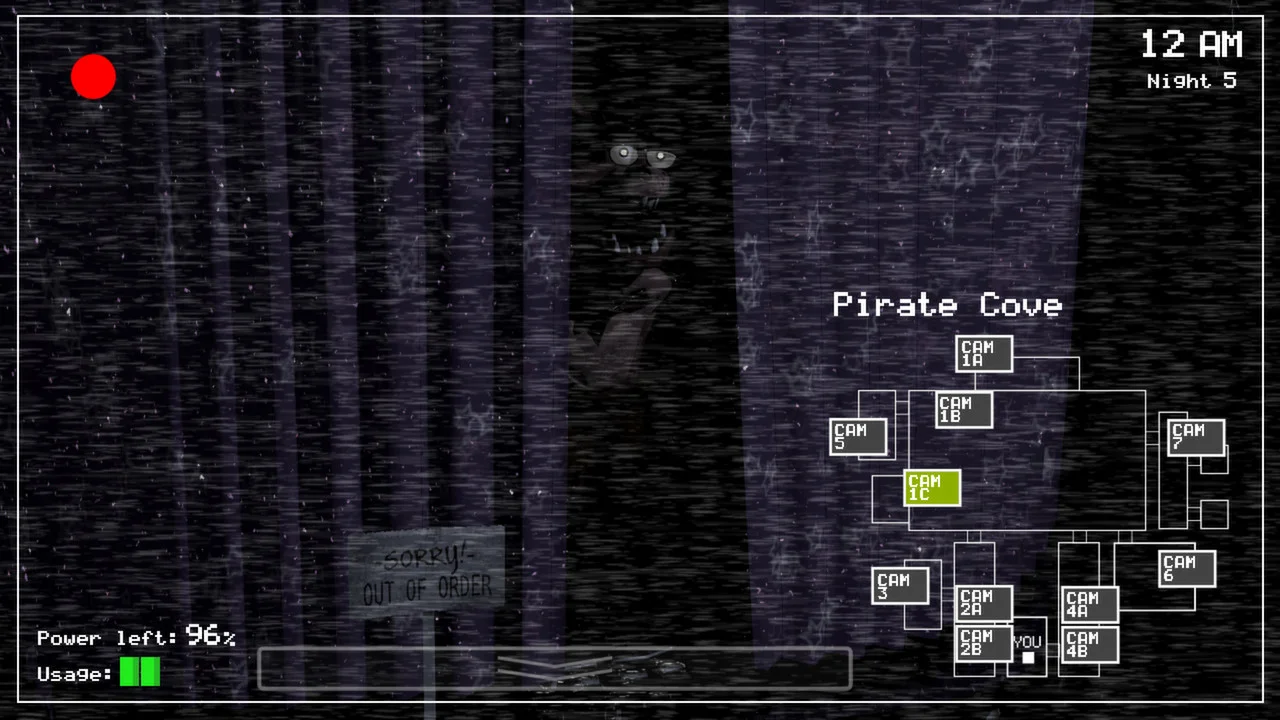
On the map, click CAM 1C to view Pirate Cove, the curtained area associated with Foxy. The capture below is from a later night and shows Foxy behind the curtain; it identifies the camera, not a fixed Night 1 timetable. If the area changes, use short checks and return to the office to manage the left door rather than camping on the feed.

Pirate Cove camera feed with CAM 1C highlighted on the right map and Foxy partly visible behind the curtain.
CAM 1C is Pirate Cove. This later-night image is only an interface reference.

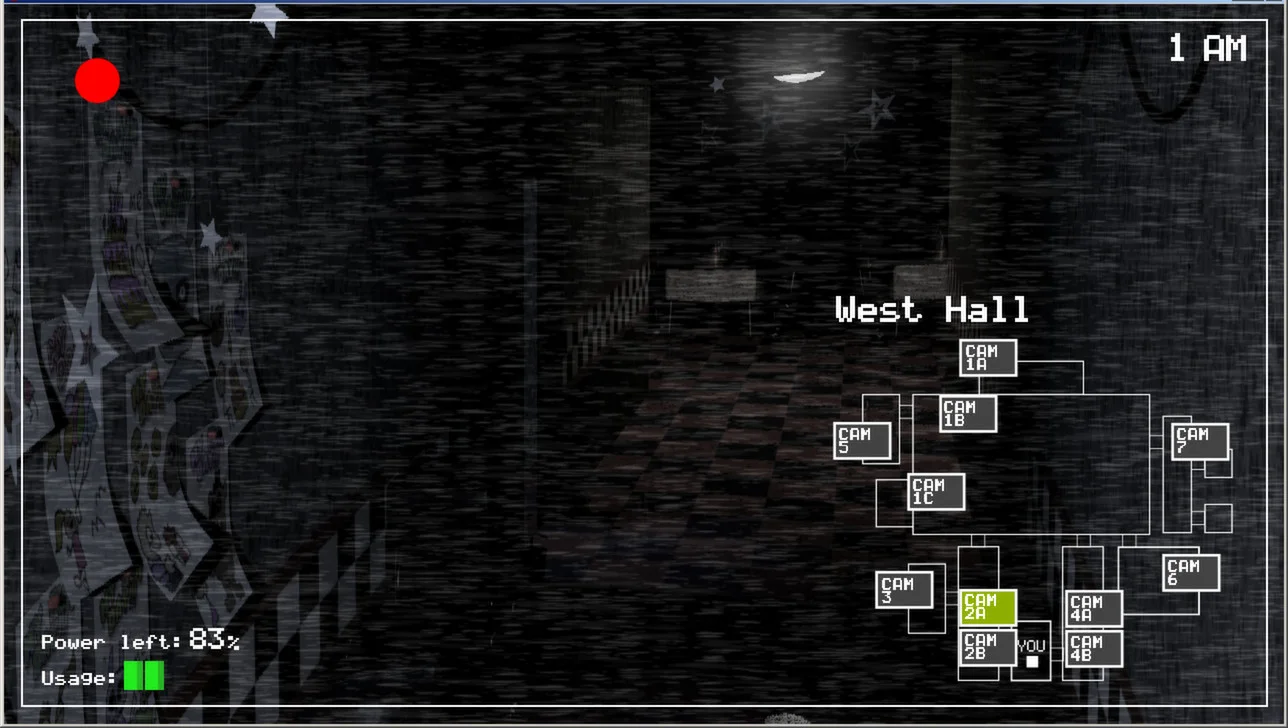
If you need to inspect the approach, CAM 2A is labeled West Hall in the separate example below. The map places it on the left route toward the office. No camera can replace a quick office-light check of the blind spot immediately outside a door.

West Hall camera in FNAF with CAM 2A highlighted on the right map and power displayed below.
CAM 2A is West Hall on the left side of the map.

7. Repeat a short loop until the clock reaches 6 AM

Use a repeatable loop: read Power left and Usage → check only the needed camera → lower the monitor → tap a door light → close that side only if the doorway demands it → reopen when clear. Watch the upper-right clock between loops. Every active camera, light or closed door raises consumption, so the point is to get useful information with the fewest powered actions.

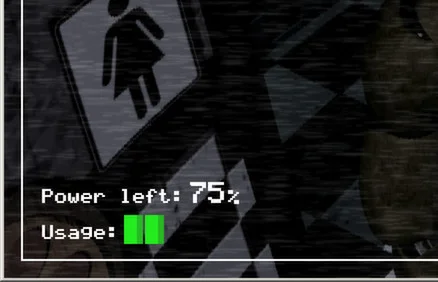
Close view of Power left 75 percent and two Usage bars in an official FNAF camera screenshot.
The bottom-left meter tells you whether your checks are costing electricity.

Do not copy the percentages or character positions in these screenshots as a required route: they come from different shifts. If power reaches zero before 6 AM, the lights and doors stop working. Your goal is to preserve enough power to keep responding to real threats until the clock completes the night.

Get Pixel Twelve's biggest stories first.

Add as a preferred source on Google