Pixel Twelve
Super Smash Bros. Ultimate Beginner Guide: Your First Match, Controls and Recovery

How To

Super Smash Bros. Ultimate Beginner Guide: Your First Match, Controls and Recovery

A visual first-match guide for Super Smash Bros. Ultimate with the local menu route, controller setup, damage display, attacks, shields, recovery and Training mode.

By Ryan CooperGame: Super Smash Bros. UltimateVerified Sep 25, 2026
Guide Type
How To
Last Verified
Sep 25, 2026

Guide details

Overview

A visual first-match guide for Super Smash Bros. Ultimate with the local menu route, controller setup, damage display, attacks, shields, recovery and Training mode.

The whole game in 30 seconds

Smash is not about emptying a health bar. Hit another fighter so their damage percentage rises, then send them beyond the edge of the screen. If you are knocked away, try to reach the stage again before you fall too far. That is the loop to learn in your first match.

The screenshots below use Nintendo’s own game images. They come from different matches, so the fighters and stages will not always look the same. Focus on the on-screen features called out in each caption: the stage edge, the damage numbers, the shield and the Training grid. Button layouts can be changed, and a single sideways Joy-Con has fewer buttons than paired Joy-Cons or a Pro Controller. If a button in this guide does something unexpected, check the Controls screen for your player name before assuming the game is broken.
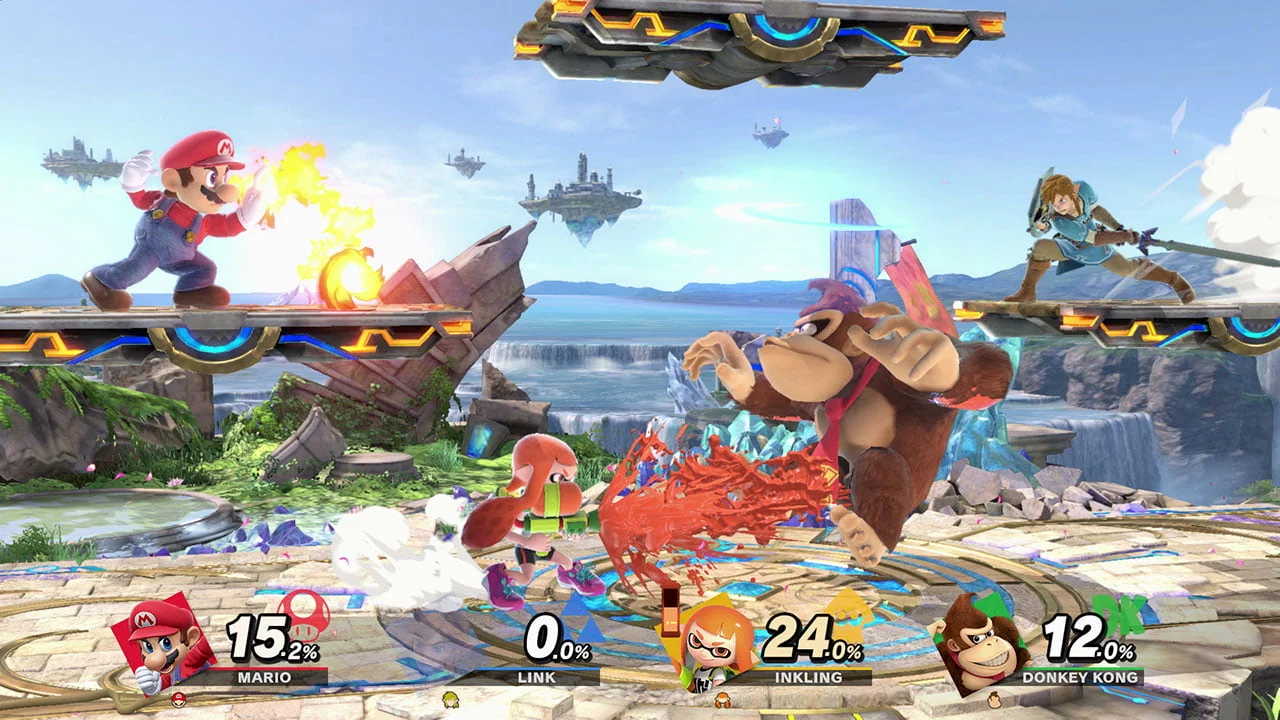
Four fighters battle on platforms while their character icons and percentage numbers line the bottom of the screen.
Find your own fighter by matching the character on stage with the portrait and damage percentage along the bottom.

1. Start one simple local match

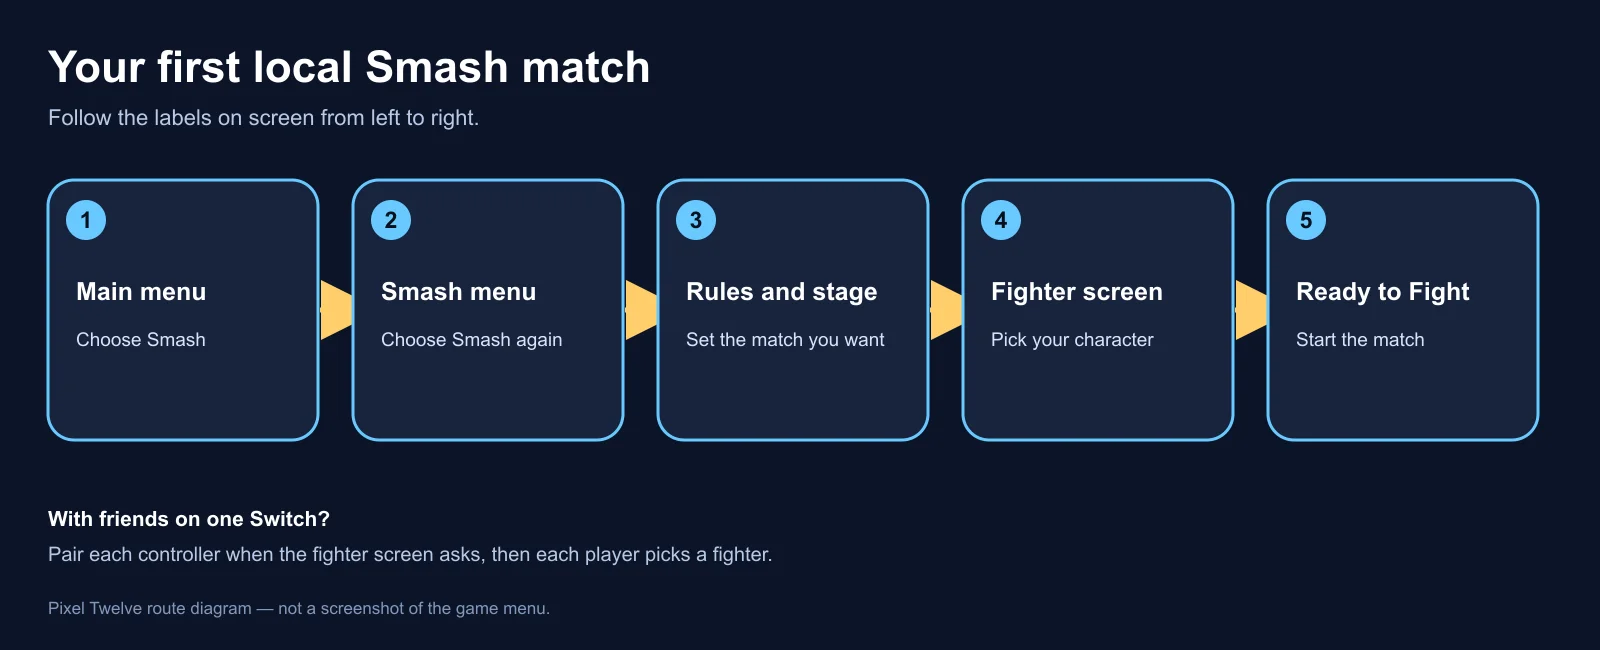
Original Pixel Twelve route diagram showing Main menu, Smash, rules and stage, fighter screen, and Ready to Fight.
This is a route diagram, not a screenshot. The labels are the ones to look for in the game menus.
  1. On the main menu, move to the large Smash option and confirm it. On the next screen, choose Smash again. Do not pick Squad Strike or Tourney for your first attempt: those add extra choices that are easier to understand after one ordinary match.
  2. Player 1 chooses the battle rules and stage. For a calm practice match, use a small number of fighters and a stage you can see clearly. A Stock rule gives each fighter a limited number of lives; a Time rule counts results until the clock runs out. Choose one rule and leave the other settings simple for now. You can change them later.
  3. When the fighter-selection screen appears, connect each player’s controller. For one Joy-Con held sideways, press the small SL and SR buttons along its top edge. For paired Joy-Cons or a Pro Controller, press L and R. Each player then moves their on-screen cursor onto a fighter portrait and confirms a choice. When everyone is ready, select Ready to Fight.

No second player? You can start with a computer-controlled opponent. Or choose Games & More, then Training, if you want space to practise without a normal match ending. Local play on one Switch does not require a Nintendo Switch Online membership.

2. Pick one fighter and find yourself on screen

Mario and Kirby are friendly first choices because their basic movement and attacks are easy to test. You do not need to know every character before playing. Pick one you recognise, then keep that same fighter for a few matches so you can notice what their jump and special moves do. A fighter portrait in the selection grid is a playable character, not a stage or item.

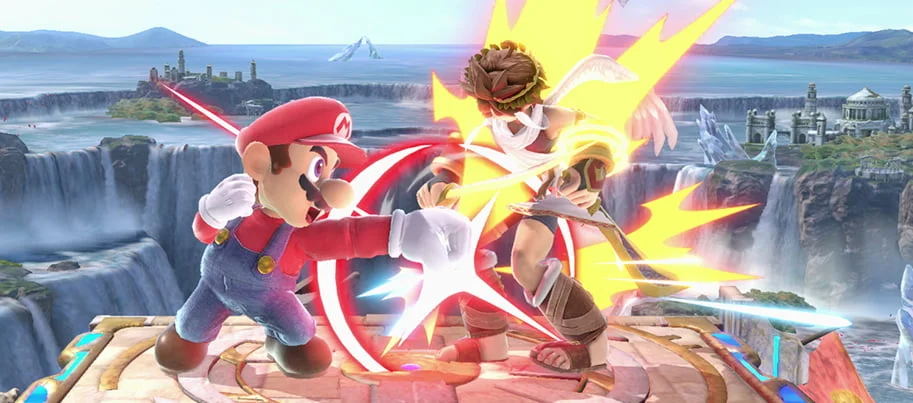
Mario punches another fighter near the centre of a platform, with a bright impact effect.
The fighter you control is the one whose portrait and percentage match the display at the bottom of the screen.
  1. At the start of the match, look for your fighter’s name or portrait at the bottom and match it to the figure on the stage. The percentage beside it belongs to you. If the screen is crowded, walk left and right for a moment and watch which figure moves with your stick. That is your fighter.
  2. Look at the stage itself. Flat ground is safe to stand on; a gap or outer edge is dangerous because you can fall past it. Some stages have smaller platforms above the ground. You can land on them, but you do not have to chase an opponent up there immediately. Keep your eyes on your fighter before you track anyone else.

3. Learn the four actions you actually need first

Move and jump. Push the left stick to walk toward or away from another fighter. Use your jump button to reach a platform or get over an attack. On a paired Joy-Con or Pro Controller with the usual layout, X or Y jumps; if your controls were changed, check the Controls screen or the in-game button guide.

  1. Stand on flat ground and press A once. That is a standard attack. Try it again while holding the stick left or right and watch the move change. Then press B once to see your fighter’s special move. Tilt the stick up, down or to the side while pressing B to test different specials. Do this in Training if a live opponent keeps interrupting you.
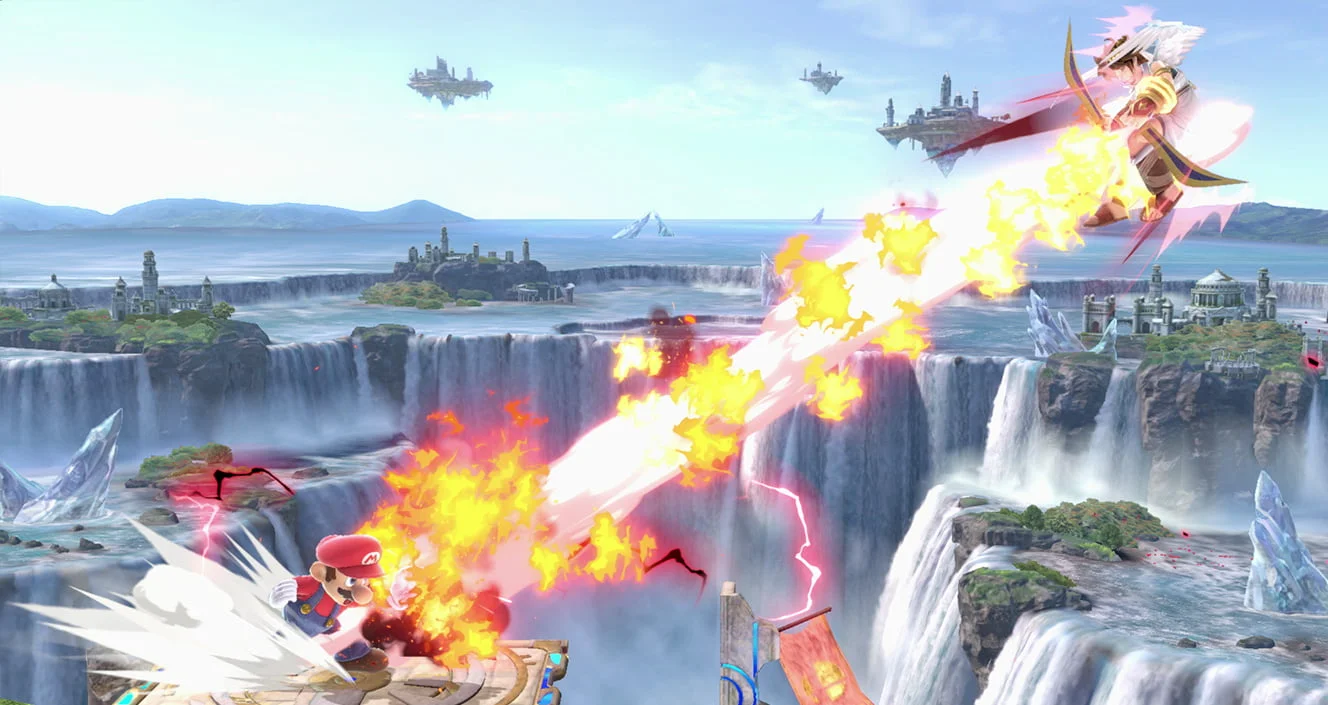
A fighter is launched diagonally upward from a platform with a bright impact trail.
A hit can send someone toward the edge; after enough damage, they fly farther.
  1. When your opponent has taken damage, flick the left stick toward them and press A together for a stronger smash attack. You can test it by watching whether the opponent flies farther than they did after a plain A hit. Do not keep charging or repeating it if the opponent is already behind you; turn and find them first.

Shield is the next button to locate. With a normal paired controller layout, a shoulder button raises a bubble around your fighter. Hold it briefly when a hit is coming, then let go. If a controller has been remapped, look in Controls for the action named Shield. You do not need to learn advanced shield timing yet.

4. Read the damage number, not just the impact

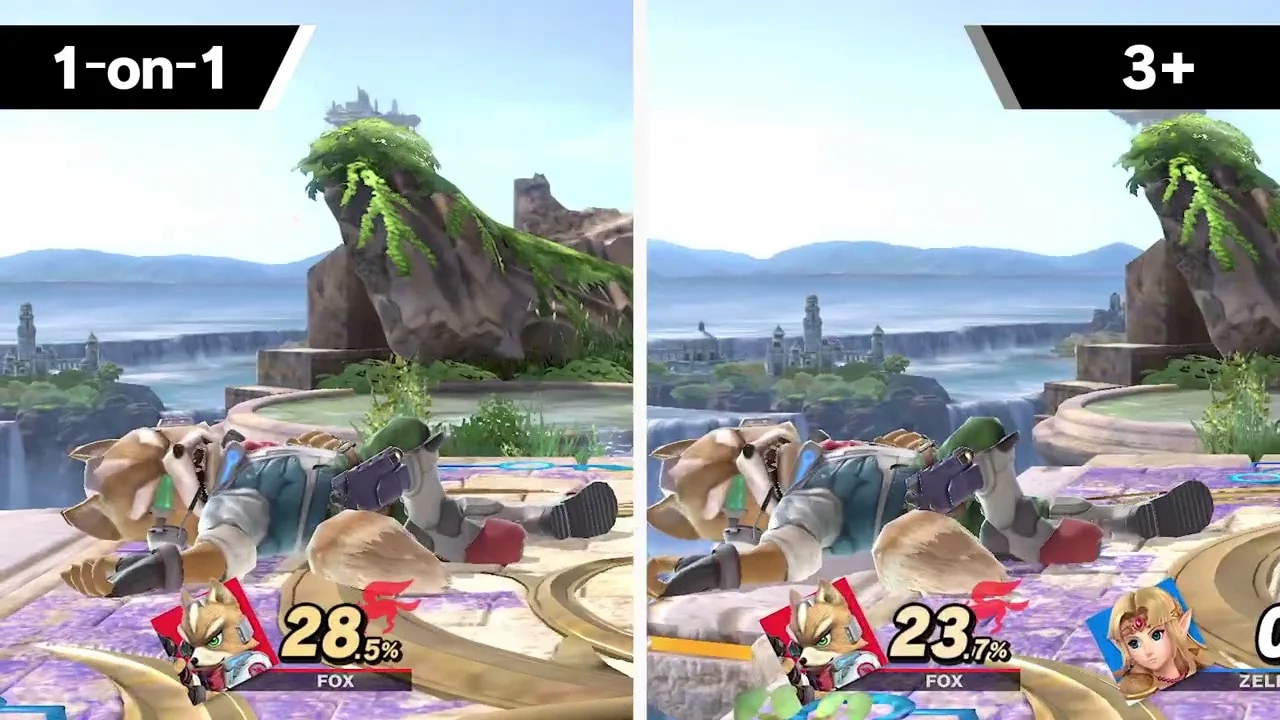
Two views of a one-on-one fight show a fighter percentage around 28 and then 23 beside its portrait.
Damage is the number beside a fighter portrait; it is not the fighter’s remaining health.
  1. After landing a hit, glance at the opponent’s percentage along the bottom. It should rise. After you are hit, look at your own number. In a normal Smash match, 80% does not mean you have 20% life left; it means you are easier to launch far away. The exact distance also depends on the attack and fighter.
  2. A knockout happens when someone cannot return before crossing the outer boundary, not merely when their number reaches 100%. That is why a fighter at a high percentage can survive another hit near the middle of a large stage but lose after being hit close to the edge. Stay nearer the centre while you are learning.

The game can change the look of its numbers depending on mode and match size. The reliable clue is the portrait-plus-percentage group at the bottom. If a match uses a special rule, read that rule before treating the percentage as the only way to win.

5. Get back when you are knocked offstage

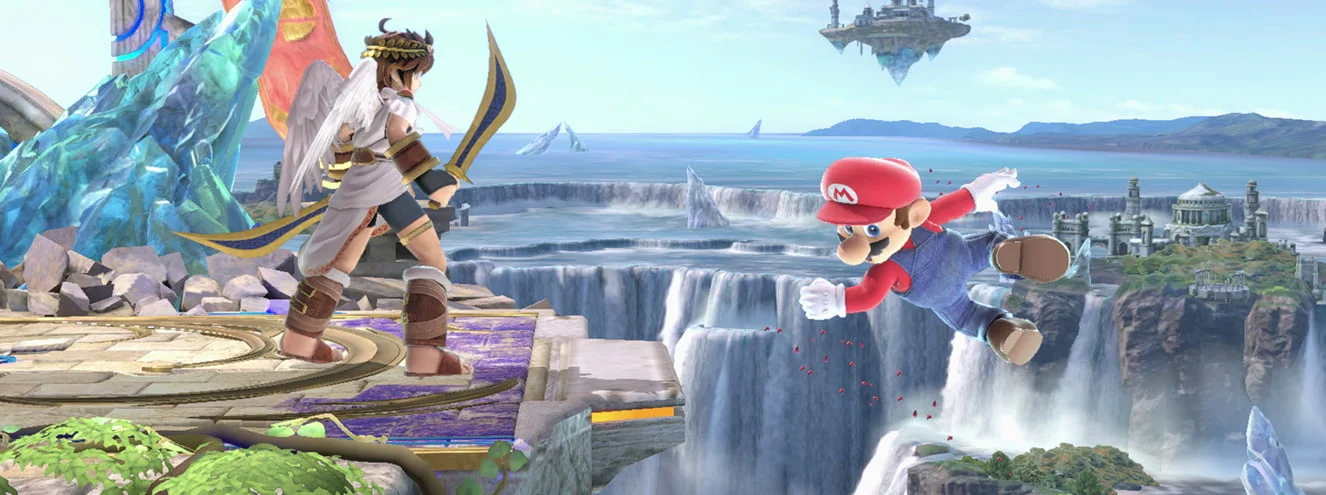
Mario jumps from beyond the right edge of a platform toward the safe ground while another fighter stands near the ledge.
The empty space beside the platform is offstage. Aim your movement back toward a ledge, not farther into the open area.
  1. The moment a hit sends you past the outer edge, find your fighter on screen and locate the nearest part of the stage. Push the left stick toward that stage, not toward the opponent. If you still have a jump, press the jump button once to gain height. Try to grab the ledge or land on the platform.
  2. If the jump is not enough, try your fighter’s up special by holding the stick up and pressing B. The move looks different for each fighter and does not always travel straight up, so test it in Training. Use it while you still have room to move; pressing it only after you have fallen far below the stage may be too late.

Common first-match mistake: A beginner often attacks while falling and forgets to move toward the stage. Recover first. You can fight again after your feet are back on safe ground. If the camera zooms out and your fighter becomes small, search for their coloured player marker before pressing another move.

6. Defend without getting lost in advanced tricks

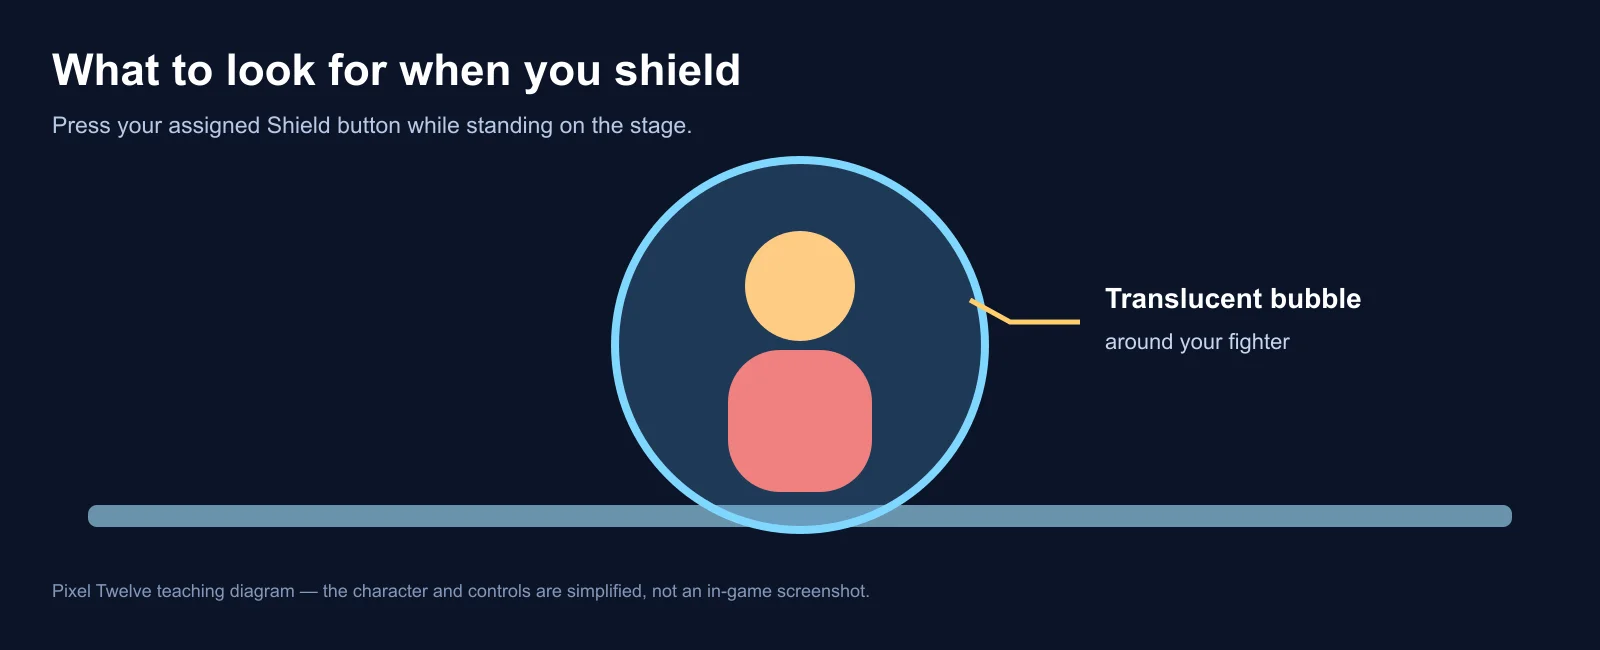
Original teaching diagram shows a simplified fighter on the stage inside a translucent blue circle representing a shield.
This is a teaching diagram, not a game screenshot. The translucent bubble is the feature to look for around your fighter when Shield is active.
  1. When someone runs toward you or starts an attack nearby, press your Shield button and watch the bubble appear. Let go after the danger passes, then move or attack. Do not hold shield forever: it gets smaller as it takes hits, and a broken shield leaves you vulnerable.
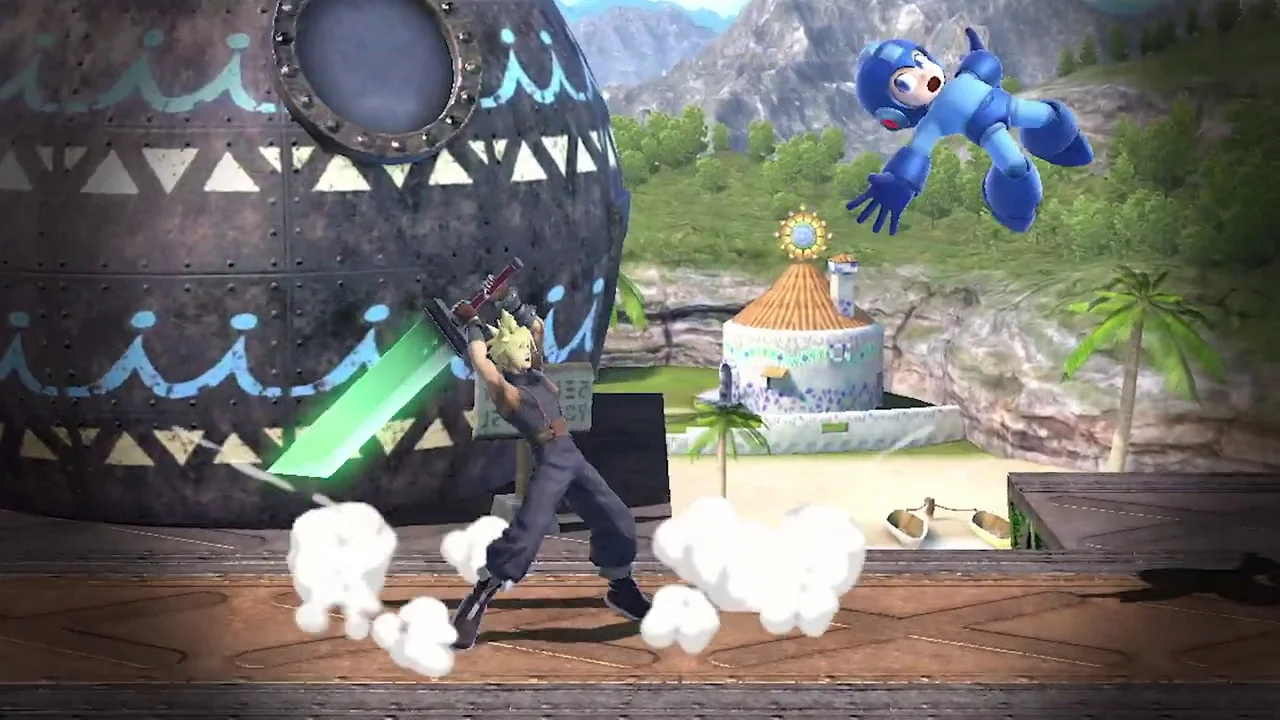
Cloud shifts through the air away from an attack, with another fighter and a stage below.
In the air, Shield plus a direction can move your fighter out of the path of a hit.

An air dodge is a later tool, not a required first move. While airborne, press Shield and move the left stick in a direction to dodge that way. It can avoid an attack, but it also changes where you travel. If you are already far from the stage, moving the wrong way can make recovery harder. Practise this close to the ground first.

7. Use Training to make each move familiar

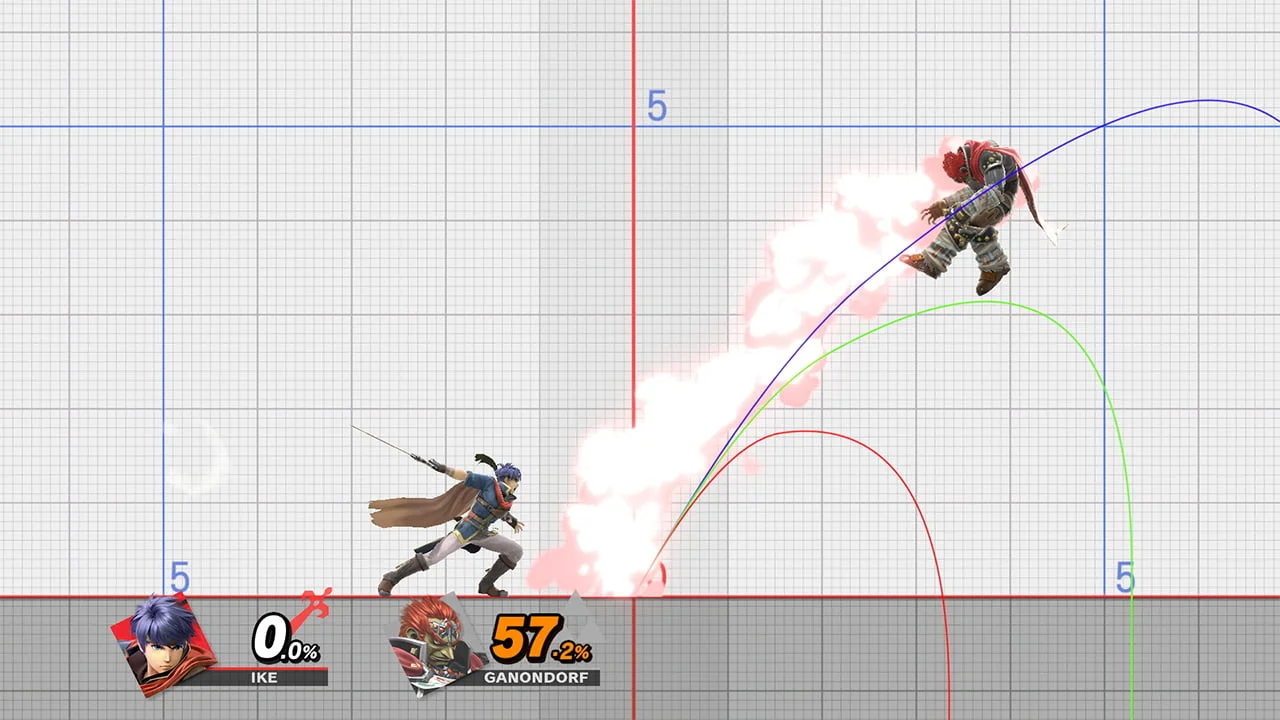
The Training stage has a white measurement grid behind two fighters and an arc showing launch distance.
Look for the grid and the flight arc in Training. They show how far a move sends the other fighter.
  1. From the main menu, choose Games & More, then Training. Select your fighter and a practice opponent. Try moving left and right, jumping once, pressing A, then pressing B. Repeat with one change at a time. The grid makes it easier to see whether a stronger move sends the other fighter farther.
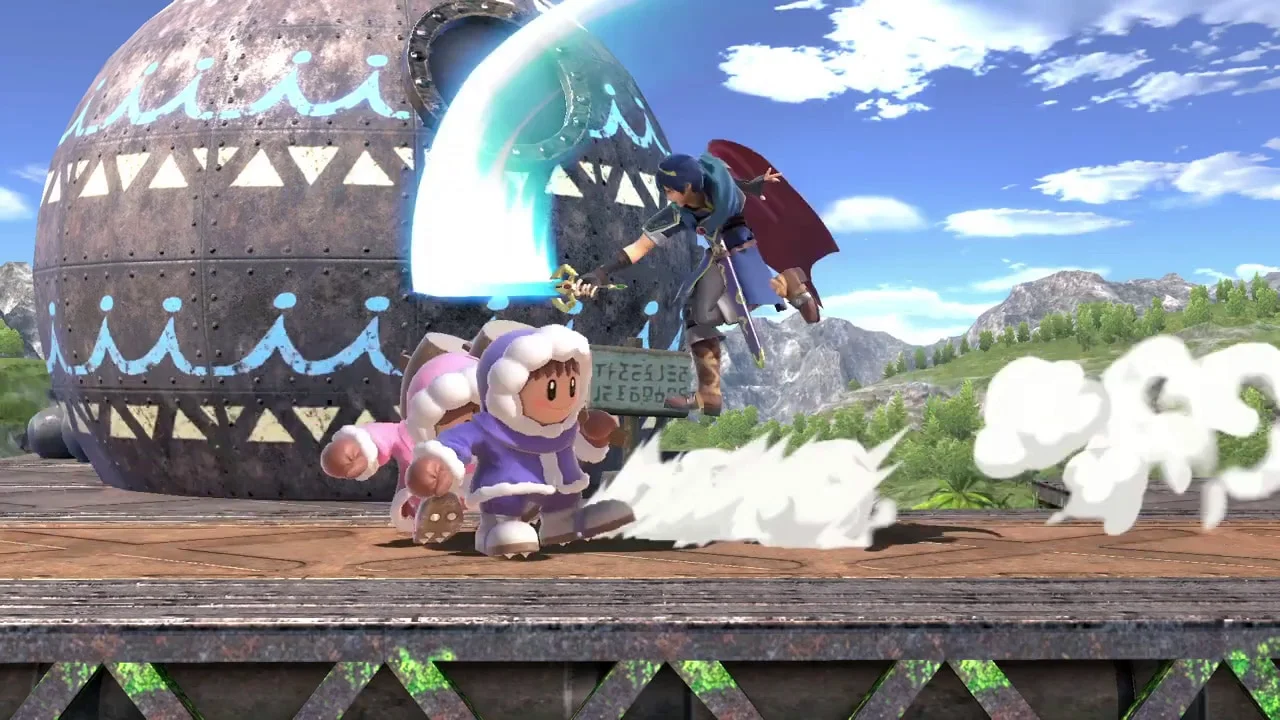
A fighter jumps a short distance and swings at an opponent above the ground.
A small jump plus attack is useful later, but first learn a normal jump and a normal A attack separately.

For a short-hop attack, Nintendo says to press A and your jump button at the same time. Try that only after you can tell which input is which. If you get a full jump or attack in place, slow down and practise the two buttons again. You are not behind: normal jumps and attacks are enough for your first games.

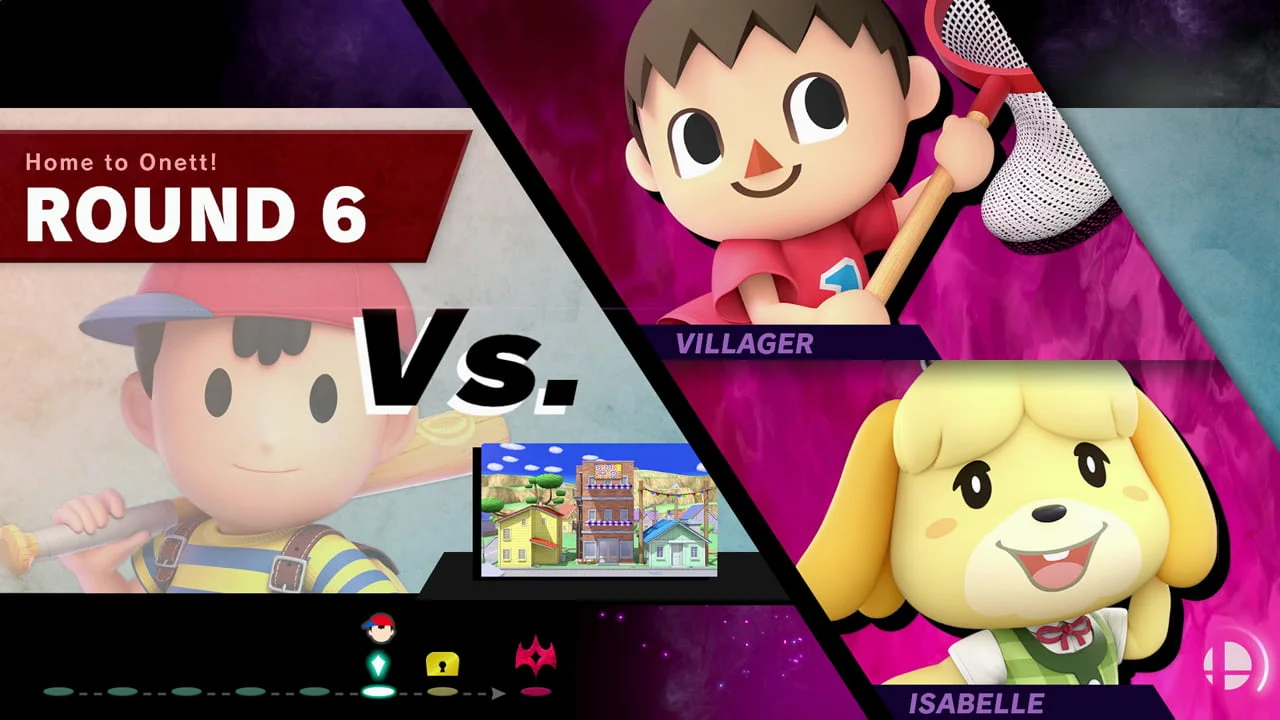
The Classic Mode matchup screen shows Villager facing Isabelle in a themed round.
Classic Mode is a separate sequence of fights; Training is the safer place to learn one move at a time.

Once a normal Smash match makes sense, Classic Mode offers a series of fights with your chosen fighter. It is under Games & More. It can be fun practice, but it is not the same menu route as a local Smash match with friends.

First-match checklist and quick fixes

  • Lost at the menu? Main menu → Smash → Smash → rules and stage → fighter selection → Ready to Fight. The route diagram above is a map of the labels, not a fake menu screenshot.
  • Controller will not join? On the fighter screen, use SL + SR for a sideways single Joy-Con, or L + R for paired Joy-Cons or a Pro Controller, then pick a fighter.
  • Cannot find your fighter? Match the portrait and percentage at the bottom to a figure on stage; move left and right for one second to confirm.
  • Opponent never loses at 100%? Percentage is damage taken, not health remaining. Land a launch near the edge, then keep them from returning.
  • Keep falling after a hit? Turn the stick toward the stage, use a remaining jump, then try up + B if the stage is still out of reach.
  • An attack button does something different? Controls may be customised or you may be using one sideways Joy-Con. Check the assigned actions in the in-game Controls menu.

After a few rounds, learn one extra action at a time. The win for your first session is being able to start a match, find yourself on screen, understand the percentage and recover from the edge at least once. Everything else can wait.

Get Pixel Twelve's biggest stories first.

Add as a preferred source on Google