Pixel Twelve
Slay the Spire Beginner Guide: Read the Combat Screen and Choose Cards

How To

Slay the Spire Beginner Guide: Read the Combat Screen and Choose Cards

A first-run Slay the Spire guide with five official screenshots and two original diagrams showing enemy intent, health, energy, card costs, events and the shop.

By Mason CarterGame: Slay the SpireVerified Sep 24, 2026
Guide Type
How To
Last Verified
Sep 24, 2026

Guide details

Overview

A first-run Slay the Spire guide with five official screenshots and two original diagrams showing enemy intent, health, energy, card costs, events and the shop.

The short version

Before you play a card, look above each enemy. The symbol and number there tell you what it plans to do next. Then check your health, the energy counter at the lower left, and the cost in the top-left corner of each card. Play what helps you survive this turn. End Turn is at the lower right.

Slay the Spire is a card game where each fight is a small choice: deal damage now, protect yourself from the next hit, or set up a stronger move. You do not have to learn every card before starting. The pictures here come from different runs, so the character, hand and numbers on your screen will not always match them.
1. Start the climb and read your first choice

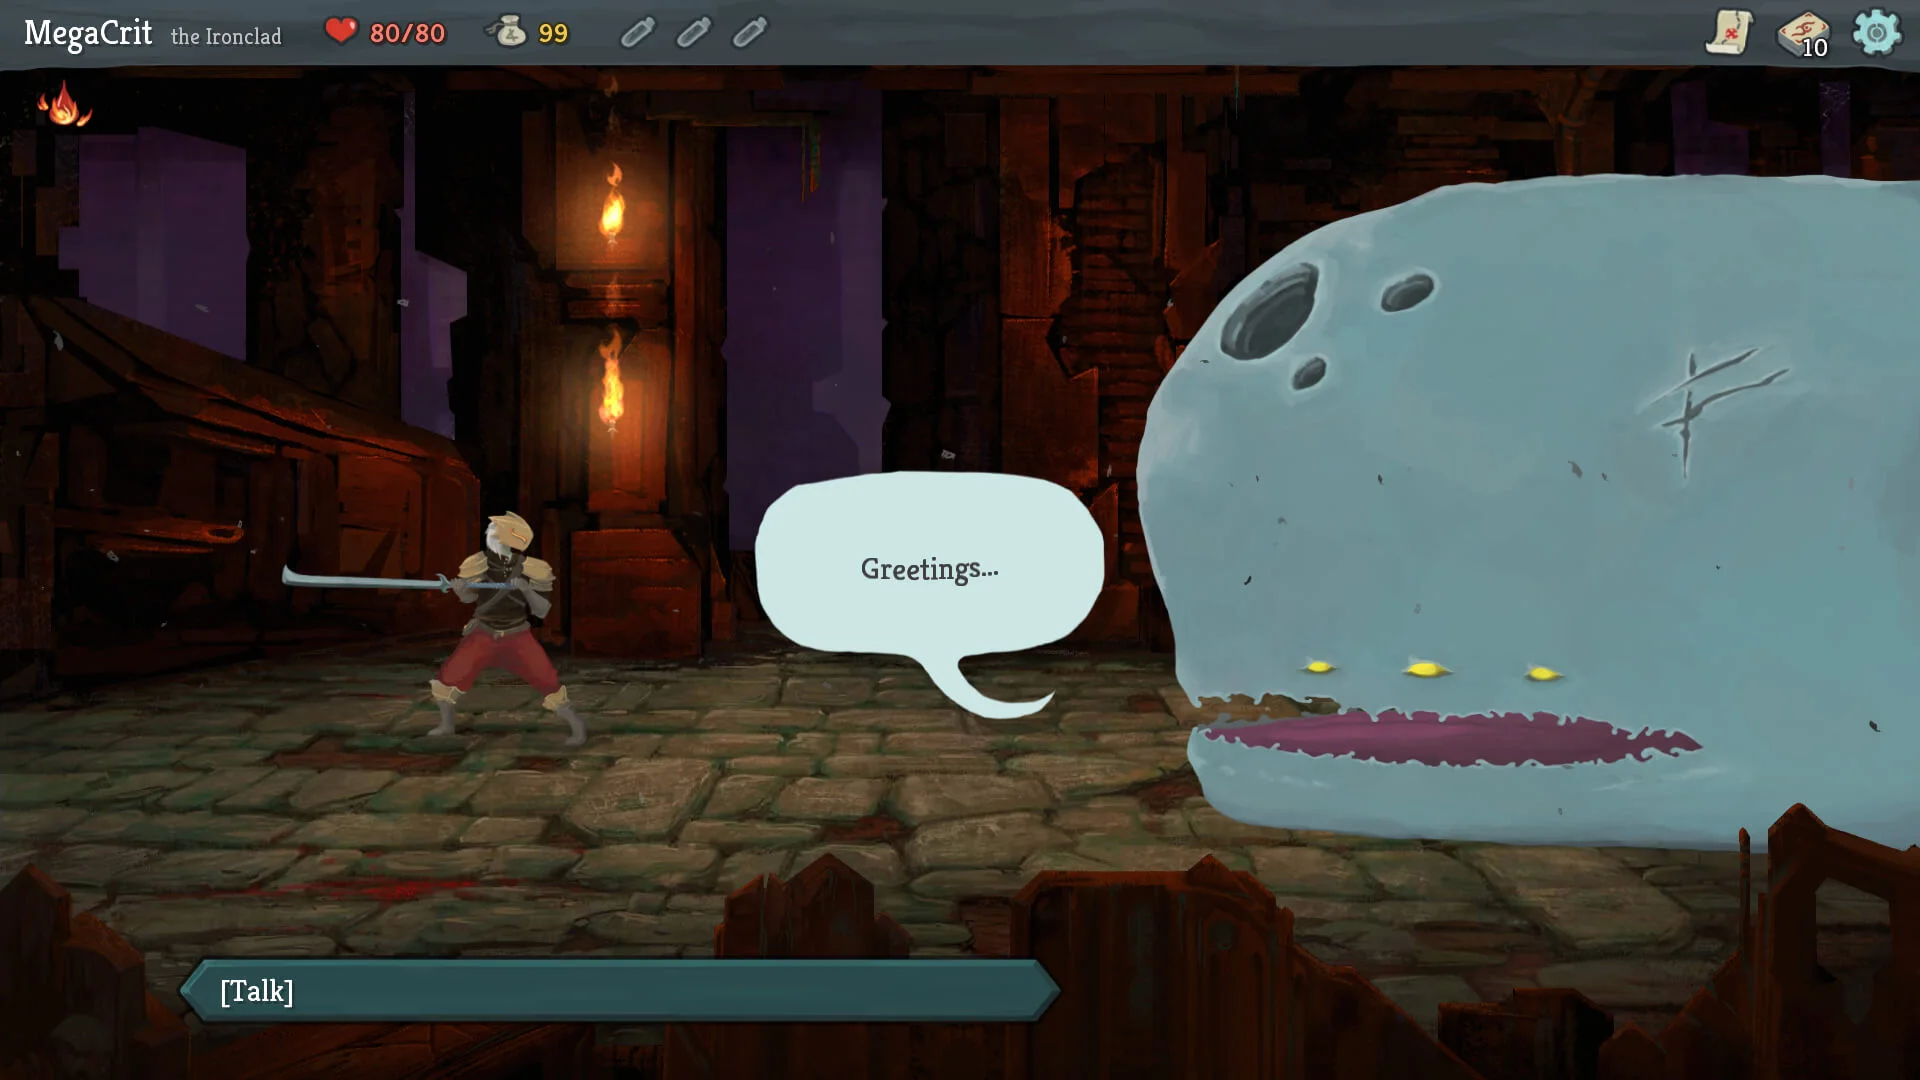
The blue whale Neow fills the right side of a Slay the Spire conversation screen; a Talk choice appears along the bottom.
Near the start of a run, Neow appears before the route. Select the on-screen choice to continue; this is a conversation, not a battle.
  1. Choose a character and begin a run. In this picture, the small figure is on the left and the large blue whale Neow is on the right. The choice bar at the bottom says Talk. Select the choice shown by your version of the game to move on.

After this opening, a route leads through fights and other stops. The route can change from run to run. This guide picks up at a fight so you can learn the combat screen first.

The interface differs between mouse, controller and touch versions. Follow the highlighted choice and the control hint on your own screen instead of relying on one fixed button name.

2. Find health, enemy intent, energy and your hand

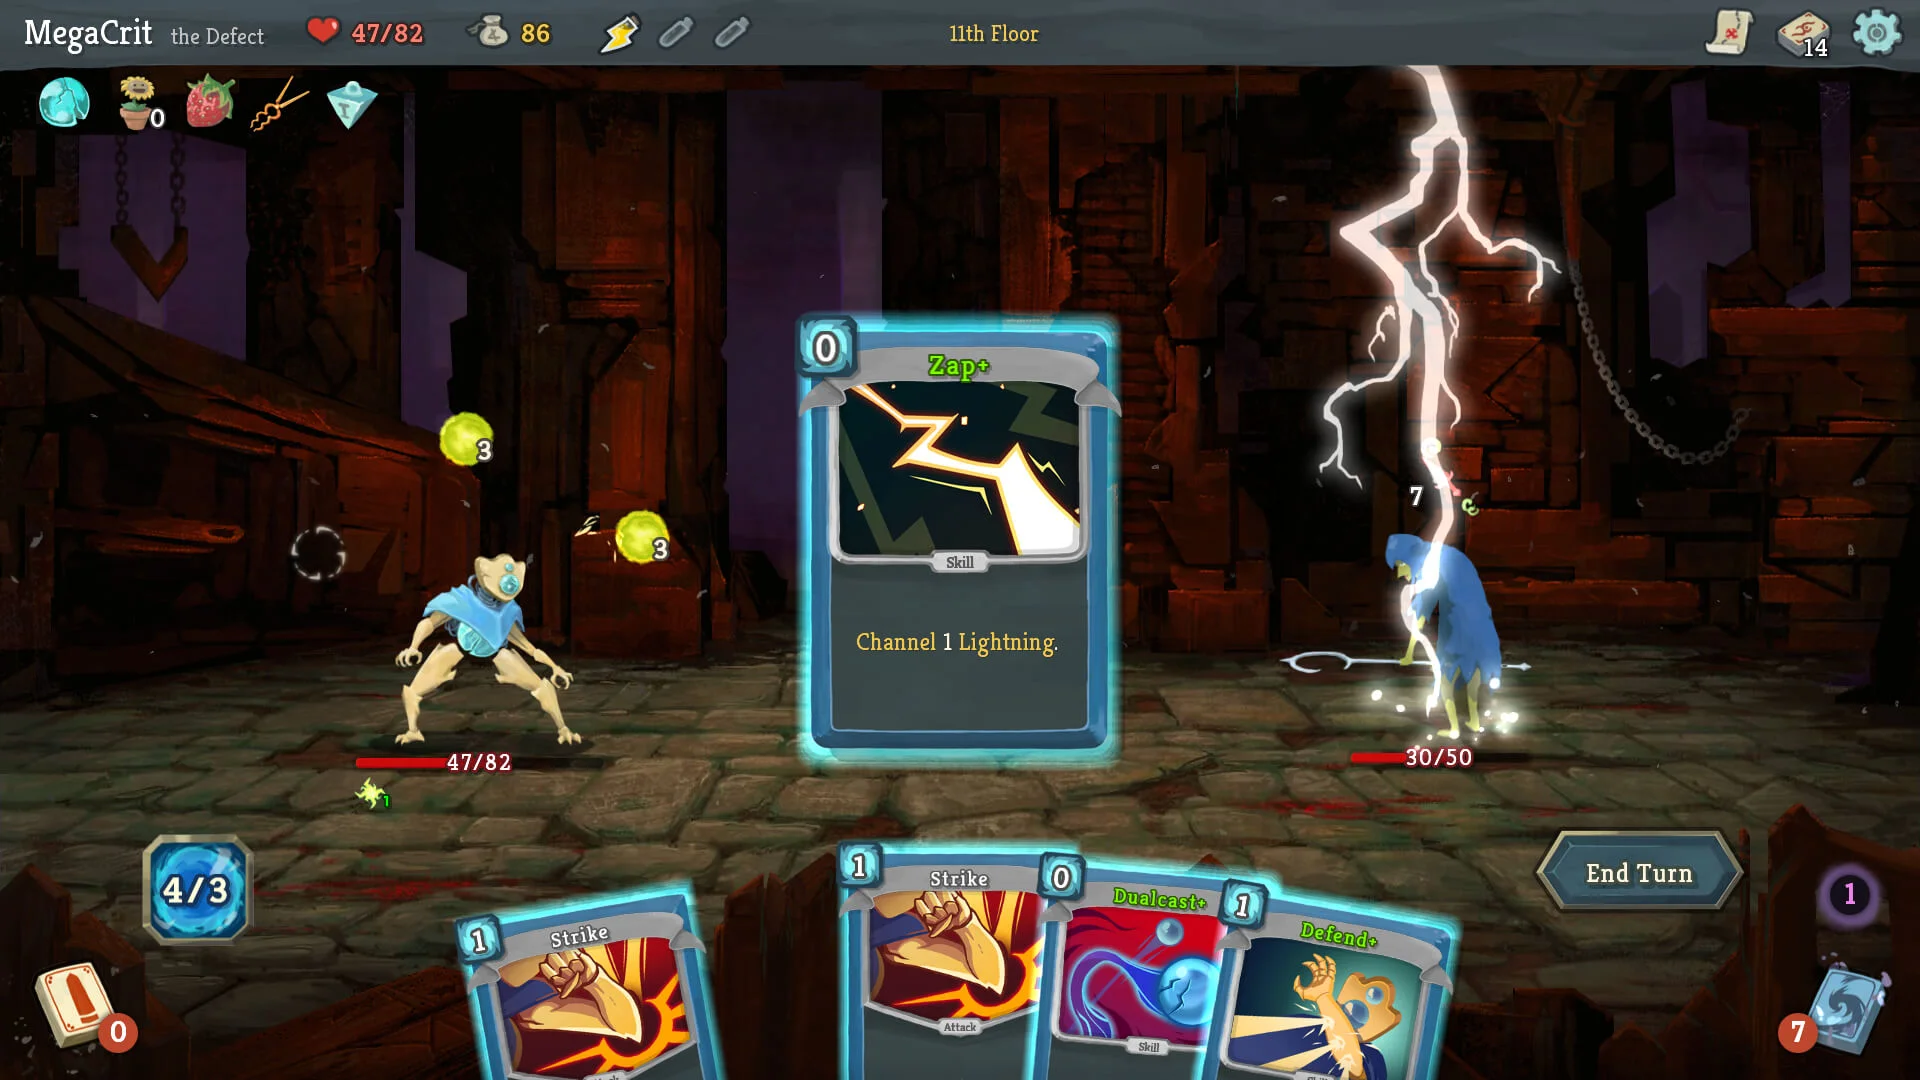
A Defect fight shows the player at left with 47/82 health, an enemy at right with 30/50 health and a 7 intent number, 4/3 energy at lower left, cards along the bottom and End Turn at lower right.
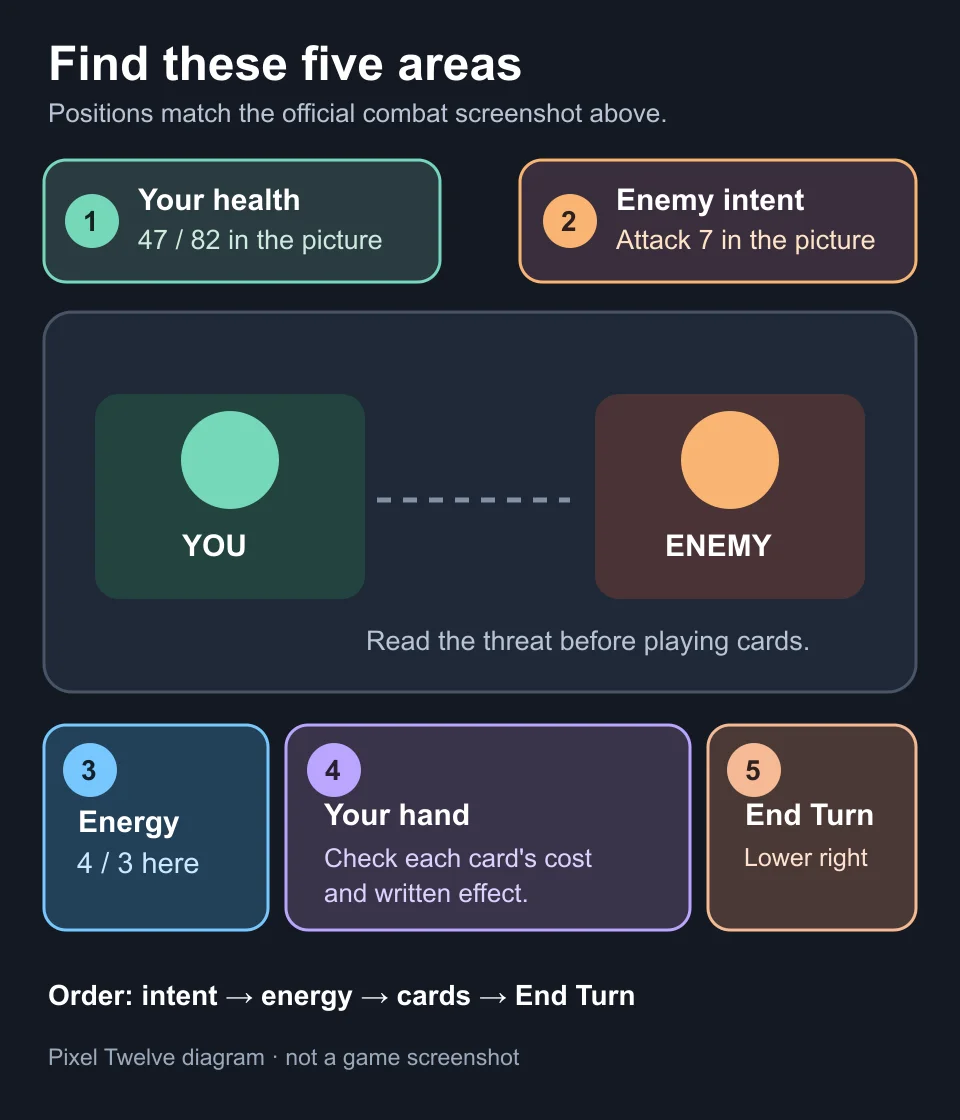
Use this screen like a map: health at the top and below each fighter; enemy intent above the foe; energy lower left; your hand across the bottom; End Turn lower right.
Pixel Twelve layout diagram showing health at upper left, enemy intent at upper right, energy lower left, cards along the bottom and End Turn lower right.
Pixel Twelve diagram, not a game screenshot: these five areas show where to look before you end a turn. The numbers match the official example image above.
  1. Find your character on the left. The red bar below them reads 47/82 in this example: 47 health remains out of a maximum of 82. The same health value is shown beside the heart near the top. The enemy is on the right; its red bar reads 30/50. These values are for this screenshot, not your first fight.
  2. Look above the enemy, not only at its red health bar. A small attack symbol with 7 beside it shows an attack planned for the enemy turn. Other symbols can mean a different action. If you are unsure, hover over or select the symbol and read the explanation before committing your cards.
  3. Now look in the blue counter at the lower left. It reads 4/3 here because this run has an effect changing the available energy. Treat the left number as energy you can spend right now. Do not assume your own counter will read 4/3.
  4. Your available cards form the hand along the bottom edge. Each card has a cost in its top-left corner. The enlarged Zap+ in the middle costs 0, while the visible Strike cards cost 1. Read the words on a card before using it; its colour or picture alone does not tell you what it does.

3. Plan one turn before you press End Turn

Enemy intent comes first. If an enemy is about to attack, compare that number with the Block you can get from defensive cards. Block is a shield for the current hit; health lost after that is harder to replace. You do not need to block every point in every fight, but you should know what you are accepting.

  1. Read every enemy intent, especially when there is more than one foe. In the screenshot above, the enemy is showing 7. In your battle, the number may be different or the icon may show a non-attack action.
  2. Compare two or three cards in your hand. A Strike is an attack. A Defend card gives Block. Skills and powers can have other effects, so read their text instead of assuming they all protect you. Check each card cost against the energy counter before selecting it.
  3. Choose a card that fits the threat. If you need protection, play a defensive card while you still have energy. If you can defeat the enemy before its action, an attack may prevent that hit entirely. For a targeted attack, select the card and then the enemy using the prompt for your platform; some cards play without a target.
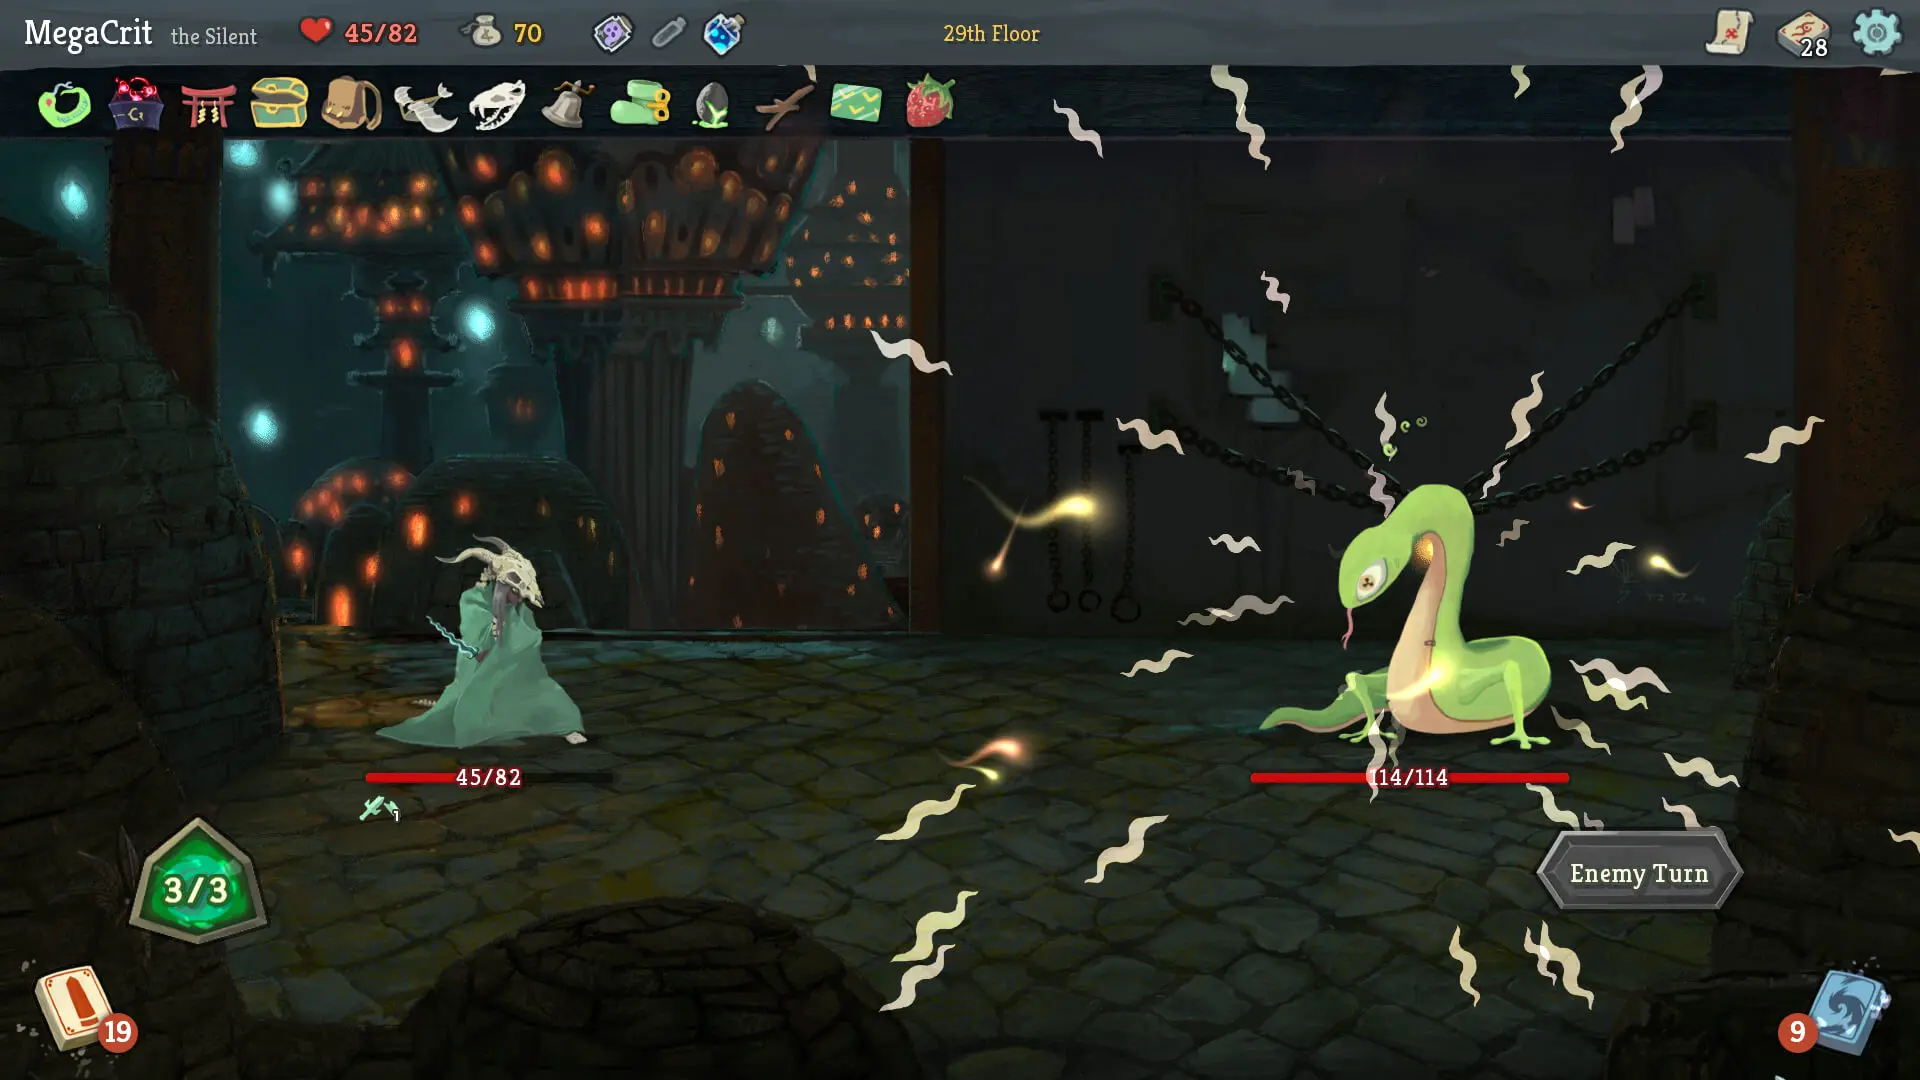
  4. After each card, look again at energy, enemy health and any new effect. When you have made the plays you want, choose End Turn at the lower right. The enemy then takes the action it showed. The hero picture at the top shows Enemy Turn in that same area: the hand has cleared because it is no longer the player turn.

If a card refuses to play, check its cost, whether it needs a target and whether the game is already in the enemy turn. Do not click End Turn repeatedly while you are still trying to read the hand.

4. Read a card before adding it to your deck

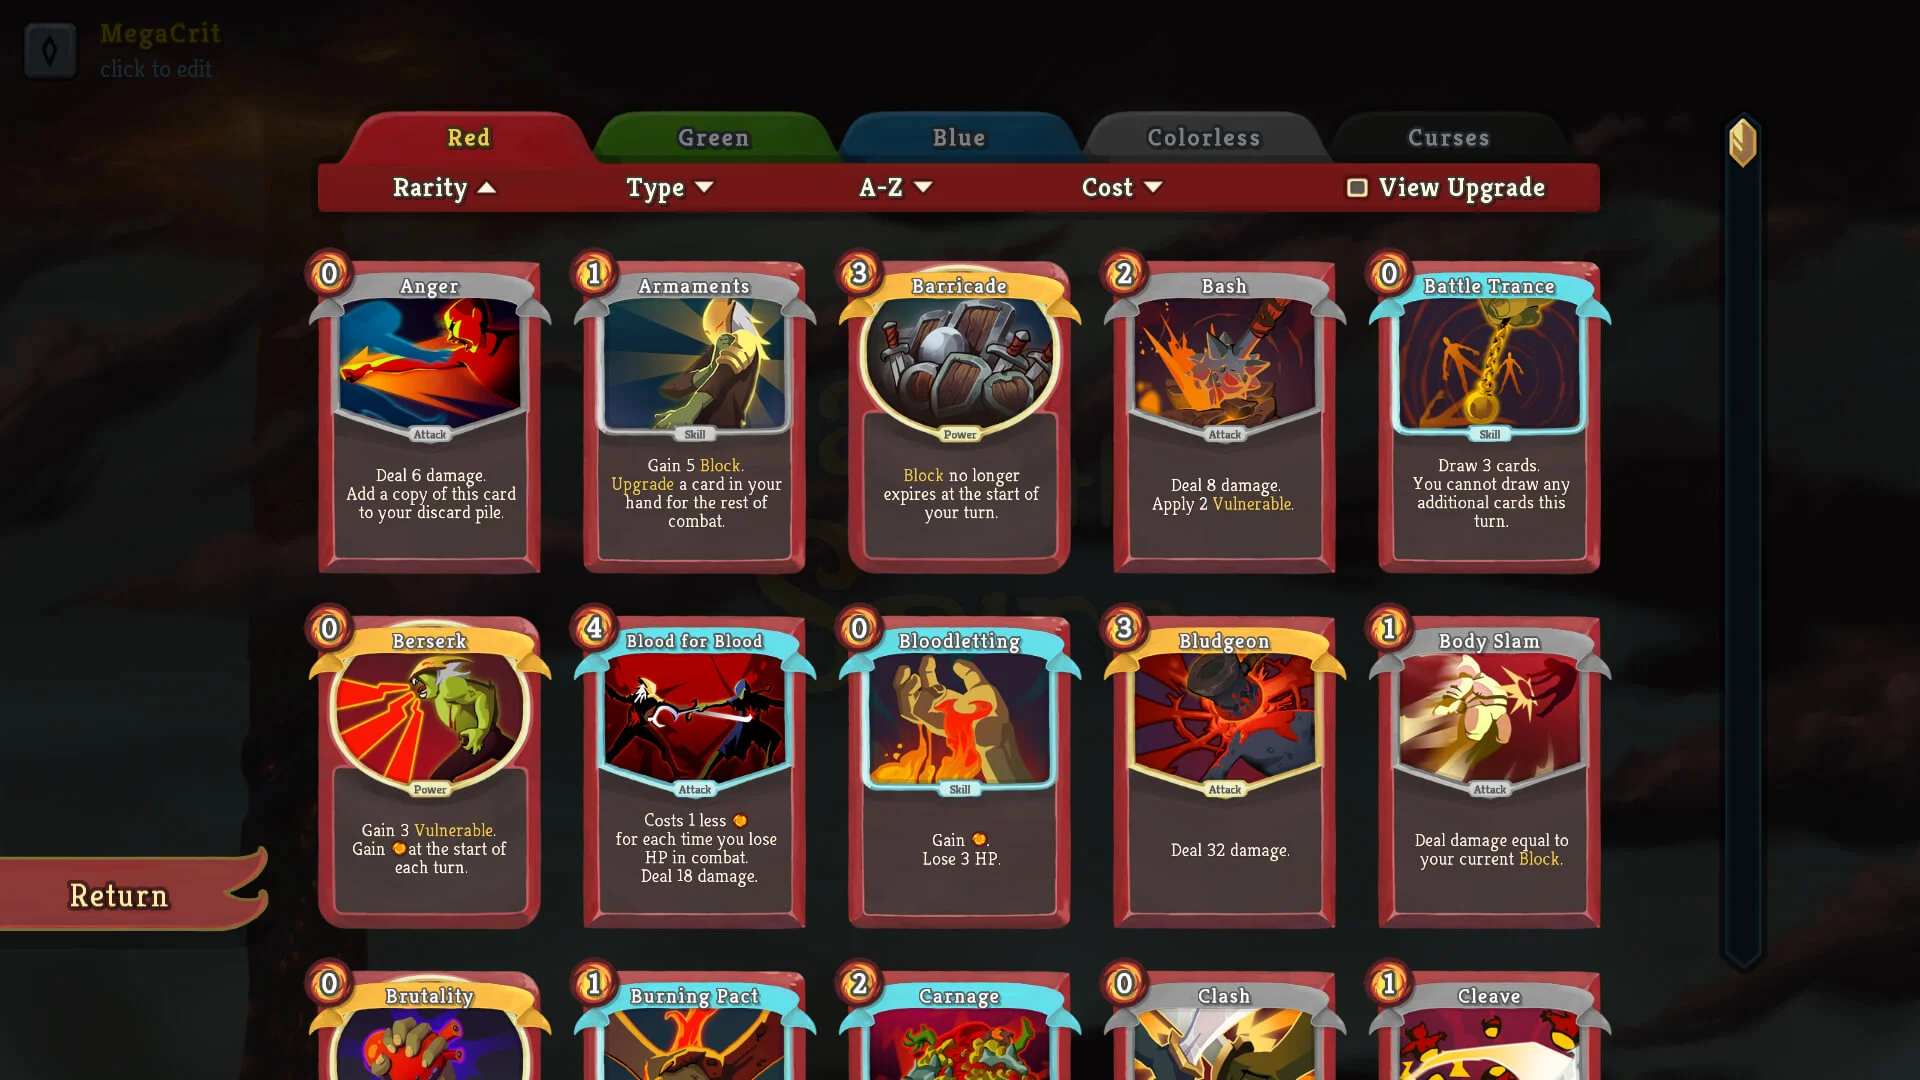
The Slay the Spire card library shows rows of Ironclad cards with costs in their top-left corners and filters across the top.
In the library, compare a card’s cost, type and written effect. A shiny border alone is not a reason to add it to every deck.
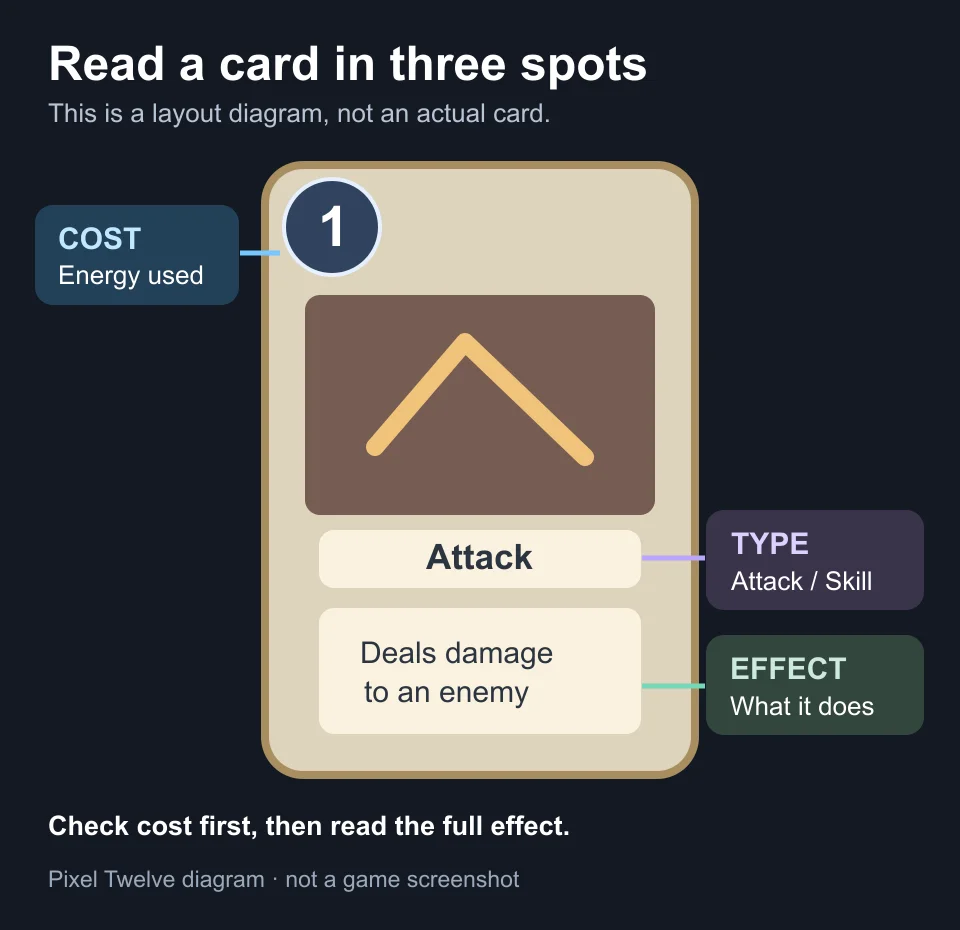
Pixel Twelve card layout diagram with large labels for energy cost at the top left, card type under the art and written effect near the bottom.
Pixel Twelve diagram, not an actual game card: check the cost, type and written effect before deciding whether a card helps your deck.

The card library in this picture is a reference screen, not the same character as the blue Defect fight above. The red Ironclad cards are arranged in rows. The small number in each top-left corner is the energy cost; the word below the picture tells you whether it is an Attack, Skill or Power.

  1. After a win, read each offered card in full. Ask what it does on the turn you draw it. If you often need Block, look for a card that helps you survive. If you struggle to finish fights, look for damage or a way to make your useful cards easier to draw. A rare card may be strong, but it still needs to work with your current deck.
  2. Check whether the card asks for something you cannot often provide, such as another effect or a large amount of energy. A reward is an option, not a command to add a card. It is fine to pass on choices that do not help the deck you have.

The library helps you recognise card types later, but you do not need to study it like homework. Learn one new card when the game offers it, then notice how often it helps in the next few fights.

5. Events can trade one thing for another

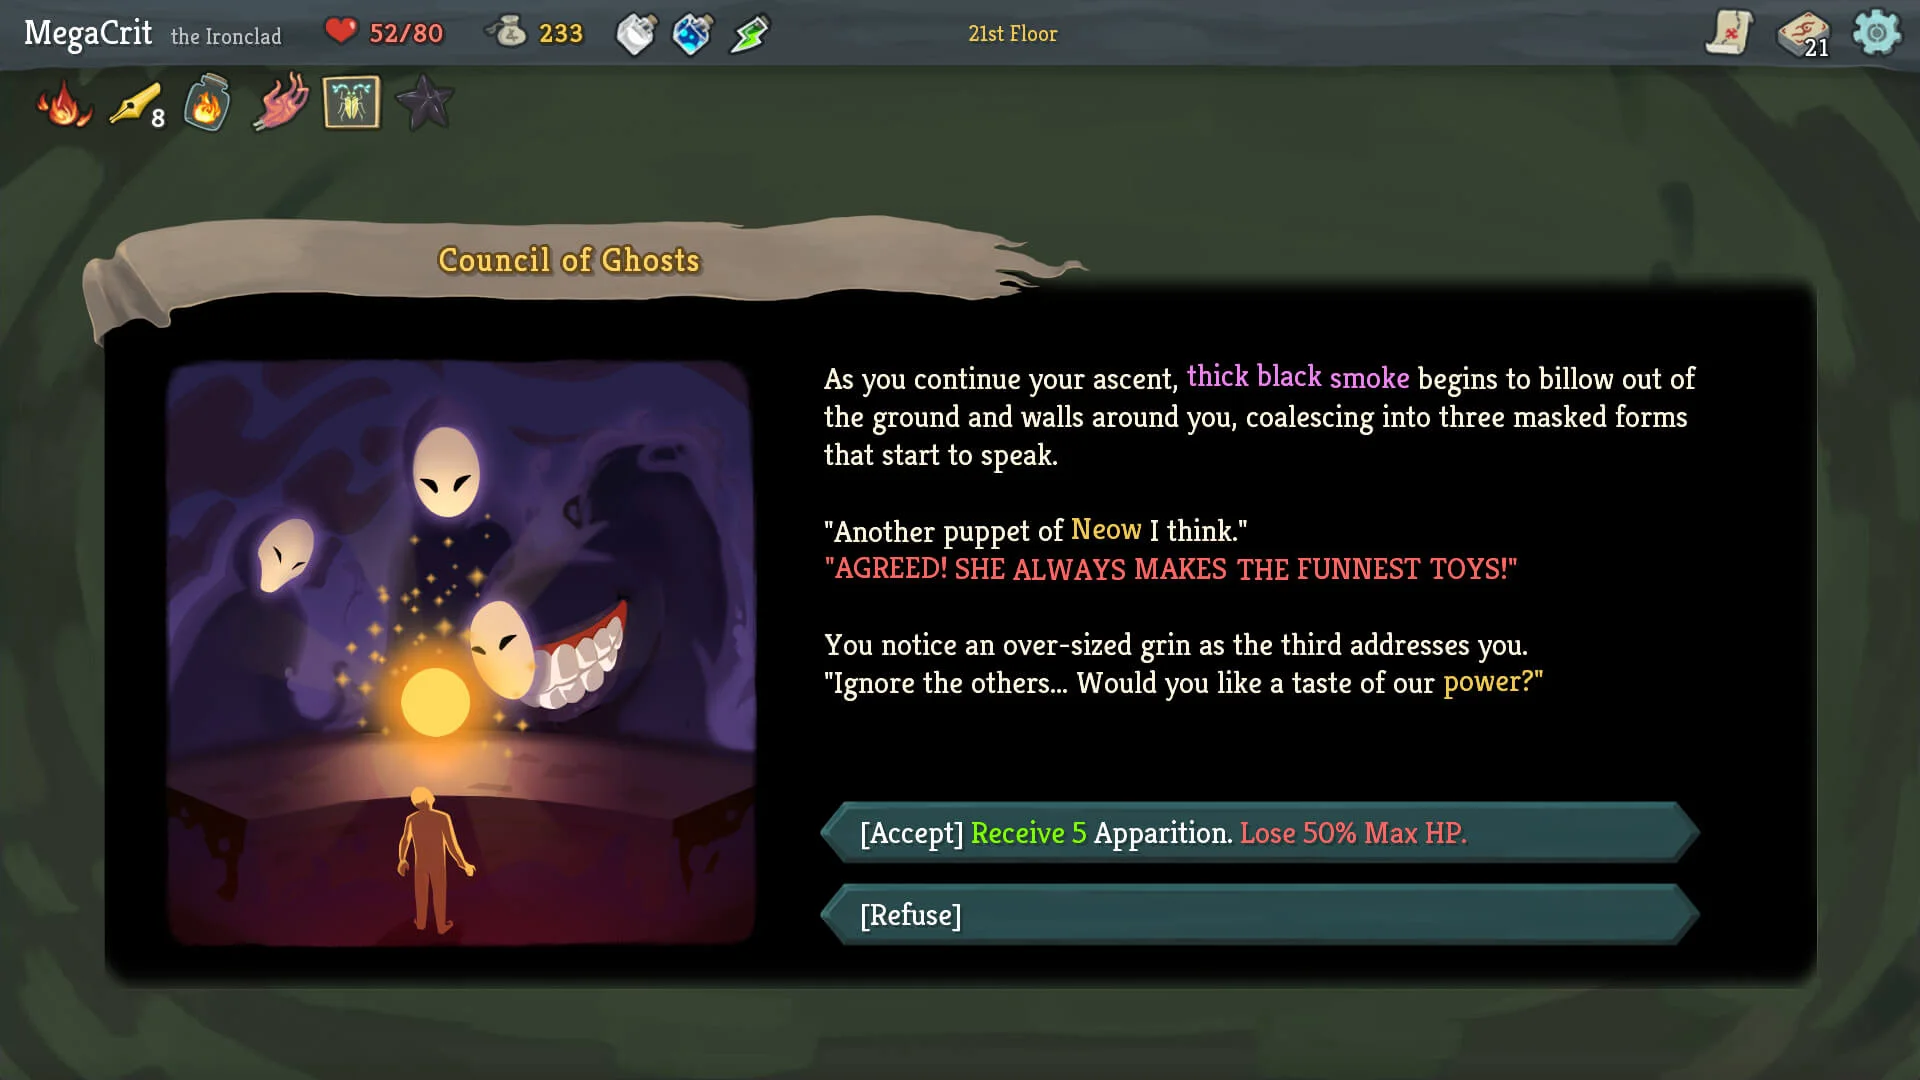
A Council of Ghosts event screen presents a story and two options; the accept choice names a reward and a maximum-health cost.
Read the entire choice line. This event offers Apparitions but also says you lose 50% maximum HP.
  1. When an event opens, read the description and every line of each choice. The Council of Ghosts example offers Apparitions, but the accept line also says Lose 50% Max HP. That cost lowers the size of your health bar for the rest of this run; it is not just a small hit you heal afterward.
  2. Compare the reward with your current situation. If you do not understand what a named reward does, use the game’s hover or selection details if available. There is no rule that you must accept a risky event because it is highlighted. Refuse is a real choice in this example.

This is one event from one run. Do not expect the same event after your first battle. The useful habit is to read the cost as carefully as the reward before you confirm.

6. Spend gold in a shop with a plan

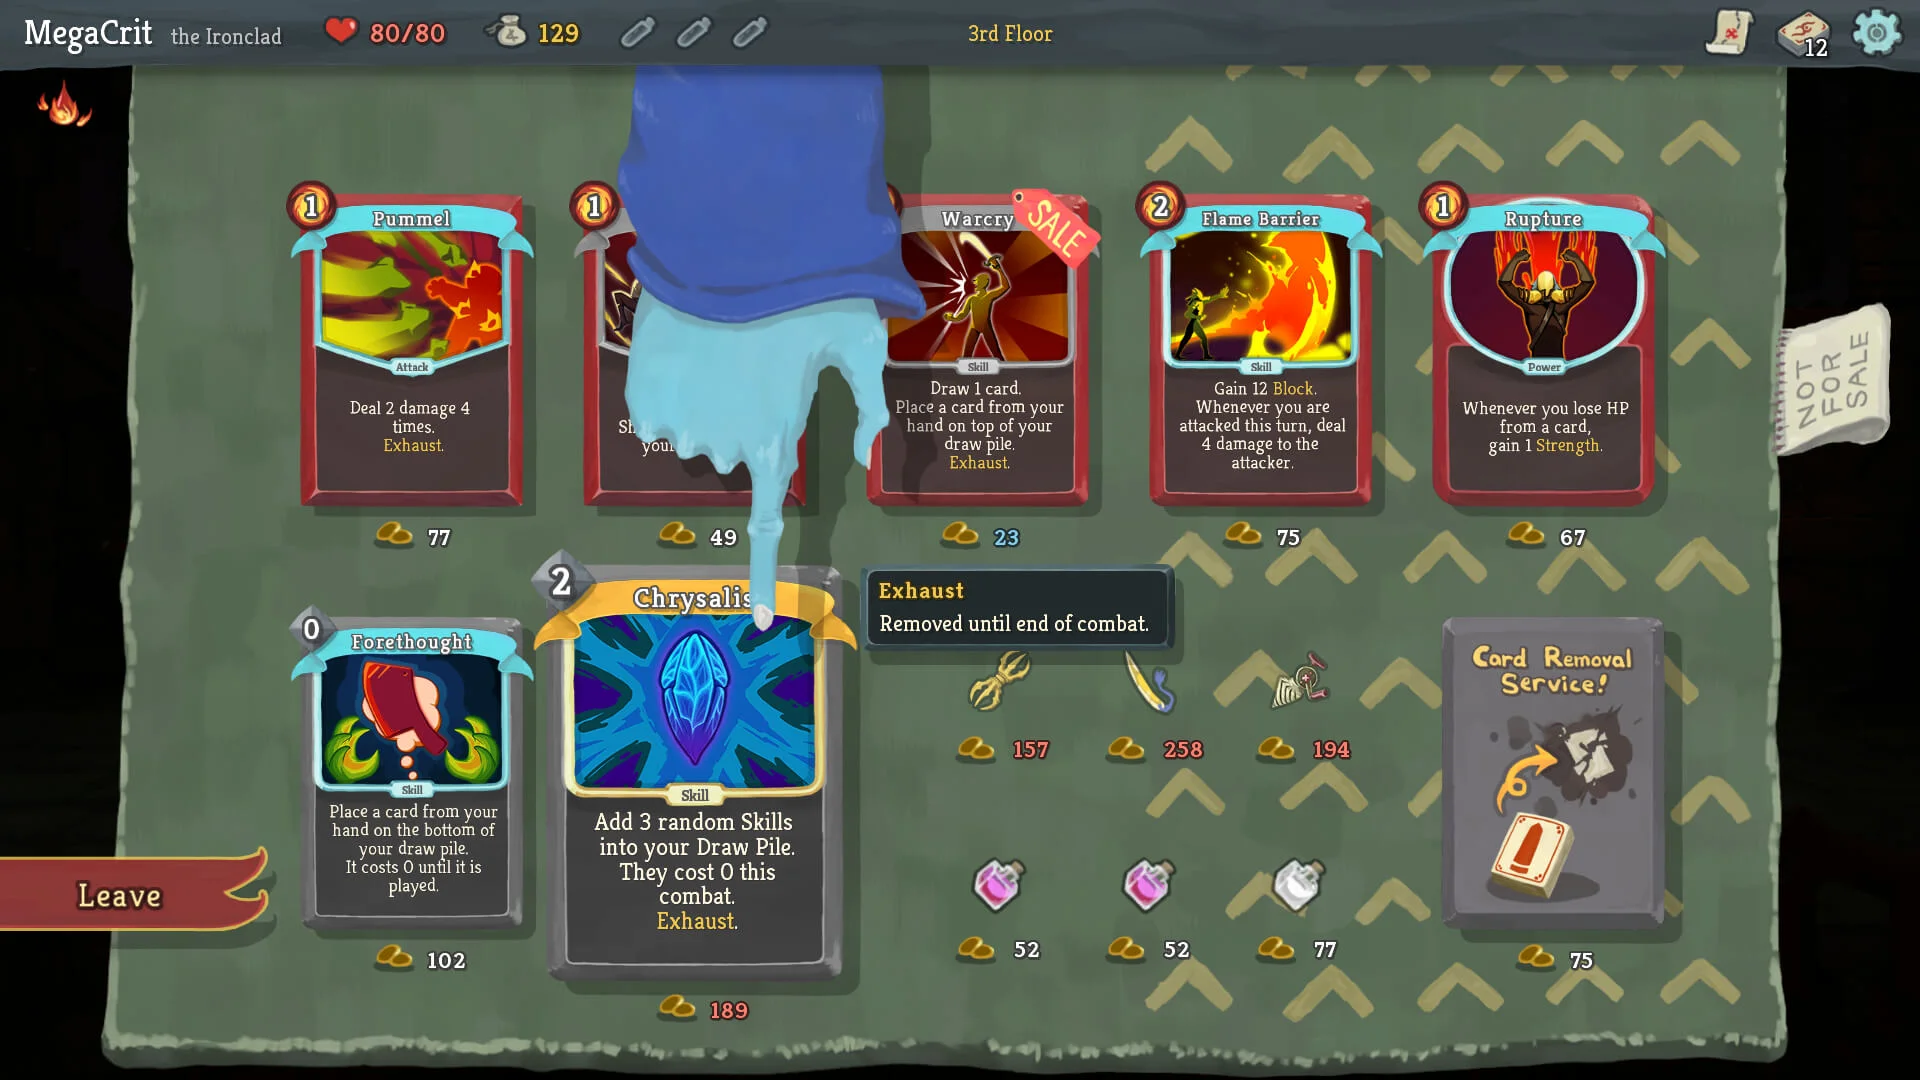
A Slay the Spire shop displays cards, relics, potions and a card-removal service with gold prices.
The shop groups different purchases on one screen. Look at the gold counter, the price and the effect before choosing anything.
  1. At a shop, find your gold at the top of the screen and the price below each item. Cards are shown together; relics and potions have their own places; Card Removal Service is on the right in this screenshot. If an item costs more than your gold, you cannot buy it yet.
  2. Read one item at a time. A relic can keep helping during the run, while a potion is something you save for a useful moment. Removing a weak or unhelpful card can make it easier to draw the cards you want. Which choice is best depends on the deck and the next fights, not on the item’s position in the shop.
  3. You can leave without buying. The Leave button is at the lower left in this image. Keeping gold may be useful later, but do not save it just because you are afraid to make any choice.

Quick checks when a fight goes wrong

  • I lost health even after playing Defend: compare the enemy’s shown damage with the Block you actually gained. One defensive card may not cover the whole hit, and some effects can change the numbers.
  • I cannot use a card: check the small cost at its top-left corner against your current energy. If it is an attack, select a valid enemy target when the game asks for one.
  • My hand disappeared: look at the lower-right button. If it says Enemy Turn, the enemy is acting. The cards return when your next turn begins, unless the fight has ended.
  • The screenshot shows 4/3 energy, but I have another number: that is normal. These official images come from different runs with different effects. Read the counter on your own screen.
  • I keep losing after taking every card: try choosing only cards that solve a clear problem in the deck you have. A smaller deck can help you see useful cards again more often.

Get Pixel Twelve's biggest stories first.

Add as a preferred source on Google