Pixel Twelve
Pikmin 3: how to choose Rock Pikmin and break a glass gate

How To

Pikmin 3: how to choose Rock Pikmin and break a glass gate

A first-time guide for the original Wii U Pikmin 3: Rock Pikmin identification, GamePad buttons, the selected-type icon, glass gate target and what to do after it breaks.

Game: Pikmin 3Verified Sep 29, 2026
Guide Type
How To
Last Verified
Sep 29, 2026

Guide details

Overview

A first-time guide for the original Wii U Pikmin 3: Rock Pikmin identification, GamePad buttons, the selected-type icon, glass gate target and what to do after it breaks.

Before you start: this is the original Wii U version

Pikmin 3 is a game about leading little plant-like helpers called Pikmin. Different types solve different problems. This guide shows how to use Rock Pikmin to open a glass gate in the original Wii U game with the Wii U GamePad. Pikmin 3 Deluxe on Switch has different controls, so do not copy the button instructions from this page into that version.

You need Rock Pikmin already available in your party. They are the small, dark, angular creatures that look like stones with legs and a stem on top. If the only Pikmin following your explorer are red, yellow or blue, keep playing until Rock Pikmin have joined your team; choosing a type cannot create Pikmin you do not have.
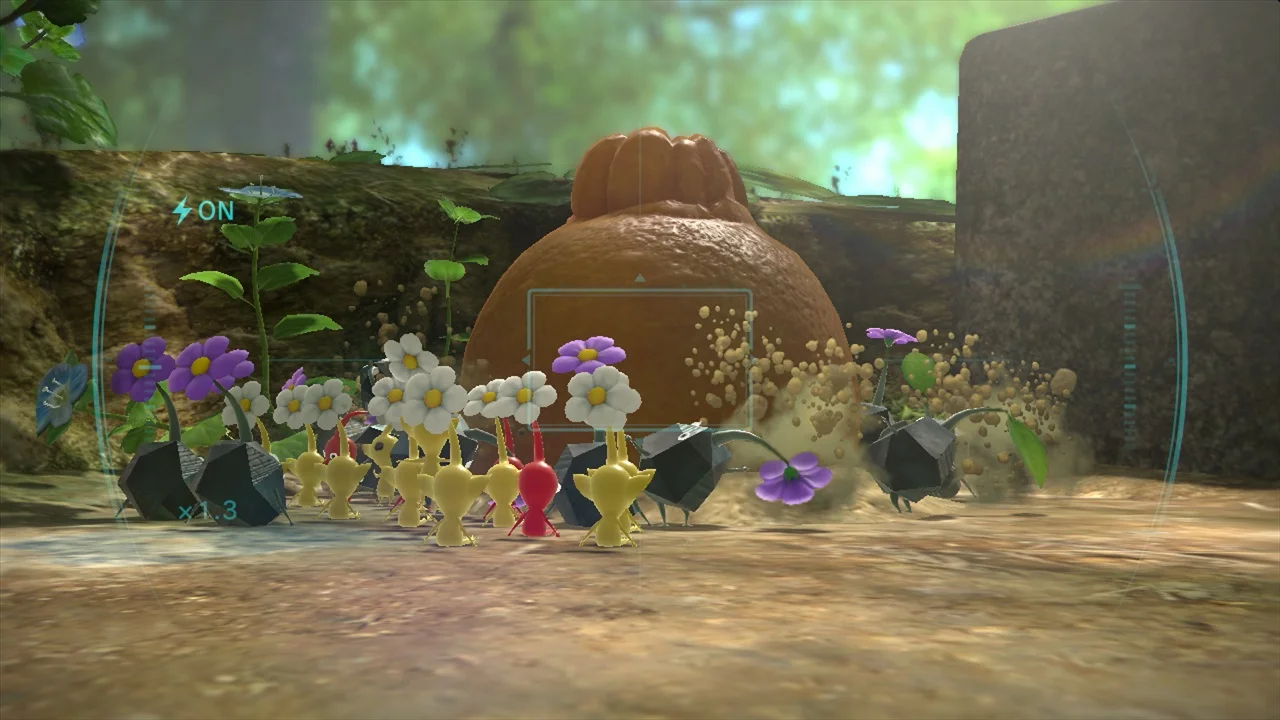
Official Pikmin 3 screenshot: black, angular Rock Pikmin with purple flowers stand among yellow and red Pikmin on a wooded path.
Find the Rock Pikmin by their dark, faceted bodies. The small leaves, buds or flowers are on their stems; their bodies are not smooth like red or yellow Pikmin.

1. Recognize the gate before you throw anything

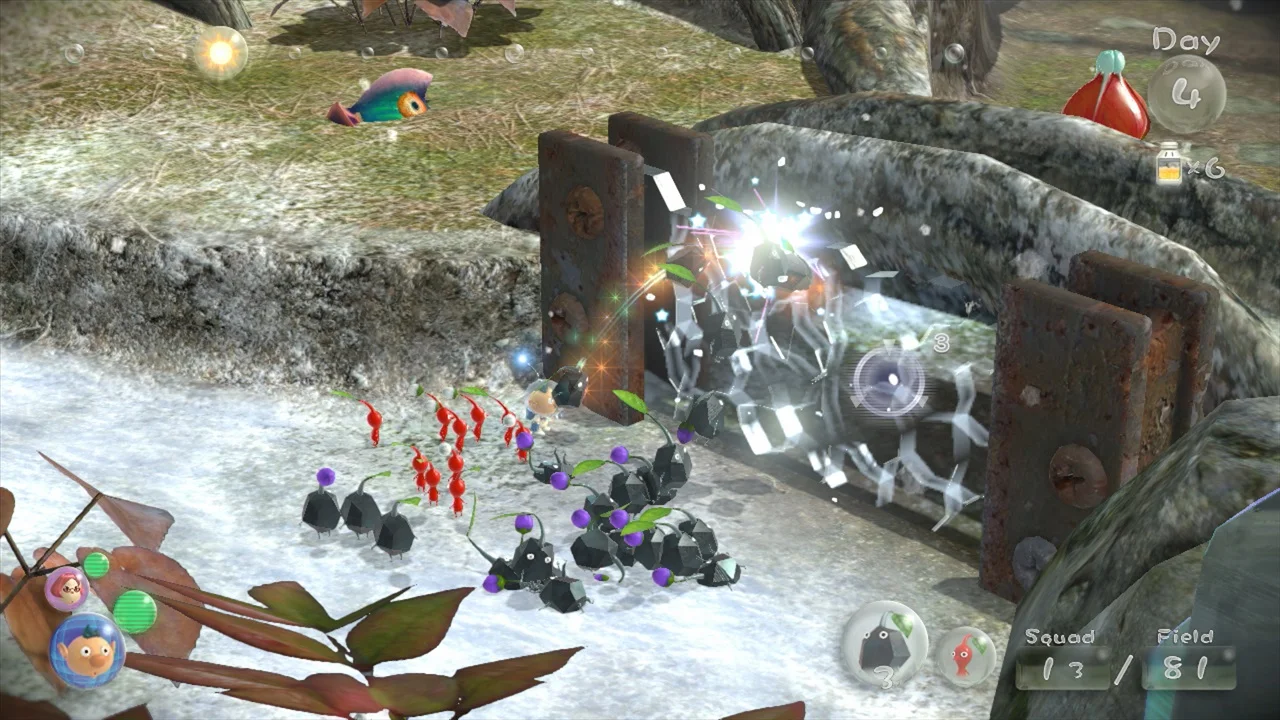
On the TV, look for a pale, see-through sheet stretched between two thick posts. The scenery behind it is partly visible, as if you are looking through cloudy glass. In Nintendo’s gameplay screenshot below, the posts stand in the middle-right area; white shards burst from the clear center as Rock Pikmin hit it. The brown posts themselves are not the target.

Official Pikmin 3 Wii U gameplay screenshot: Rock Pikmin smash a transparent gate between two rusty posts, with the selected Rock type icon at lower right.
The gate is the cloudy panel between the posts. Aim at that panel, not at a post. At the lower right, the selected-type circle shows a dark Rock Pikmin.

A pile of dirt, a wooden wall and a crystal object are different obstacles. Rock Pikmin can break glass and hard crystal, but first check what is actually blocking the path. If you see the clear panel between posts, continue with the steps below.

2. Find L, A and ZR on the Wii U GamePad

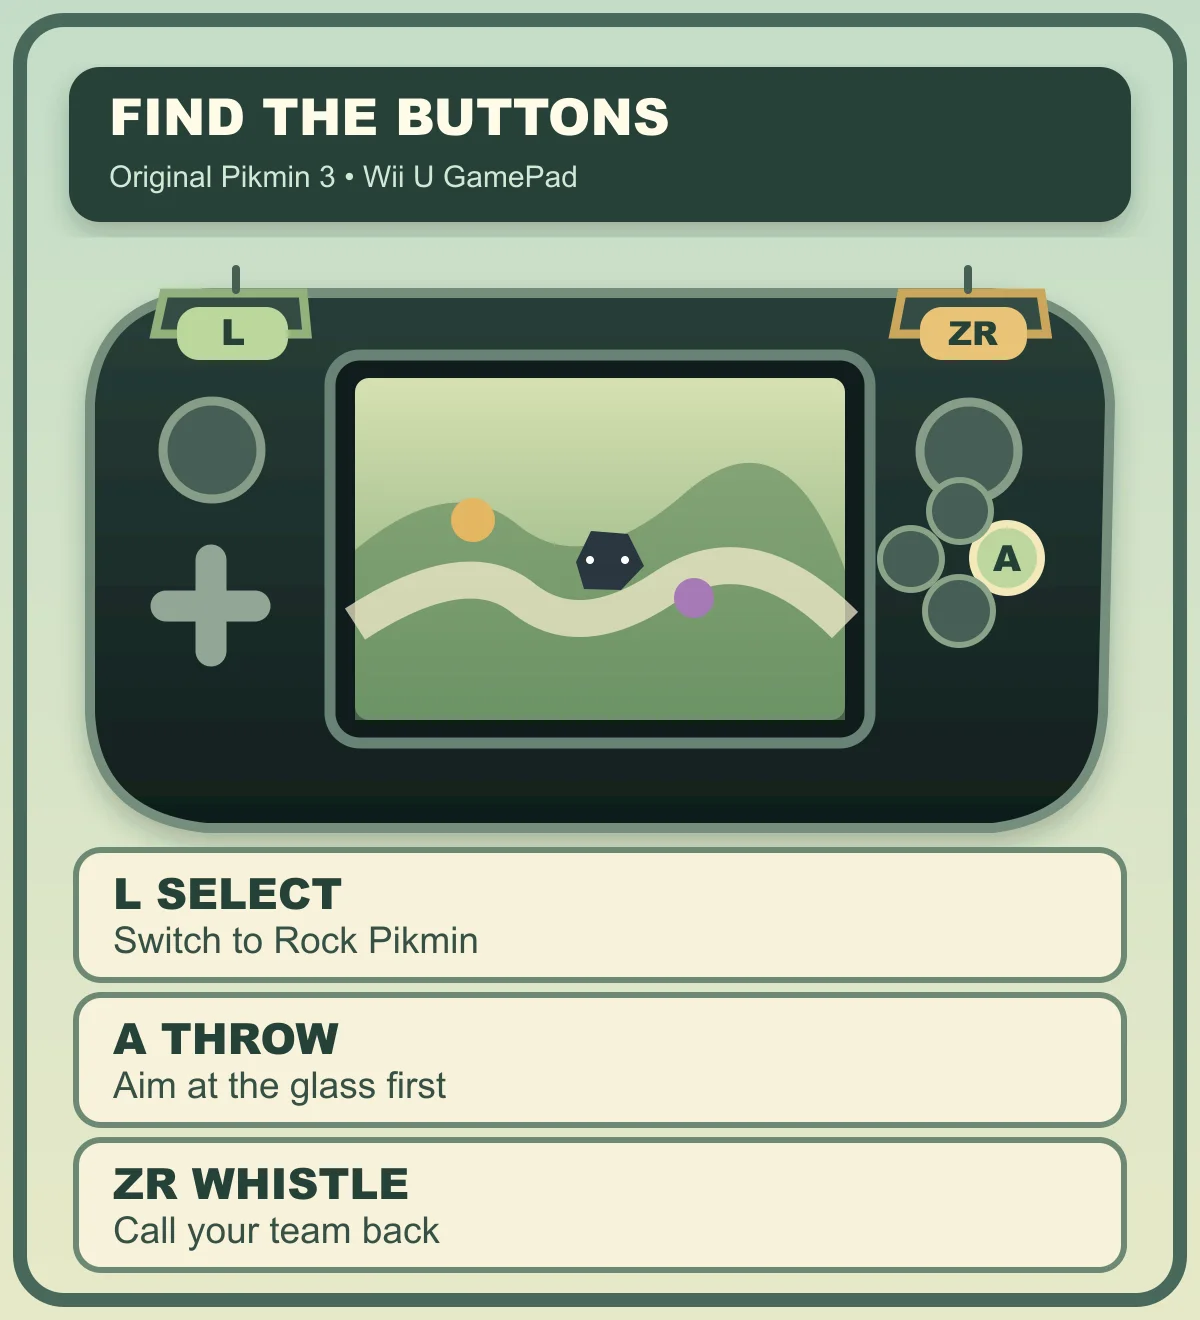
Hold the Wii U GamePad normally. L is the shoulder button along its upper-left edge. A is the right-hand button in the four-button group to the right of the screen. ZR is the right-hand rear shoulder button. Nintendo’s original Wii U manual assigns L to choosing what to throw, A to throwing, and ZR to the whistle that calls Pikmin into your group. The labeled Pixel Twelve diagram below shows where to look. It is an original control diagram, not a photo or game screenshot.

Original Pixel Twelve Wii U GamePad diagram: L highlighted on the upper left, A highlighted as the right-hand face button, ZR highlighted at the upper-right rear, with their Pikmin 3 actions in padded panels.
Pixel Twelve original diagram, not a screenshot. L changes the Pikmin type; A is the right-hand face button and throws the selected type; ZR calls your team back.

If your Rock Pikmin are a few steps away, move your explorer near them and hold ZR to whistle them into the following group. Look for the dark stone bodies to walk in behind your explorer before moving to the gate.

3. Press L until the Rock Pikmin icon is selected

Stand a short distance in front of the gate with Rock Pikmin following. Press L to cycle what your explorer will throw next. Watch the round selected-type icon at the lower right of the TV image as it changes. Stop when it shows a small dark, pointed Rock Pikmin rather than a red, yellow or blue face. In Nintendo’s screenshot below, the Rock icon is the left circle in the lower-right HUD; a red Pikmin icon sits beside it. The number near the icon tells you how many of that type are ready in your group.

Official Wii U Pikmin 3 screenshot with Rock Pikmin selected in the lower-right circular type icon and a glass gate in the middle-right of the field.
Look at the lower-right circular icon: its dark, angular face means Rock Pikmin are the selected type. The clear gate is between the two posts above it.

If pressing L never shows the Rock icon, check that Rock Pikmin are actually following the active explorer. The large group you can see elsewhere on the field is not necessarily in this explorer’s squad; walk close and whistle with ZR to gather them first.

4. Aim at the clear center, then press A

Face the clear panel from nearby. Move your aiming pointer onto the glass between the posts, not the frame or the ground. With the Rock icon still selected, press A to throw one Rock Pikmin at it. Watch for a chip, crack or burst of white pieces on the panel. Throw more Rock Pikmin at the same glass until the barrier breaks and the opening is clear.

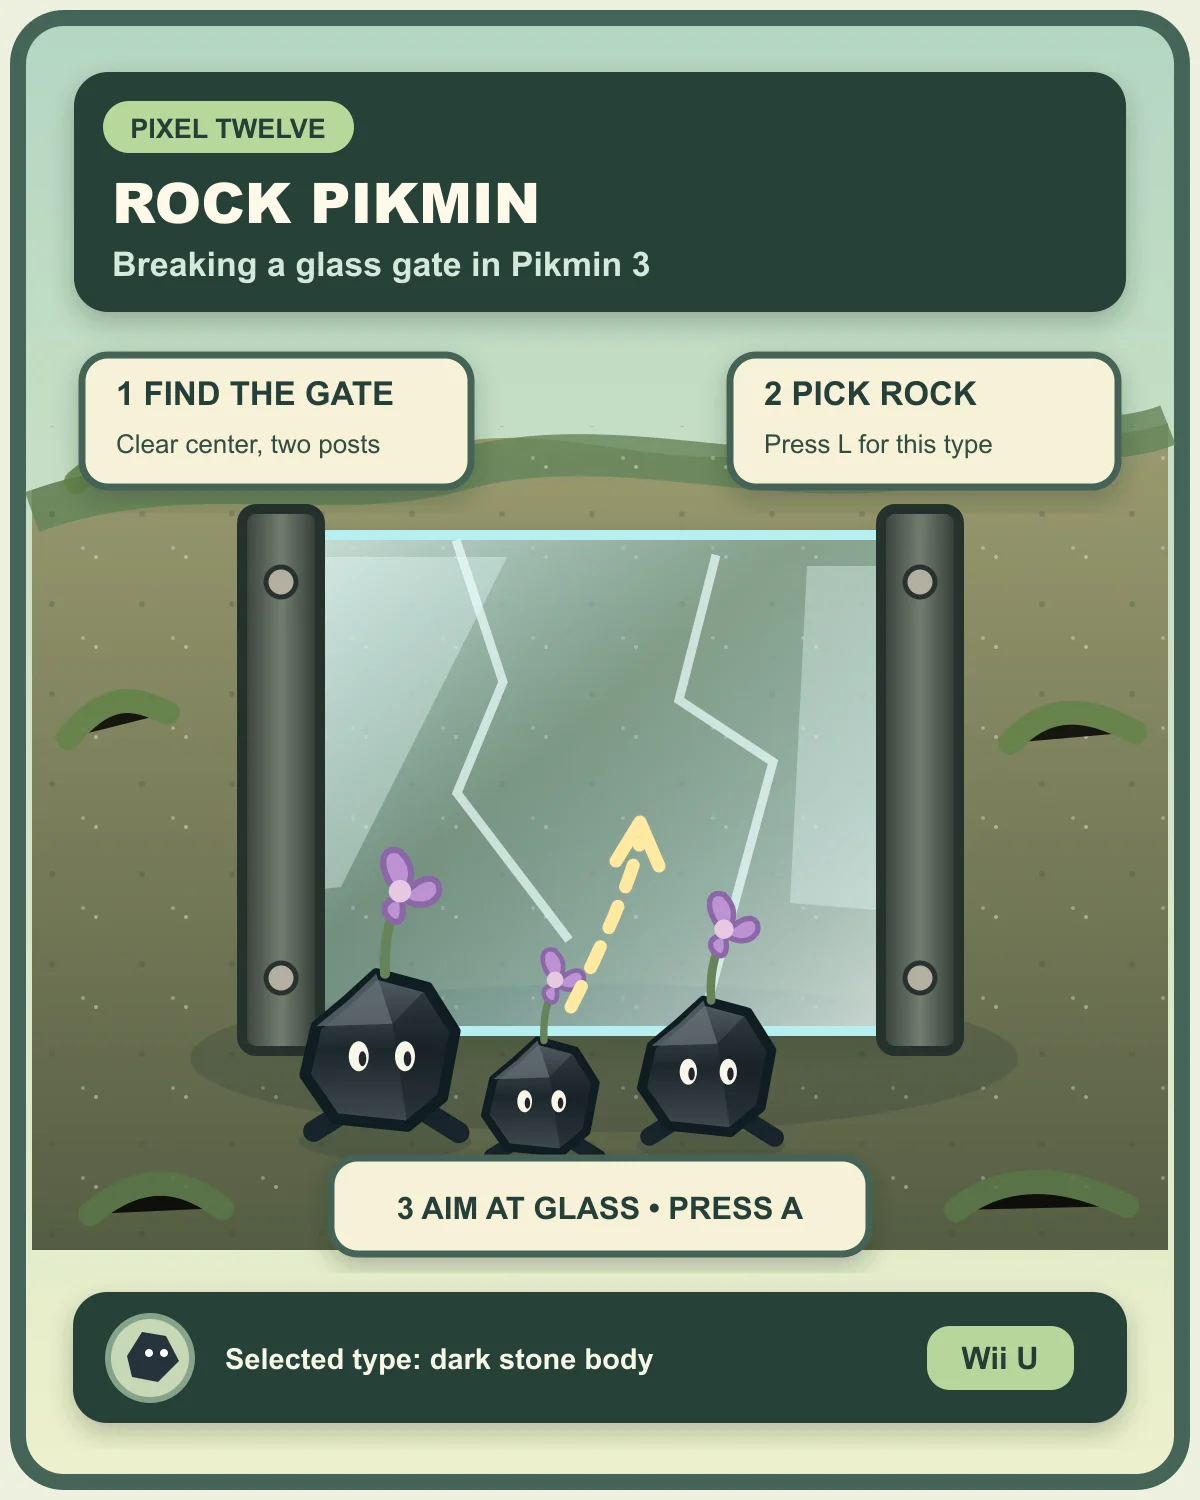
Original Pikmin 3-inspired Pixel Twelve diagram: dark angular Rock Pikmin face a translucent glass gate between riveted posts; three padded panels show Find the Gate, Pick Rock with L, and Aim at Glass with A.
Pixel Twelve original diagram, not an in-game screenshot. The pale center is the target; the posts are not. The Rock Pikmin have dark angular bodies and purple flowers.
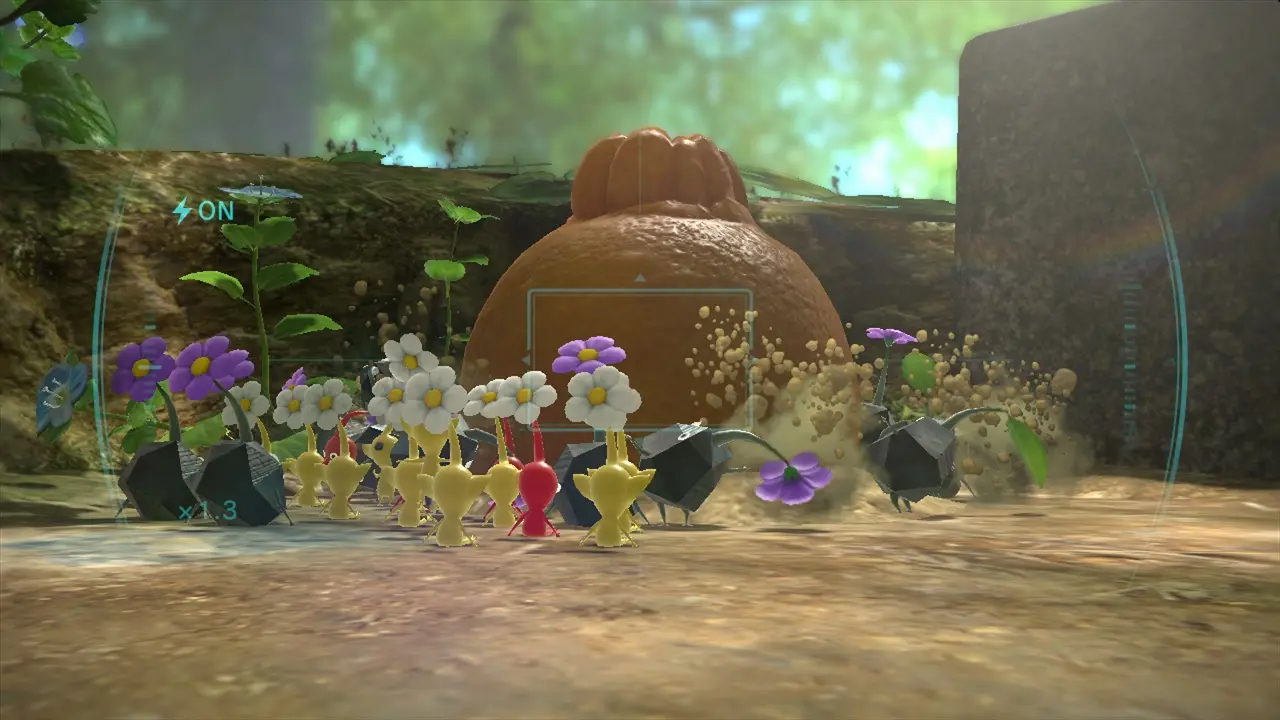
Official Pikmin 3 Wii U screenshot showing glass shards around a transparent gate as Rock Pikmin hit it.
This is the in-game result to look for: white fragments fly from the gate while Rock Pikmin strike its clear center.

If only a red or yellow Pikmin flies, stop and press L again until the Rock icon appears. If a Rock Pikmin lands on a post without making glass shards, move the pointer inward toward the transparent center and try again. The original Wii U game also supports a Wii Remote and Pro Controller, but their physical button positions differ from the GamePad diagram.

5. Call the Pikmin back and walk through

Once the cloudy panel disappears, hold ZR to whistle the Rock Pikmin back. Look for the small dark bodies to leave the broken gate and gather behind your explorer. Then move through the space where the glass used to be. Check that no Pikmin are still working or standing beyond the gate before you leave the area.

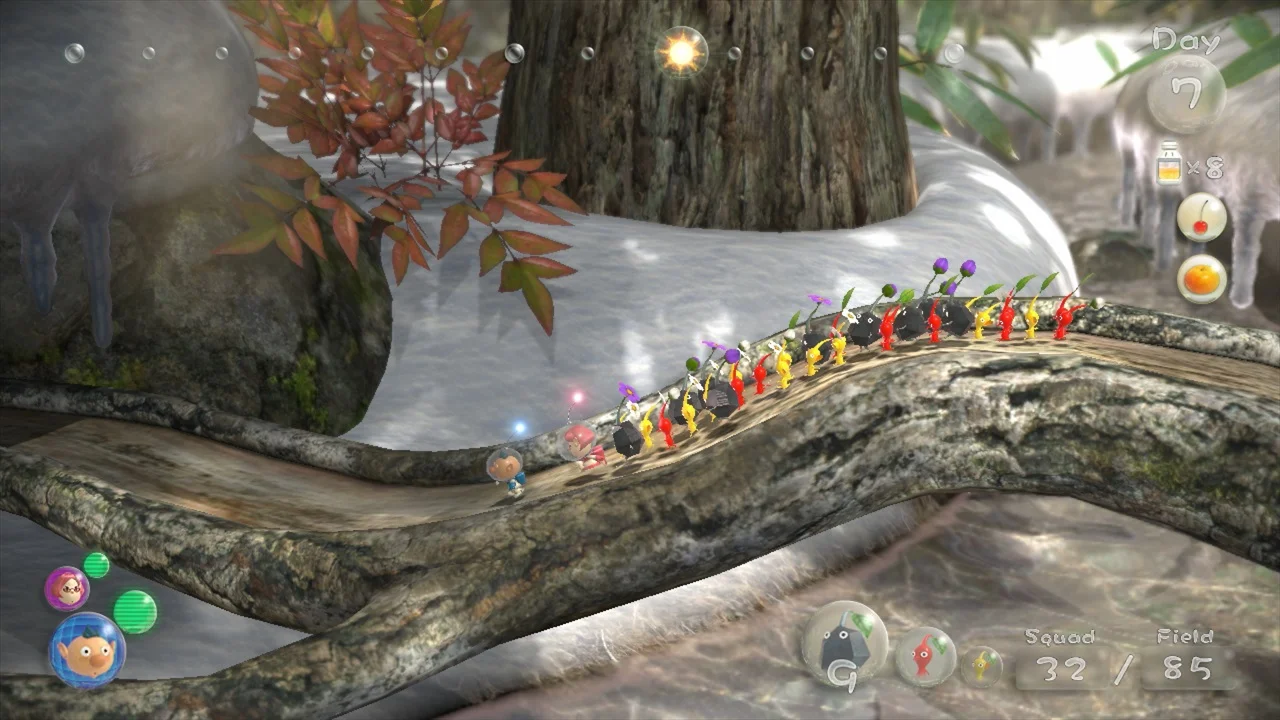
Official Pikmin 3 screenshot showing a mixed squad of Pikmin following an explorer along a garden path; type icons and the day HUD are visible.
After a task, whistle scattered Pikmin back and watch the line following your explorer before continuing along the path.

Quick check: clear panel between posts → gather the dark Rock Pikmin → press L until their icon is selected → aim at the clear center → press A until it shatters → use ZR to call your team back.

If the gate is not breaking

No Rock icon at the lower right? The active explorer may not have any Rock Pikmin following. Bring the dark stone Pikmin close and hold ZR to add them to that explorer’s group, then press L again.

Something else is being thrown? Press L while looking at the lower-right type icon. Stop only when the dark Rock face is shown.

The throw lands but nothing shatters? Move a little closer and aim at the cloudy center between the two posts. If there is no clear panel there, it may be a different kind of obstacle.

Your controls do not match? Confirm the console is Wii U and the controller is a GamePad. Pikmin 3 Deluxe on Switch, and the Wii U game with a Wii Remote, do not use this exact button layout.

Get Pixel Twelve's biggest stories first.

Add as a preferred source on Google