Pixel Twelve
Papers, Please day 1: how to check passports and stamp the right decision on PC

How To

Papers, Please day 1: how to check passports and stamp the right decision on PC

On your first day at the Grestin checkpoint, look for the official bulletin, call a traveler with the speaker, check the passport’s country and choose the correct visa stamp.

Game: Papers, PleaseVerified Sep 29, 2026
Guide Type
How To
Last Verified
Sep 29, 2026

Guide details

Overview

On your first day at the Grestin checkpoint, look for the official bulletin, call a traveler with the speaker, check the passport’s country and choose the correct visa stamp.

Before you start: this is the desktop layout

This guide is for the original mouse-controlled PC and Mac layout of Papers, Please. On a phone, the documents and stamps are arranged differently. Start a new game and reach the first shift at the Grestin border checkpoint. You are the inspector sitting inside the booth; the line of people is outside above your desk.

You do not have to learn every passport rule at once. On day 1, only citizens of Arstotzka may enter. The date on the first bulletin is 1982.11.23. Your job is to read that rule, make a decision for each traveler and stamp the passport. The official game screenshot below shows the actual first-day bulletin on the right side of the desk.
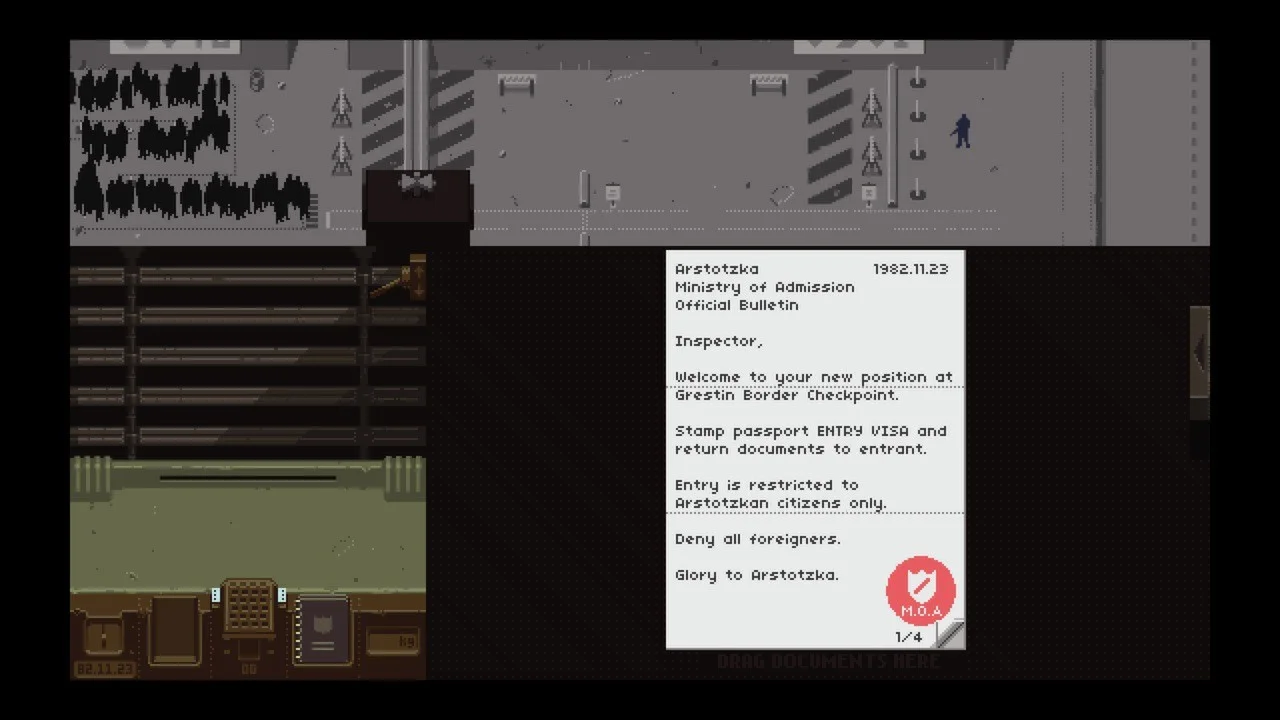
Official gameplay screenshot of the day-one bulletin dated 1982.11.23 on the right side of the desk; the queue is along the upper left of the screen.
Actual day-one screen. The white bulletin says Arstotzkan citizens only and deny all foreigners. The small speaker control is just to the right of the dark booth near the middle of the top view.

1. Find the speaker and call the first traveler

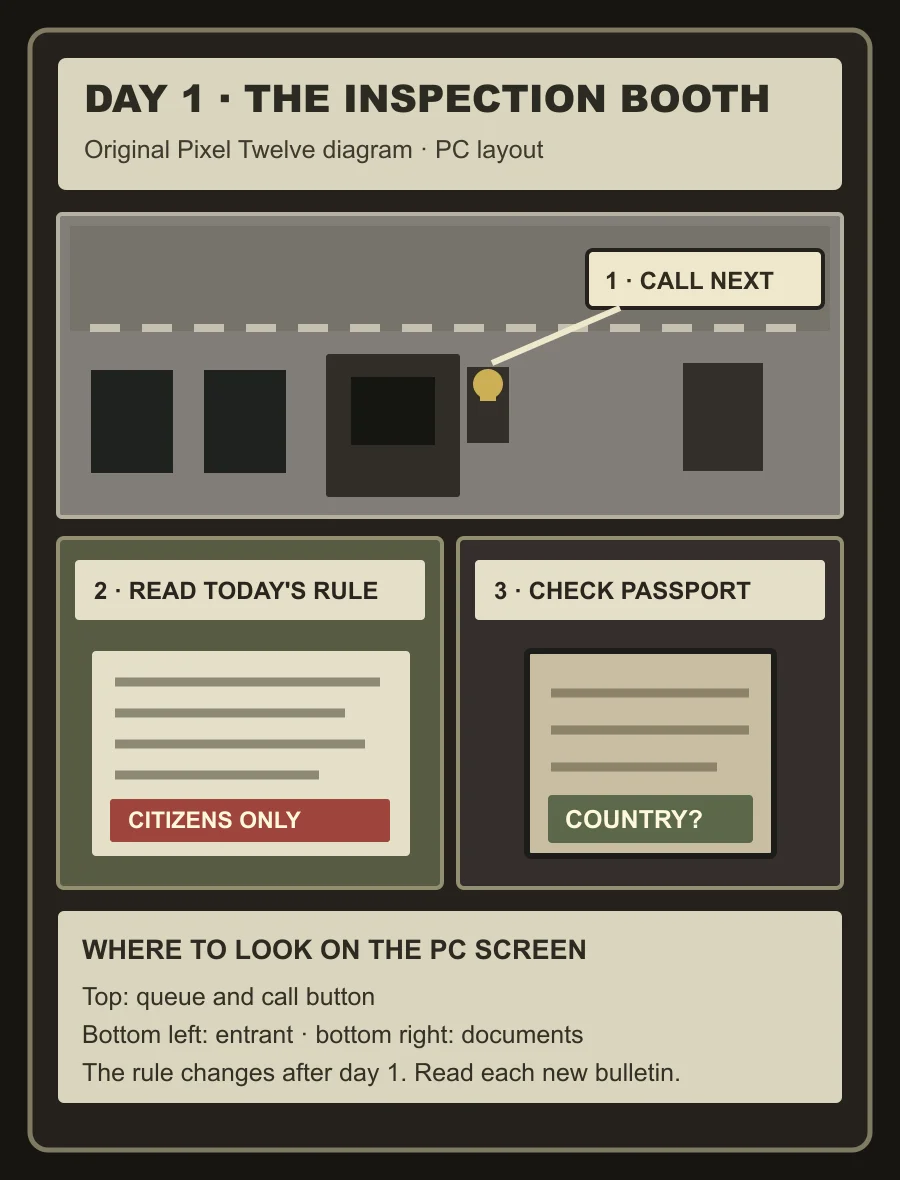
Move the bulletin aside so you can see the desk. Above it is a gray overhead view of the border: the line of people is on the upper left and your dark booth sits nearer the middle. Look for the small speaker or gold call button attached to the right side of the booth where the visitor approaches. Click it once. One person walks up to the lower-left window.

Original Pixel Twelve diagram of the desktop Papers, Please booth: queue and booth across the top, call button beside the booth, bulletin on the lower left and passport work area on the lower right.
Original Pixel Twelve diagram, not an in-game screenshot. First call next beside the booth; then use the bulletin and passport on the desk below.

If no one is at your window, click the speaker again only after the previous traveler has left. The lower-left area shows the person speaking to you. The broad area on the lower right is where you move documents and use the stamps.

2. Find the passport and read its country

When the person reaches the window, wait for a passport to appear in the narrow handover slot along the lower edge of the visitor window. Click and drag that small booklet into the open desk space on the right. A passport has the traveler’s photo, name, dates and a country name. For this first shift, find the country printed on the passport before worrying about later-day paperwork.

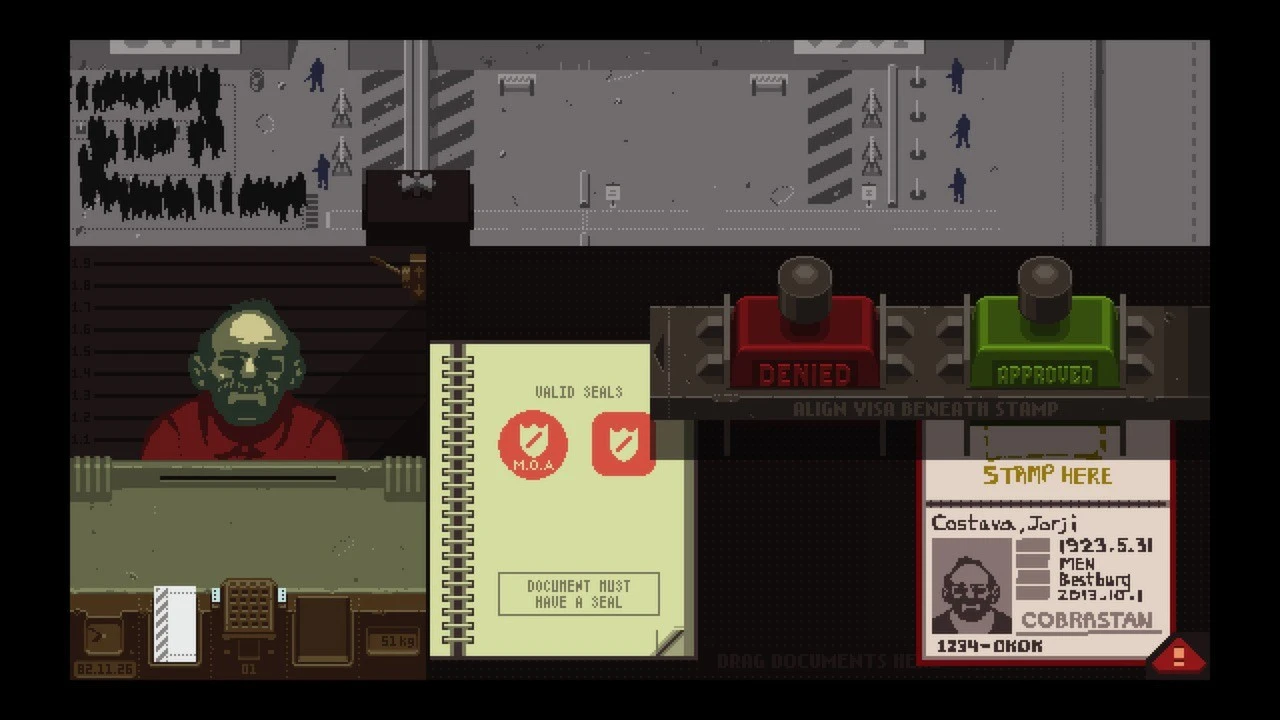
If it says ARSTOTZKA, the day-one bulletin allows entry. If it names another country, the bulletin says to deny entry. Read the country on the document, not the traveler’s face or what they say. You can also open the green Rules and Regulations book on the desk; its contents page is shown in the next official screenshot, although that screenshot was taken on a later in-game day.

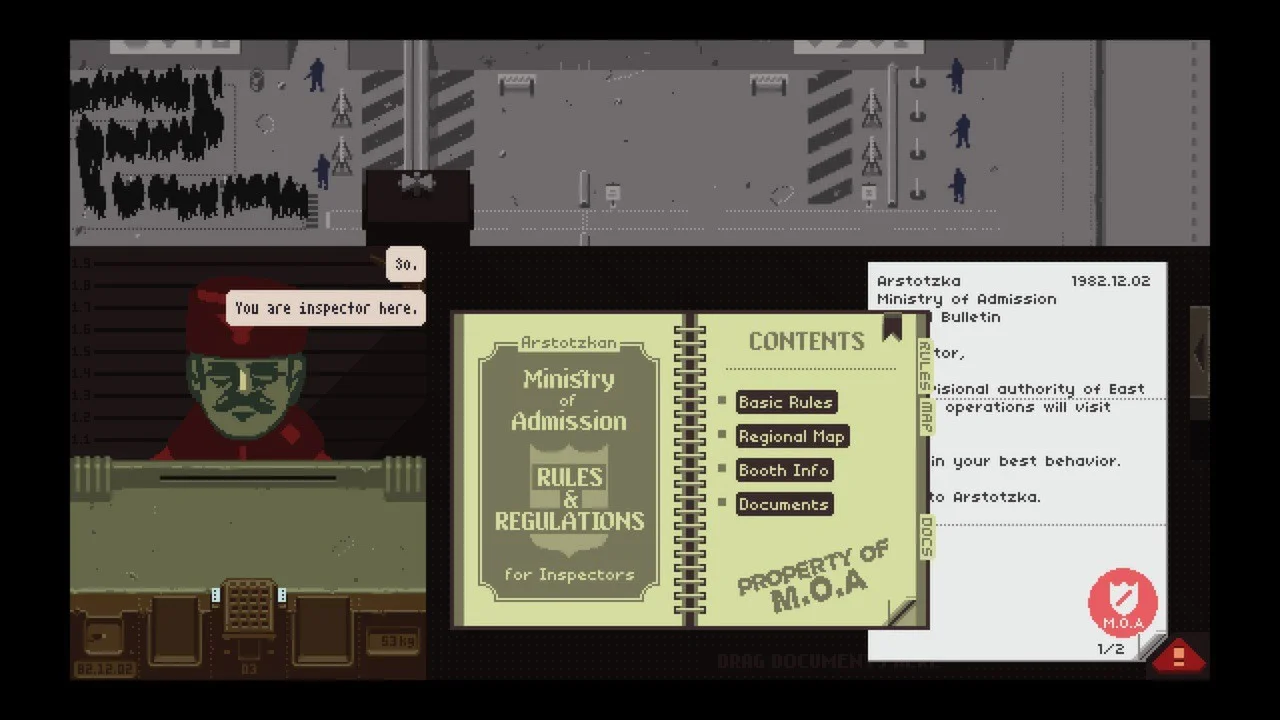
Official later-day Papers, Please screenshot showing the green Rules and Regulations book open on the desk and its Basic Rules option.
The book is a green, ring-bound booklet in the middle of the desk. This is a later-day screenshot for identifying the book; on day 1, the white bulletin above supplies the key rule.

3. Choose APPROVED or DENIED

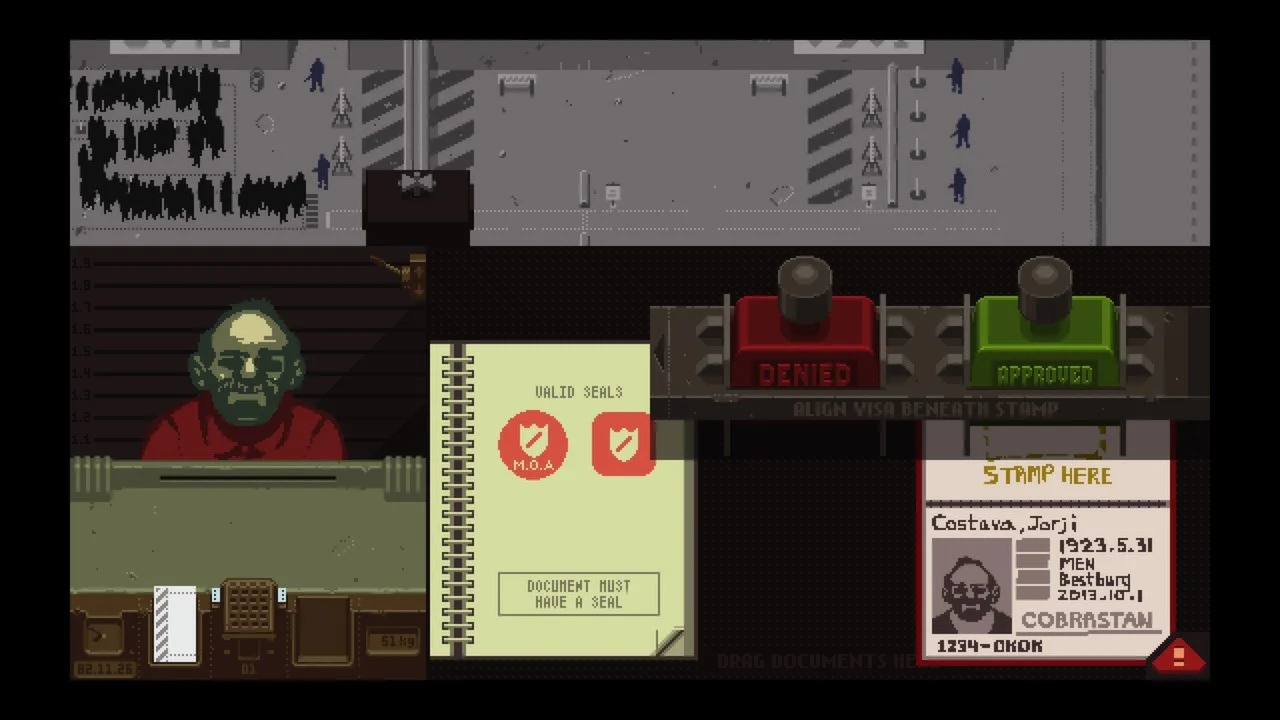
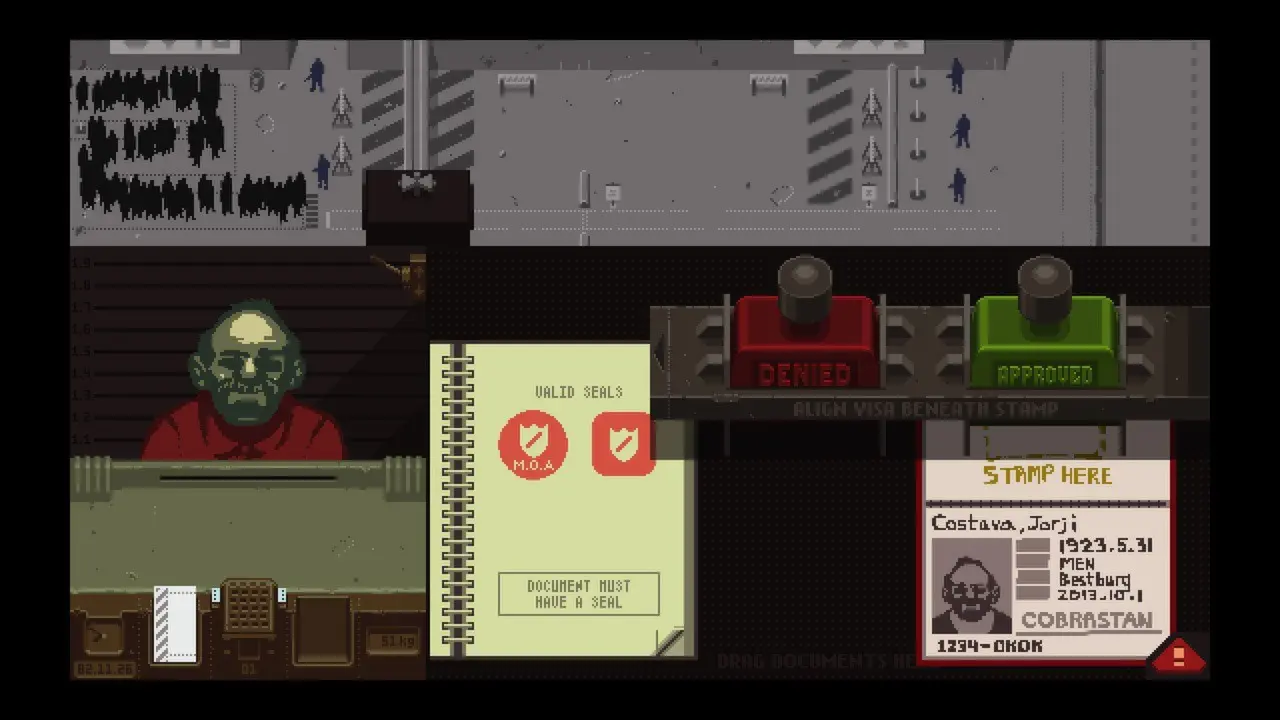
At the far right edge of the desk click the small tab to open the stamp tray. It slides out with two big controls: red DENIED on the left and green APPROVED on the right. Move the passport so its blank entry-visa box sits under the stamp you plan to use. Then click that stamp once. The official screenshot below shows exactly where the two stamp controls appear; its passport is from a later day, so use it for the controls, not for the day-one answer.

Official Papers, Please screenshot of the red DENIED and green APPROVED stamp handles above the entry visa box on a passport.
Actual game stamp tray. Red DENIED is left, green APPROVED is right. The shown traveler and documents are from a later day, not an example of the day-one rule.

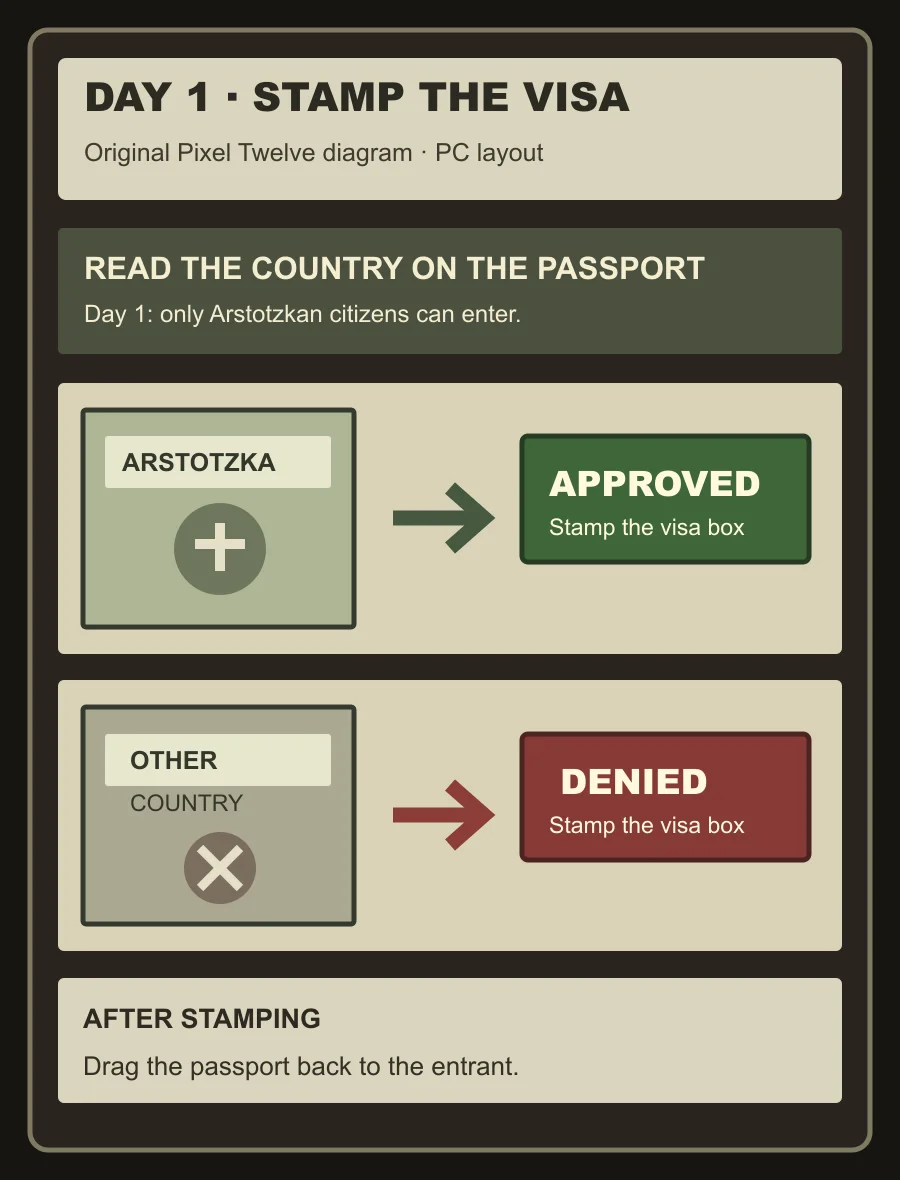
The original diagram below shows the day-one decision without adding later rules: Arstotzka passport → green APPROVED; any other country → red DENIED. It uses large colored stamp panels so you can check the decision quickly on a phone.

Original Pixel Twelve day-one decision diagram with a green APPROVED stamp for an Arstotzkan passport and red DENIED for other countries; every label is inside a padded panel.
Original Pixel Twelve diagram, not a game screenshot. This rule is only for day 1. Read the next morning’s bulletin before using the same decision again.

4. Return the stamped passport and call the next person

After you see the stamp mark on the passport, drag the passport back to the traveler’s handover area at the lower-left window. They cannot leave until you return their document. Wait for the person to walk away, then click the speaker beside the booth to call the next person. Repeat: read country → stamp → return passport → call next.

If a paper slip appears after someone leaves, read it before you continue: it can tell you that your decision broke a rule. You can still keep playing, but check the bulletin again. The shift eventually ends; the family screen then shows your wages and living costs. You do not need to finish the line to advance the day.

Quick fixes when the first shift feels stuck

No traveler at the window? Find the small speaker beside the dark booth in the top half of the screen and click it. Do not click the people in the line.

Can’t read the passport? Drag the booklet from the handover slot onto the open desk area. Check the country name on the document, not the person’s words.

Can’t see the stamps? Look at the far right edge of the desk for the stamp-tray tab. Open it, place the passport’s visa box below a stamp, then click the red or green handle.

The person will not leave? Drag the stamped passport back toward the lower-left handover slot. Stamping alone does not return the document.

The rule seems wrong tomorrow? It changed. Day 2 allows foreign visitors under new conditions and adds inspection hardware. Read the new bulletin; do not keep denying every foreign passport by the day-one rule.

One-line reminder: read the white bulletin → click the booth speaker → read the passport country → stamp green or red → return the document.

Get Pixel Twelve's biggest stories first.

Add as a preferred source on Google