Pixel Twelve
Megastore: Tidy Up Together Beginner Guide: Find the Right Shelf

How To

Megastore: Tidy Up Together Beginner Guide: Find the Right Shelf

A screenshot-led first-shelf guide for Megastore: Tidy Up Together: identify the department, read the held item, check the shelf and repeat in Electronics.

Guide Type
How To
Last Verified
Sep 29, 2026

Guide details

Overview

A screenshot-led first-shelf guide for Megastore: Tidy Up Together: identify the department, read the held item, check the shelf and repeat in Electronics.

Before you start: three places to look

You start in the Toy Store. The floor is covered with products, but the game gives you clues before you move anything: large wall directions, smaller hanging shelf signs and the name of the product you are holding at the lower left of the screen. Work through those clues in that order. The screenshots below are real official game images, not a mock interface.
Official Toy Store screenshot: large teal arrows on the back wall point left for Toy and Summer; orange arrows point right for Music and Clothing.
Start with the back wall. Teal Toy and Summer point left; orange Music and Clothing point right. These are department directions, not individual shelf names.

In this image, the two counters at the upper left show shelf and product progress. The carry count is at the lower left. Do not read those numbers as directions: use the big words and arrows on the wall to pick the right area first.
1. Pick up one product and read its name

Choose one visible product from the pile. Use the Take control shown on your screen, then look at the lower-left product label. That label tells you what you are carrying and how many of that exact product have been placed. The button hint can differ if you remapped controls or use a controller, so follow your own on-screen hint instead of memorizing a key from this screenshot.

Official Toy Store screenshot with hanging signs for Pretend Play, Plushies and Toy Vehicles; the lower-left HUD names the held item Retro Purple Lava Lamp.
The lower-left blue strip says “Retro Purple Lava Lamp 1 / 28.” The nearby Pretend Play and Plushies signs are not proof that this lamp belongs on either shelf.

Notice the trap: the item can be beside a shelf that is not its destination. If the name does not fit the hanging category sign, keep looking. Do not place it just because that shelf is closest.

2. Find the item label when the screen is busy

If the pile hides the product in your hands, use the blue strip above the carry count at the lower left. The close view below is cropped from the same official screenshot. It shows the product name and its placed/total count; it is not a new game screen.

Close crop of the official screenshot lower-left HUD showing the held item label Retro Purple Lava Lamp 1/28 and carry count 1/10.
Close view of the lower-left HUD: the long blue strip names the selected product; the white 1/10 below it is how many items the player is carrying.

3. Match the smaller sign and check the shelf

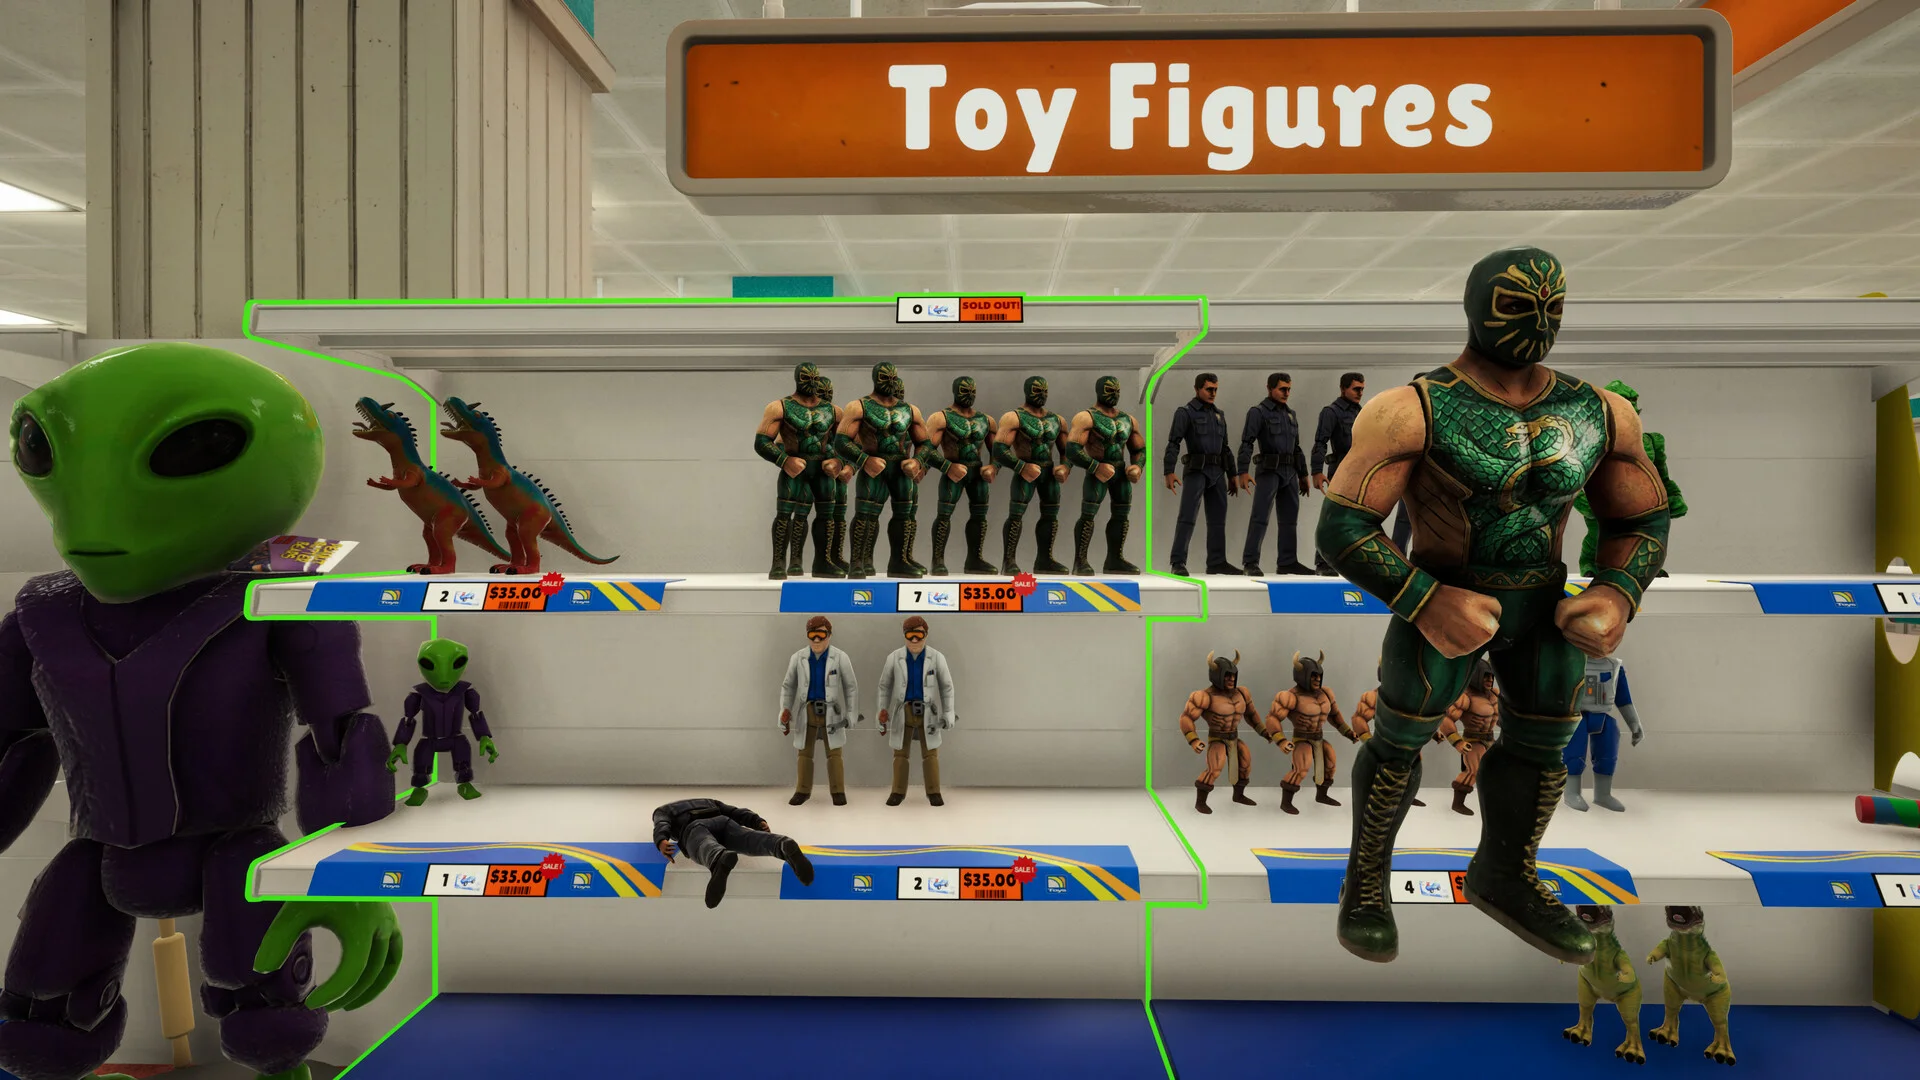
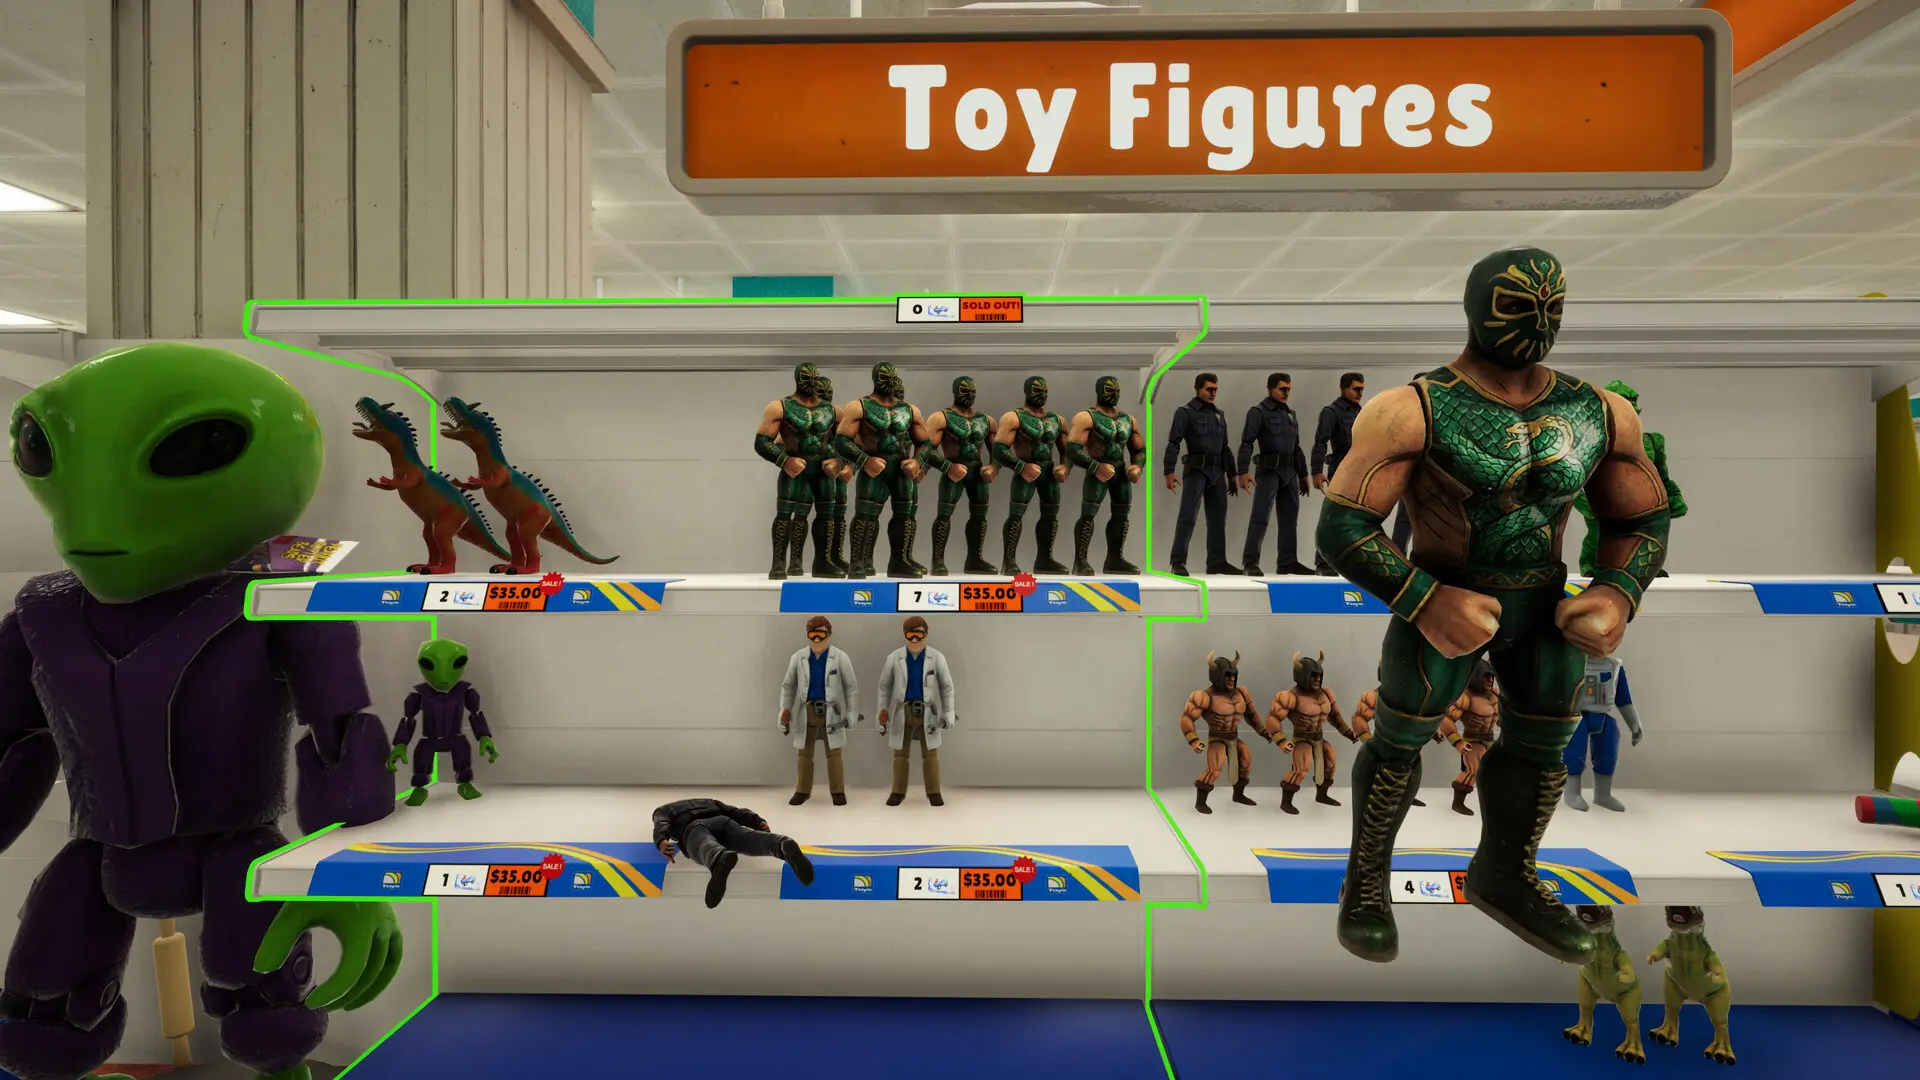
Now follow the department direction into the aisle. Read the smaller sign hanging above each shelf. In the screenshot below, “Toy Figures” is the category above the display. The green outline shows which shelf the player is aiming at. Compare your held product name with the shelf’s product-name tooltip when you inspect it; Update 1.0.5 added that tooltip. A green outline only identifies the shelf you are targeting—it does not mean every toy figure in your hands belongs on every position of that display.

Official gameplay screenshot: Toy Figures category sign above a shelf outlined in bright green, with different figures and small product labels on the display.
Look up for “Toy Figures,” then at the bright green outline around the shelf being targeted. Check the product-name tooltip before placing an item.

When the label and shelf match, move close enough for the game’s Place interaction to appear and use the button it shows. If it does not accept the item, check the product name and shelf tooltip again: the broad category can be right while the exact product slot is wrong. Then try the matching part of the display, not a random empty shelf.

4. Repeat the same search in the Electronics Store

After you finish the Toy Store, the Electronics Store unlocks as the second map. It was added September 18; players whose existing save already completed Toy Store get it automatically. Its blue-and-orange ElectroMart look is different from the Toy Store, but the search is the same: read the large area sign, then the smaller category sign, then the product name before placing.

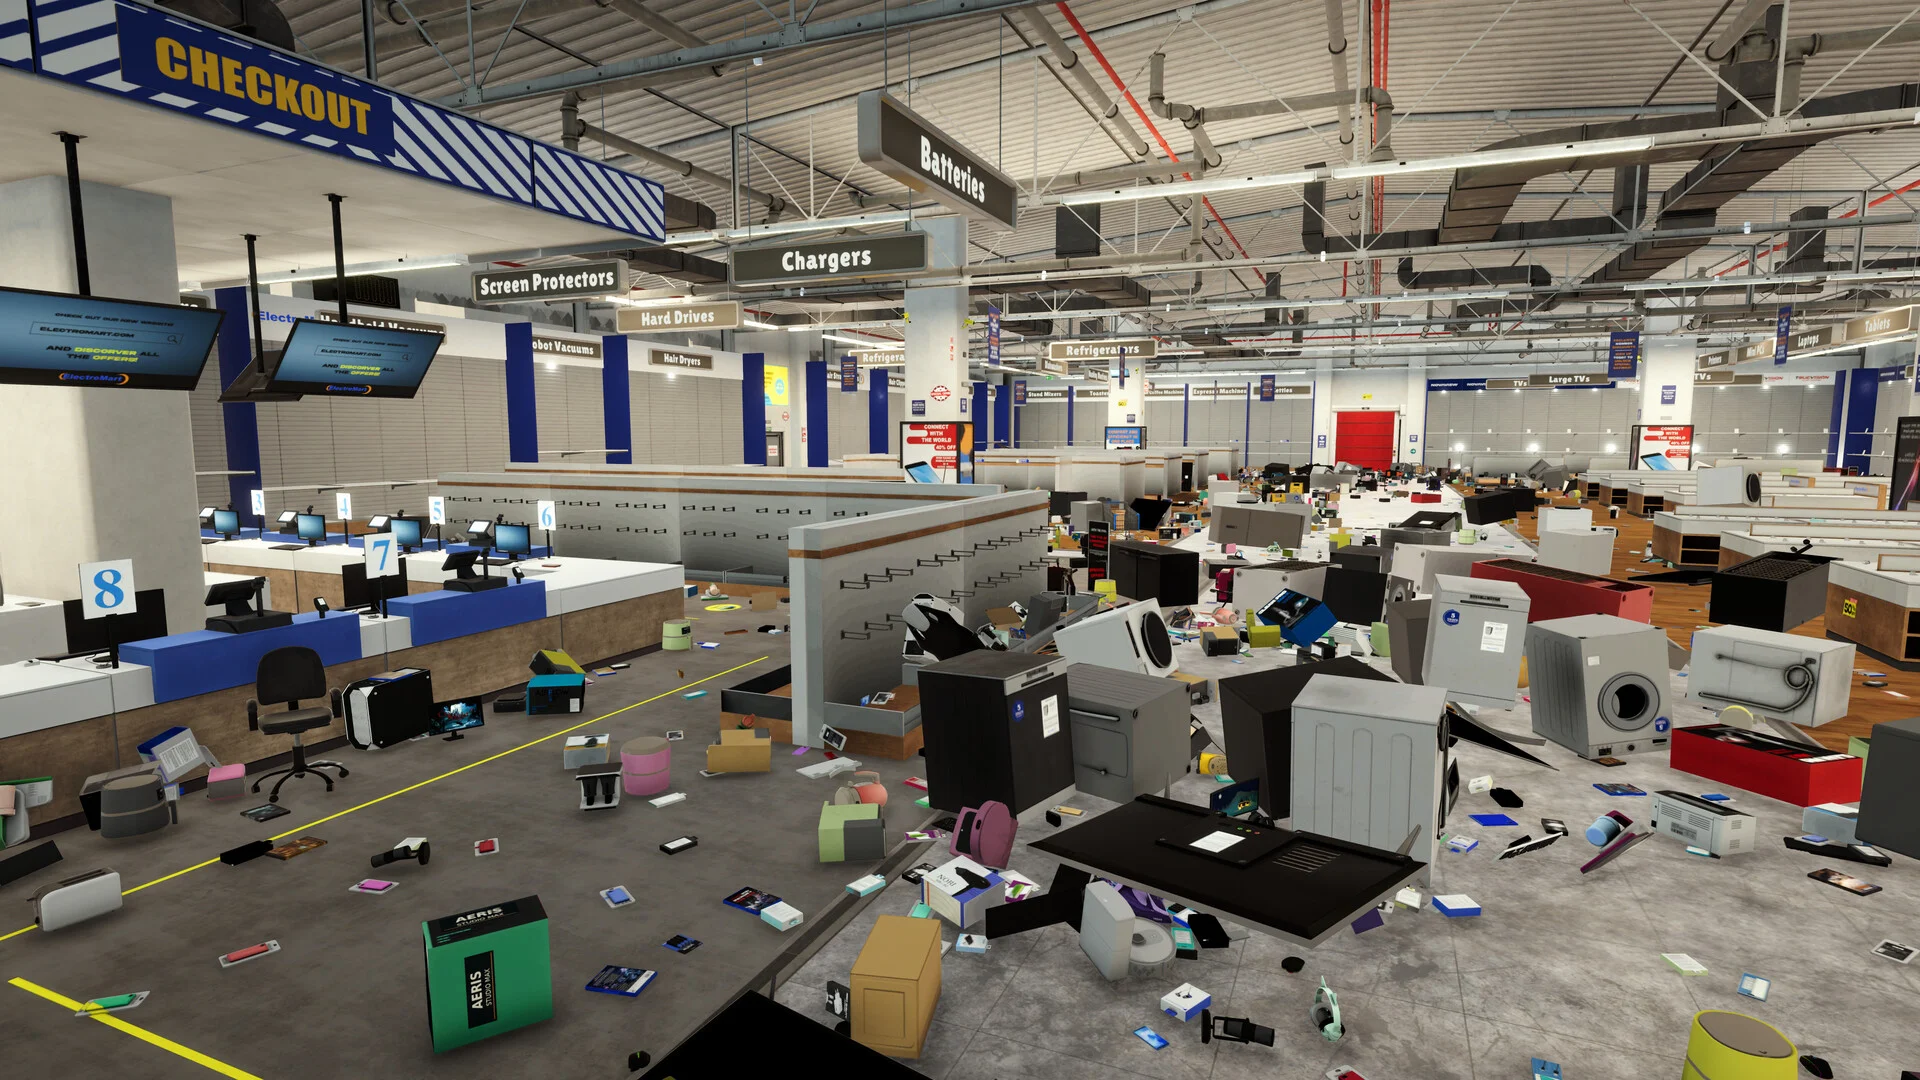
Official Electronics Store screenshot: blue checkout sign at upper left; smaller signs for Batteries, Chargers and Screen Protectors hang over displays, while appliances and computers lie on the floor.
In Electronics, the blue CHECKOUT sign is a landmark. Look past it for smaller labels such as Batteries, Chargers and Screen Protectors; those name product categories.

This store includes large appliances as well as tiny accessories. A washing machine is easy to recognize, but a small cable or battery pack may need the lower-left product label. The developer says large items use different carrying and throwing animations, but they still fit in the game’s inventory.

If your first shelf still will not fill

Check these in order: (1) held product name at the lower left; (2) department direction on the wall; (3) hanging category sign above the aisle; (4) exact product-name tooltip when inspecting the shelf. The screenshots beside the steps show where each clue appears. If a product does not fit, carry it to the right category instead of testing every shelf.

You do not need to finish a whole shelf before making progress. Since Update 1.0.6, correct placements award 75% of that shelf’s XP gradually, while completing the shelf gives the remaining 25%. This guide is about finding the first correct shelf; for prices, co-op and the current four-store lineup, see the game hub and the linked overview.

Get Pixel Twelve's biggest stories first.

Add as a preferred source on Google