Pixel Twelve
Loop Hero Beginner Guide: Cards, Gear, Retreat and Camp

How To

Loop Hero Beginner Guide: Cards, Gear, Retreat and Camp

A visual first-expedition guide to the loop, card hand, equipment panel, safe retreat and camp buildings in Loop Hero.

Game: Loop HeroVerified Sep 23, 2026
Guide Type
How To
Last Verified
Sep 23, 2026

Guide details

Overview

A visual first-expedition guide to the loop, card hand, equipment panel, safe retreat and camp buildings in Loop Hero.

Start here: what you do in Loop Hero

The small hero walks around the closed road and fights on their own. Your job is to place cards, equip dropped items and decide when to go home. For a first expedition, place only a few enemy cards, check your health and return with materials if the next circuit looks risky. You do not need to defeat the boss on your first run.

The screenshots show the PC layout. On Switch or Xbox, the same named panels are present, but the button used to select them can differ. Read the on-screen prompt on your version before confirming a card or a retreat.
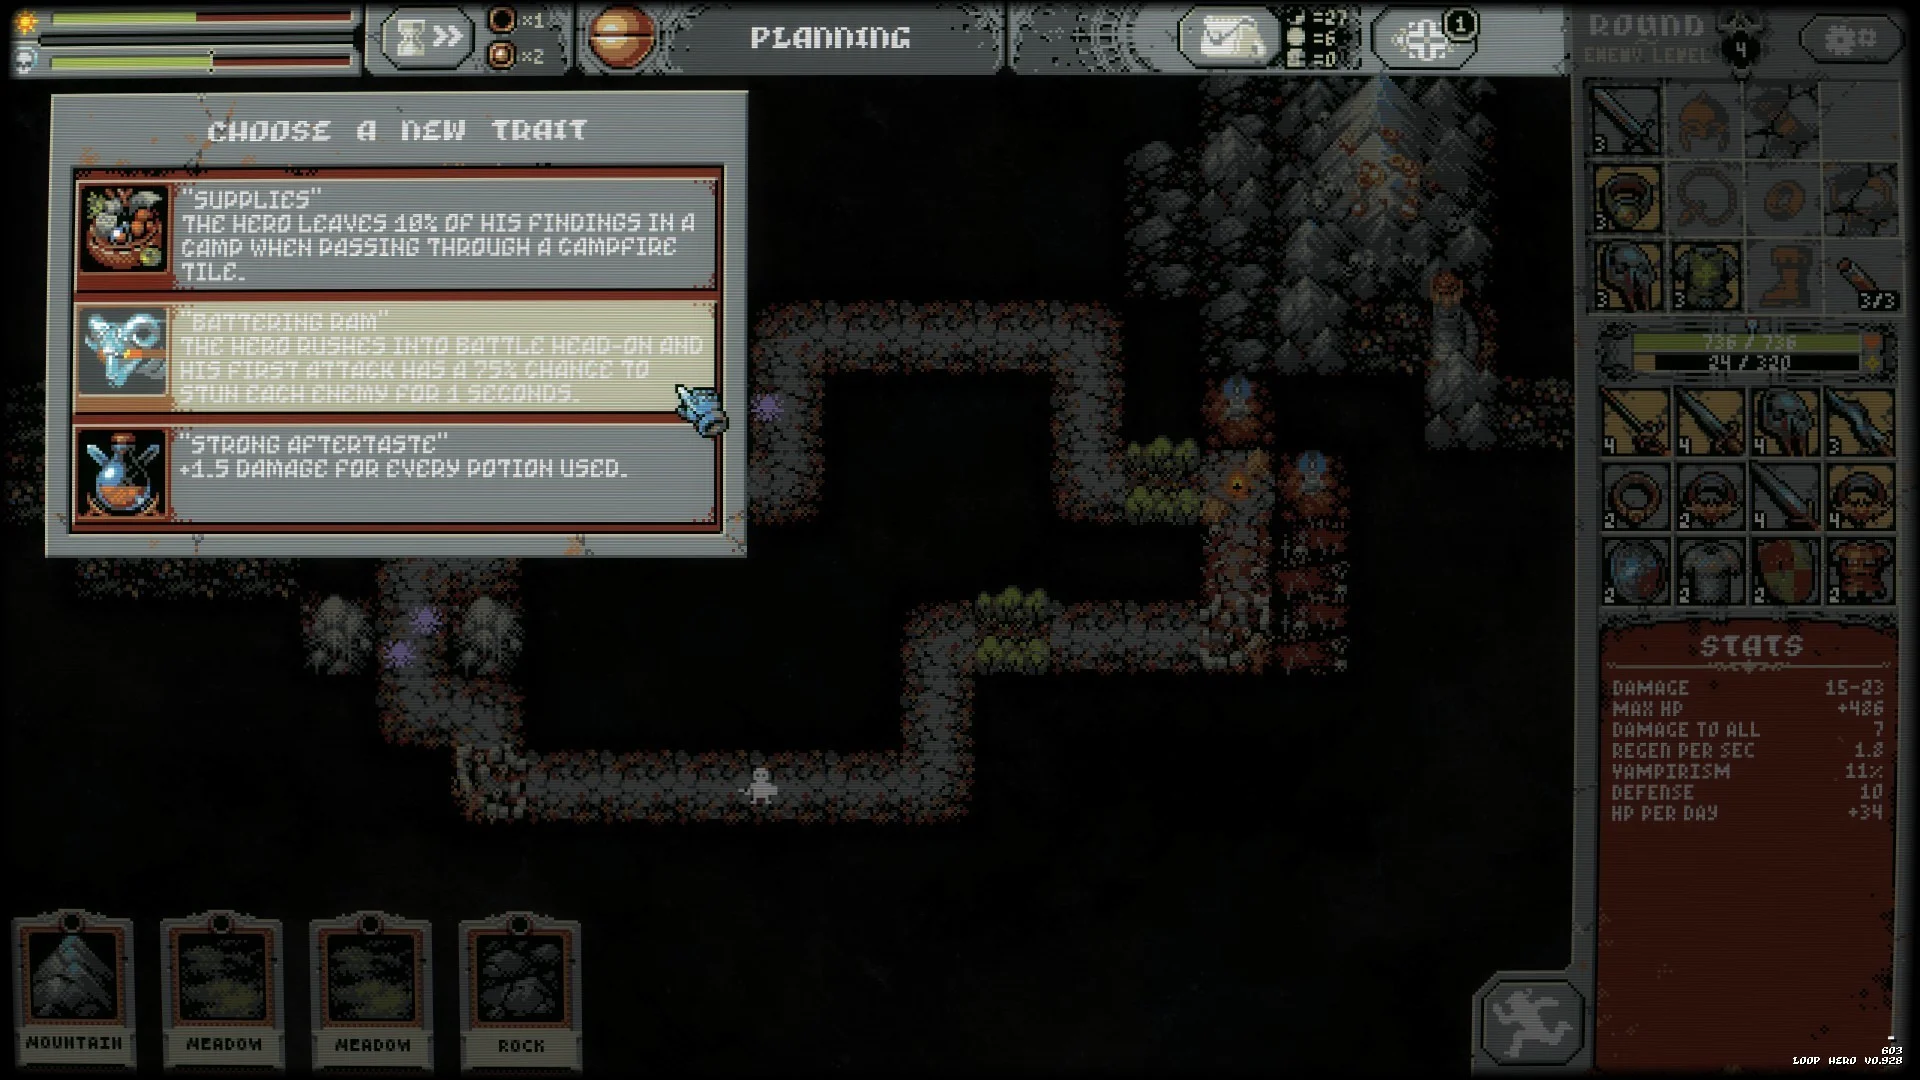
1. Recognise the four parts of the expedition screen

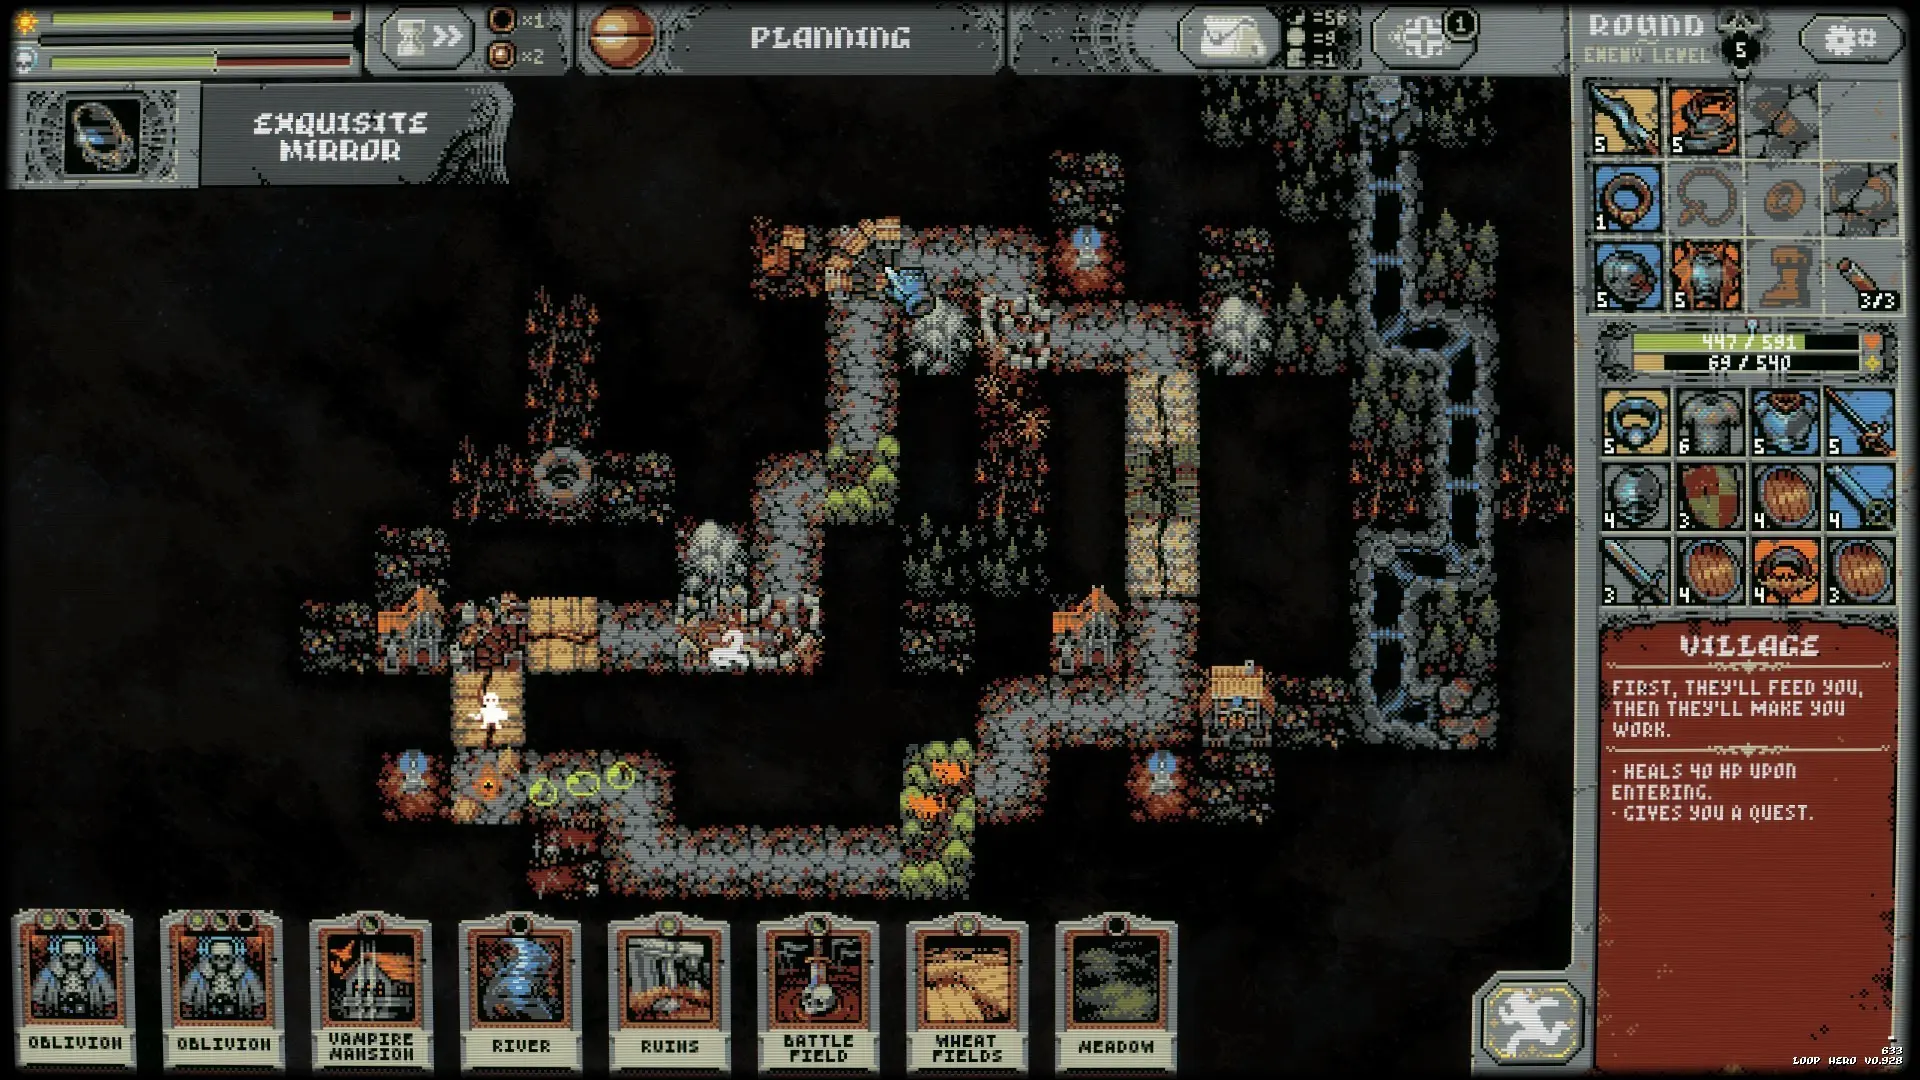
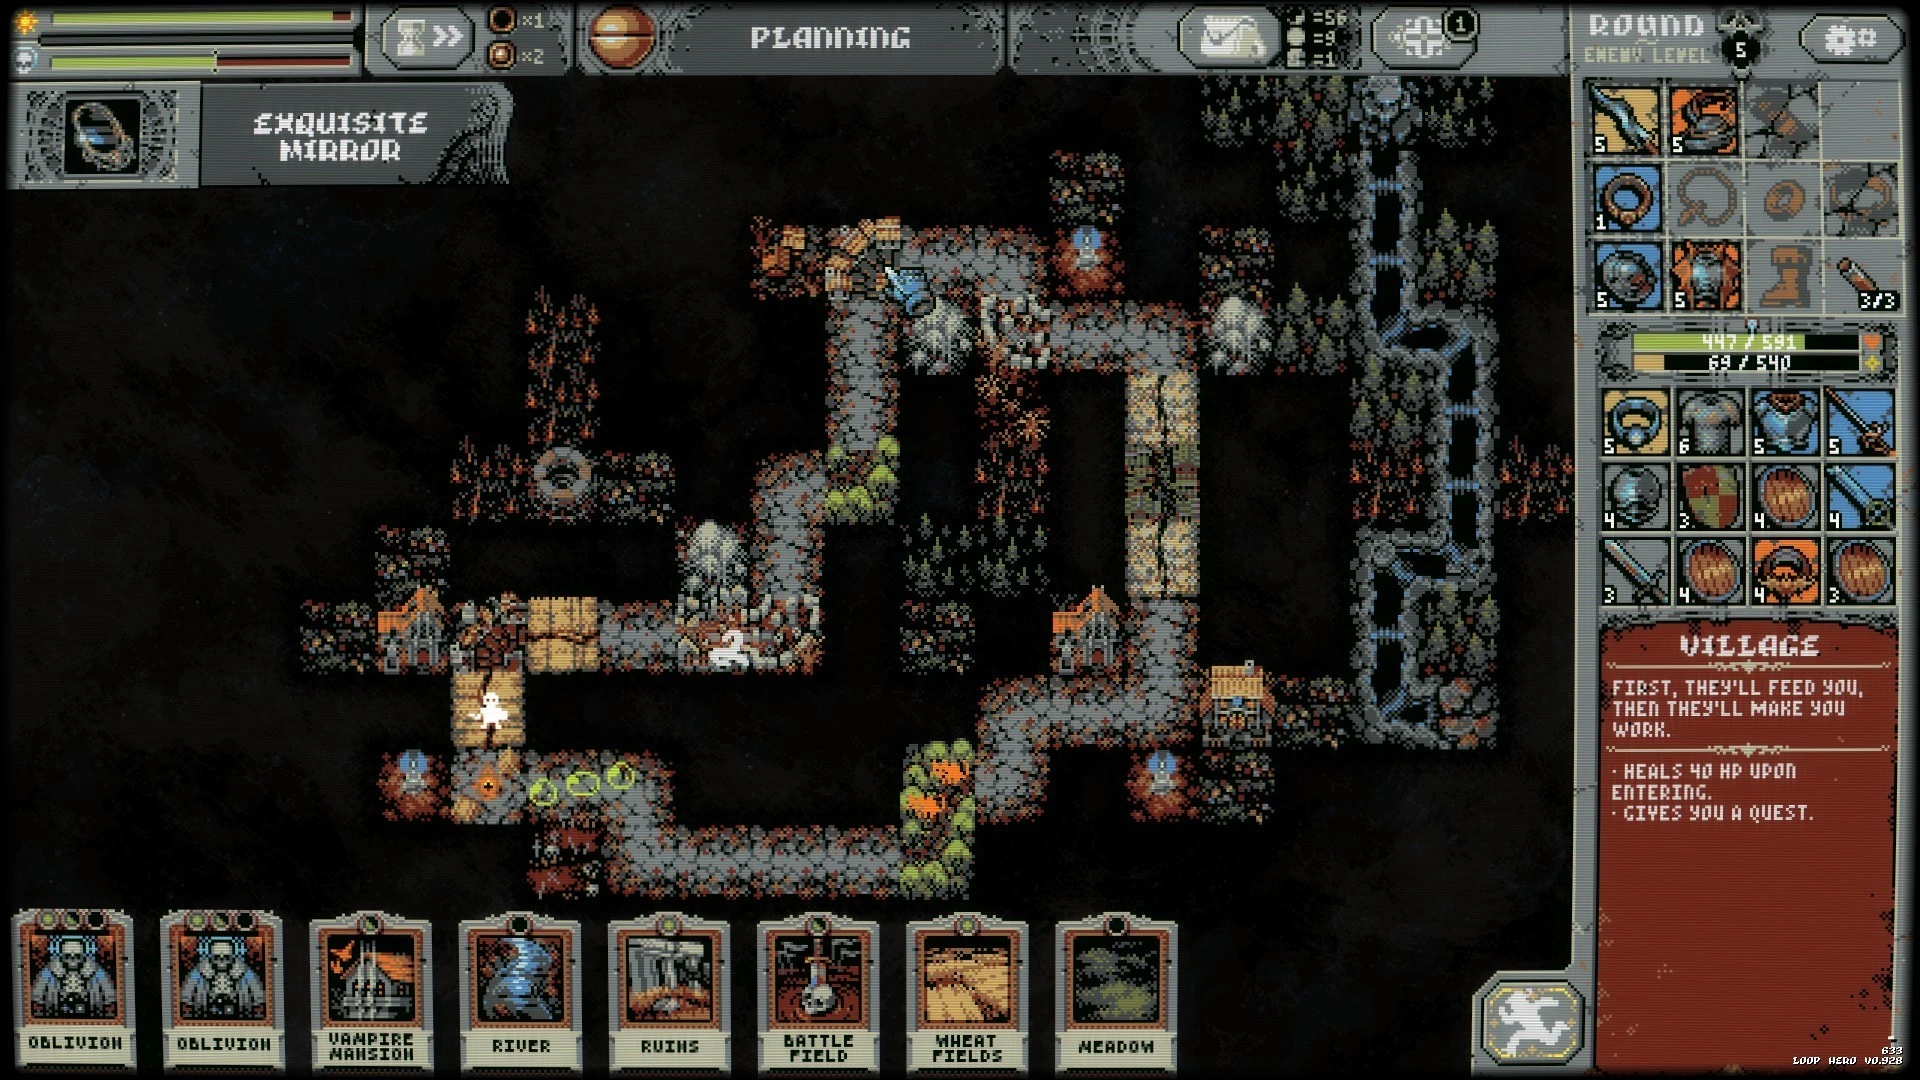
Look at the picture above the guide. The winding pale road in the middle is the loop. The tiny walking figure is your hero. The cards waiting in a row across the bottom are your hand. The upper part of the right panel holds equipment slots, and the lower part holds items that have dropped. Health is the horizontal bar at the upper-left. The square action control near the lower-right is where you check the retreat option.

  1. Let the hero move through the first stretch of road. The hero automatically stops to fight an enemy; you do not need to click the enemy to attack.
  2. When a card or item appears, pause the game. Look at the bottom row to see whether you gained a card, and at the right-hand item grid to see whether gear dropped.
  3. Before resuming, read the text on the card or item. A card changes the map; a sword or armour piece changes the hero’s equipment.

2. Put each card on the right kind of square

Loop Hero screenshot with Mountain, Meadow and Rock cards along the bottom row beneath the route.
Look at the bottom row: Mountain, Meadow and Rock are landscape cards. Place them on empty ground outside the grey road, not on the road itself.

Cards are divided by where they fit. Road cards go directly on a grey road square. Roadside cards go on a free square touching the road. Landscape cards, including the Mountain, Meadow and Rock shown in the screenshot, go on open ground away from the road. Some special cards have their own rules. If the card refuses a square, check its description and try the matching area.

  1. Choose a card in the bottom row. Before confirming, move it over the road and then over empty ground; the valid location becomes clear from the placement preview.
  2. Try a Meadow or Rock on an empty landscape square first. It gives you a chance to learn placement without creating another enemy on the road.
  3. Add one enemy-making card only when your current fights are manageable. A Grove belongs on a road square and creates battles on later circuits. Several enemy cards together can overwhelm a new hero.

Placed cards also advance the chapter’s boss progress. Do not fill every available square just because a card is in your hand.

3. Use the right panel to change gear

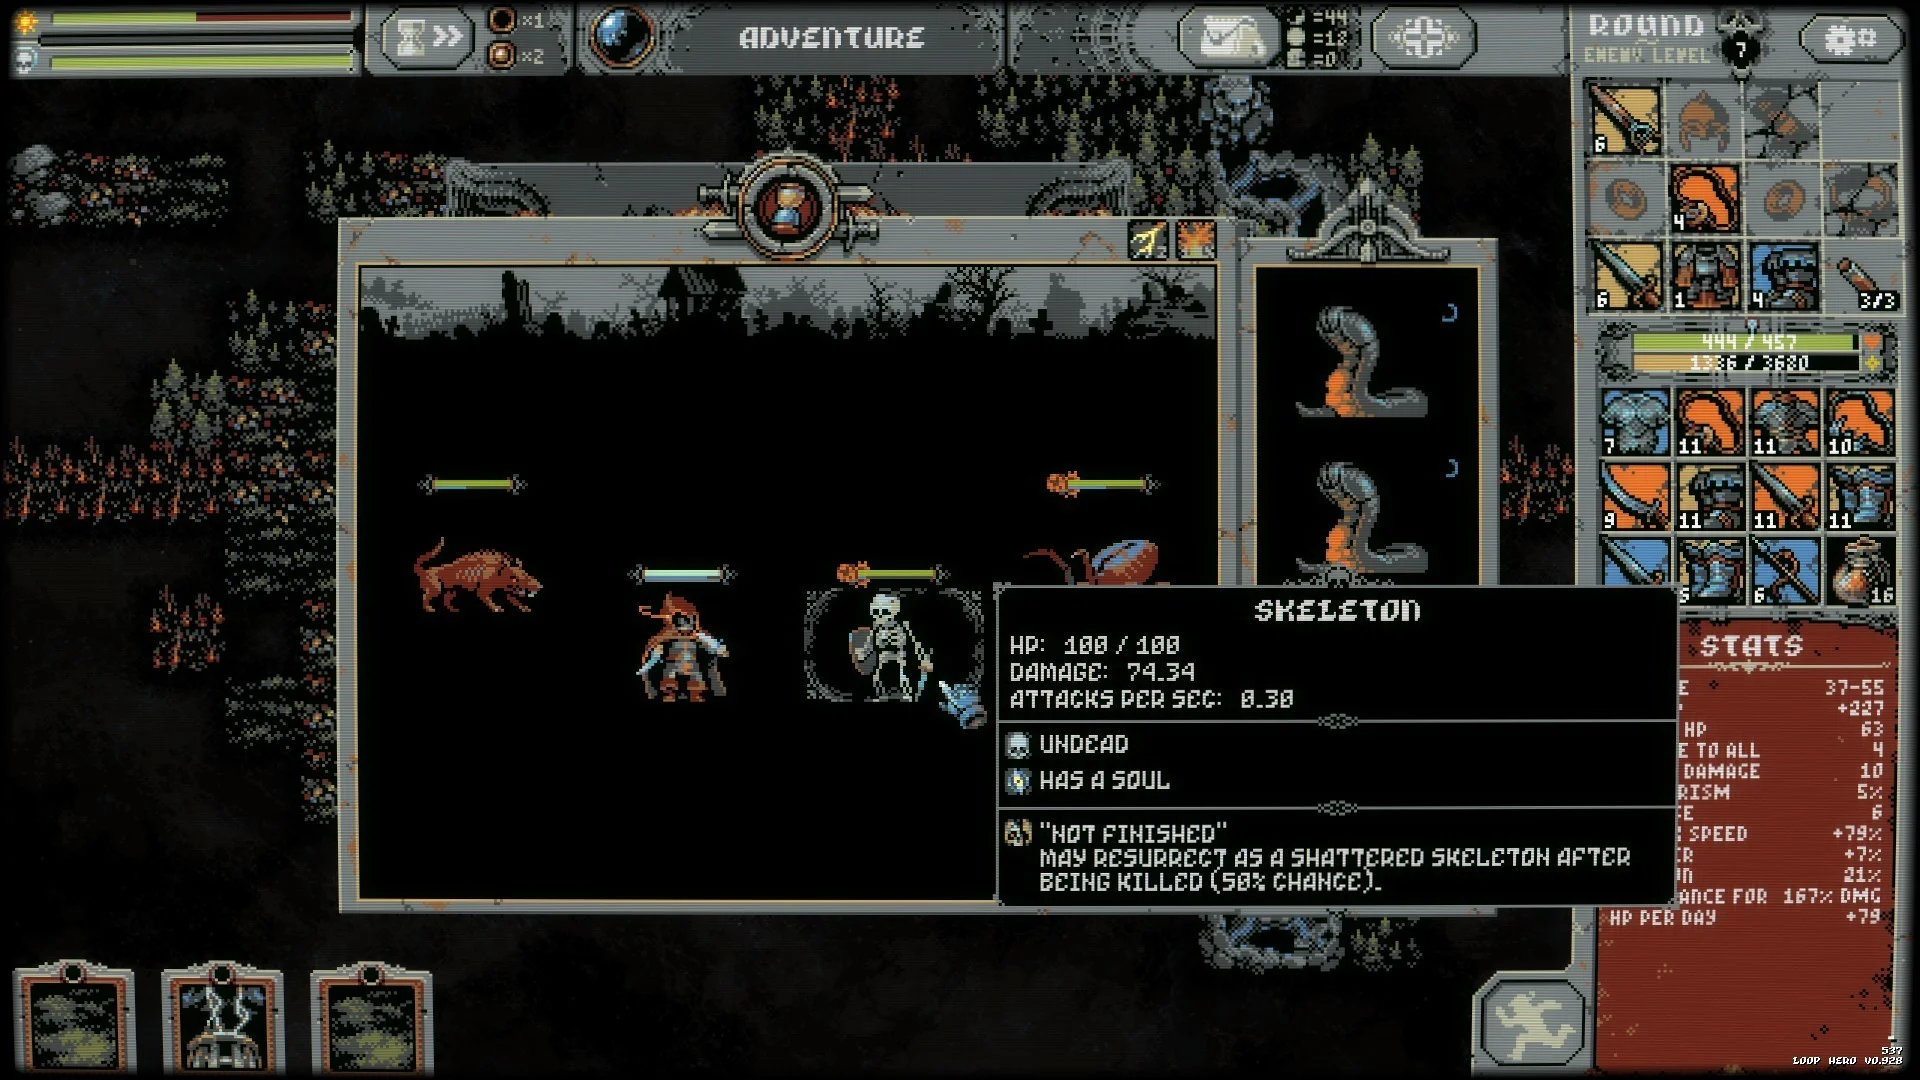
Loop Hero combat screen with the hero and enemies in the middle and equipment grid at the upper-right.
During a fight, watch the health bar at the upper-left. The right-hand grid shows equipped gear above and spare drops below.
  1. After a battle, pause and inspect the item grid on the right. Hover or focus on a new sword, shield, ring or armour piece to read its stats.
  2. Compare it with the matching slot above the grid. Put the new item in that slot only if its effects help your current hero; a higher item number alone does not explain every stat.
  3. Look back at the upper-left health bar before adding another enemy card. A route that costs most of your health each time around needs fewer fights or better gear.

The hero handles attacks automatically, but you can still pause to manage equipment. Different classes later use some slots differently, so check the item’s name instead of assuming every character carries the same setup.

4. Retreat while you can still keep the haul

The campfire is the marked square where an expedition begins and each circuit ends. When the hero reaches it, the next loop starts and some health returns. The lower-right retreat control tells you whether leaving now is safe. The Campfire reference says a safe retreat keeps the collected materials, while leaving in the middle of a loop normally loses 40% of them. Dying costs more.

  1. Find the campfire on the route before the hero reaches it. Check the health bar at the upper-left and the next stretch of enemies on the road.
  2. Pause at or near that campfire square. Select the lower-right retreat control and read the confirmation before leaving; the safe state shows a running figure. If it says you will lose resources, you are not yet at a safe exit.
  3. If the next loop looks harder than your remaining health can handle, retreat now and use the saved materials at camp. A short successful trip still improves later attempts.

Do not wait for a boss to appear to decide whether to go home. If it spawns at the campfire and you are unprepared, retreat before the confrontation rather than entering by accident.

5. Build something useful after you return

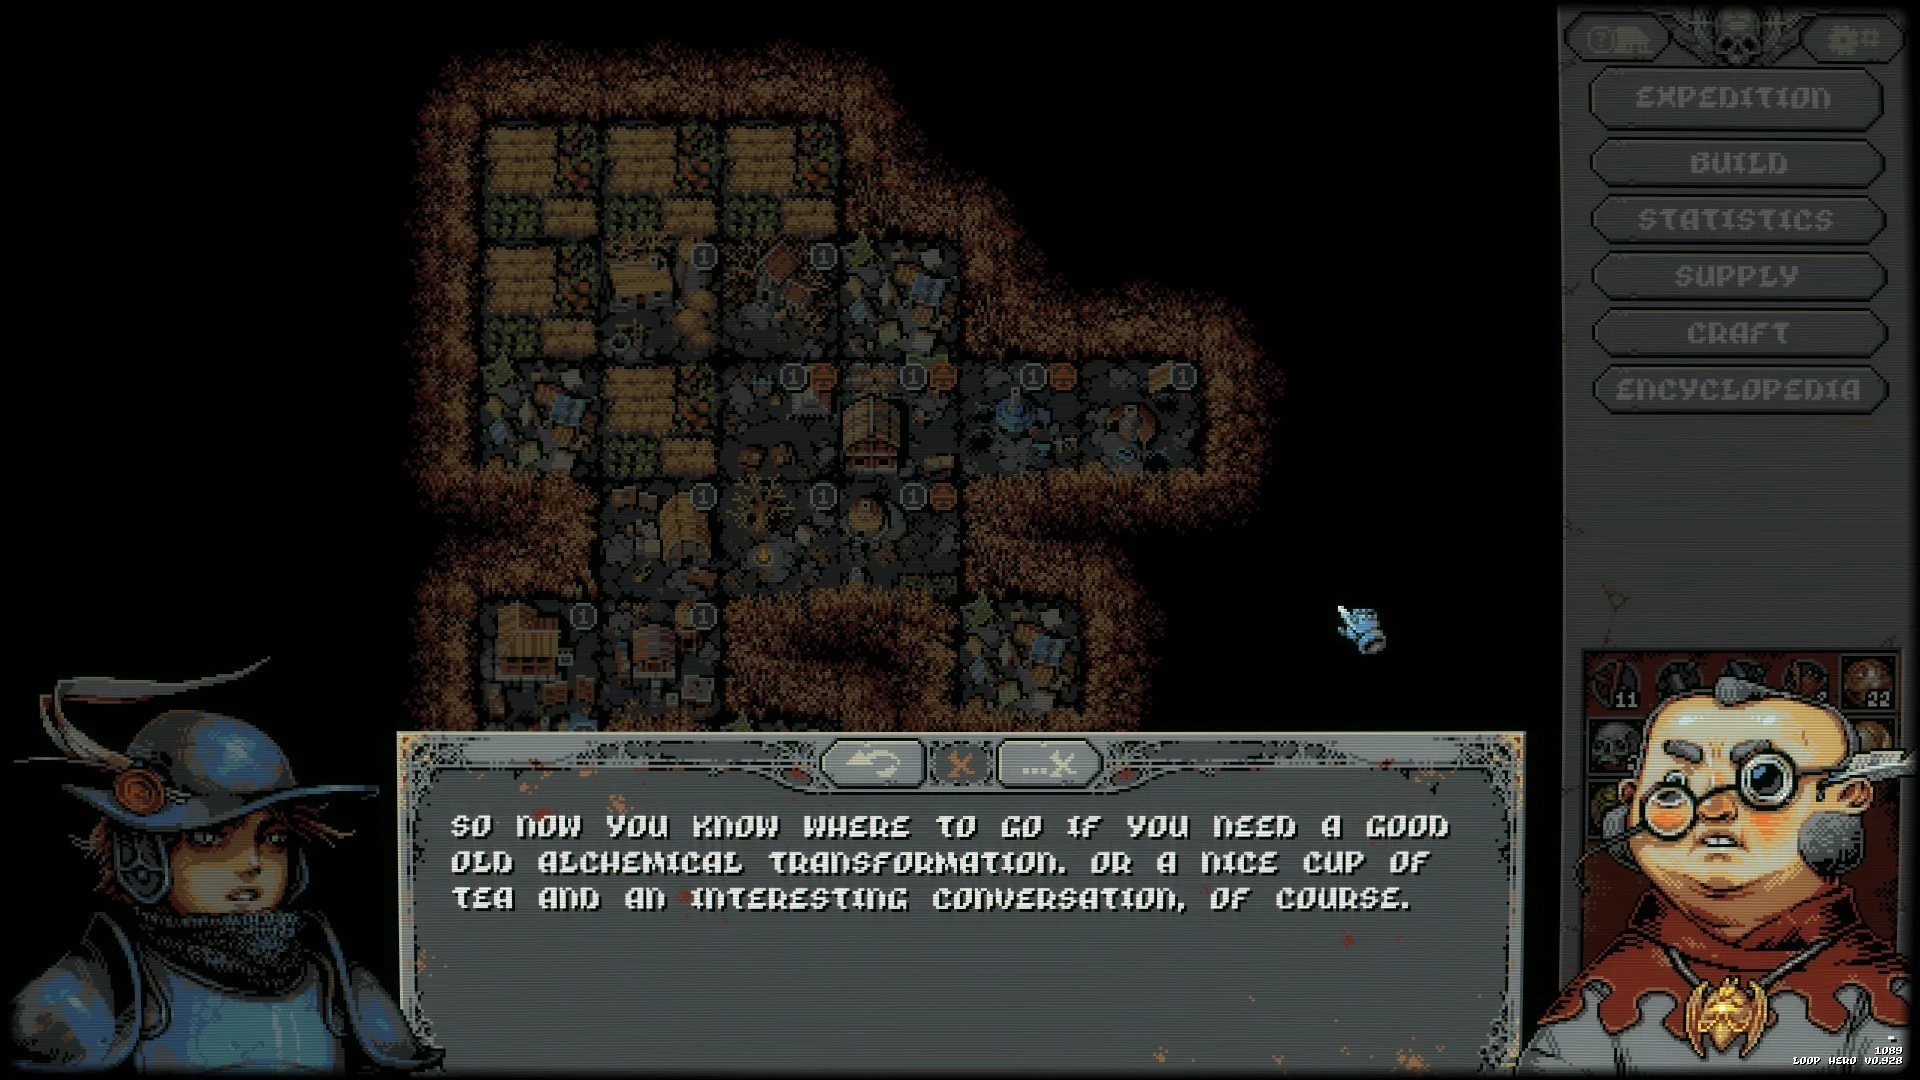
Loop Hero camp screen with Expedition, Build and other options listed at the right.
Back at camp, choose Build in the right-hand menu. Expedition starts another trip; Build opens the permanent structures.
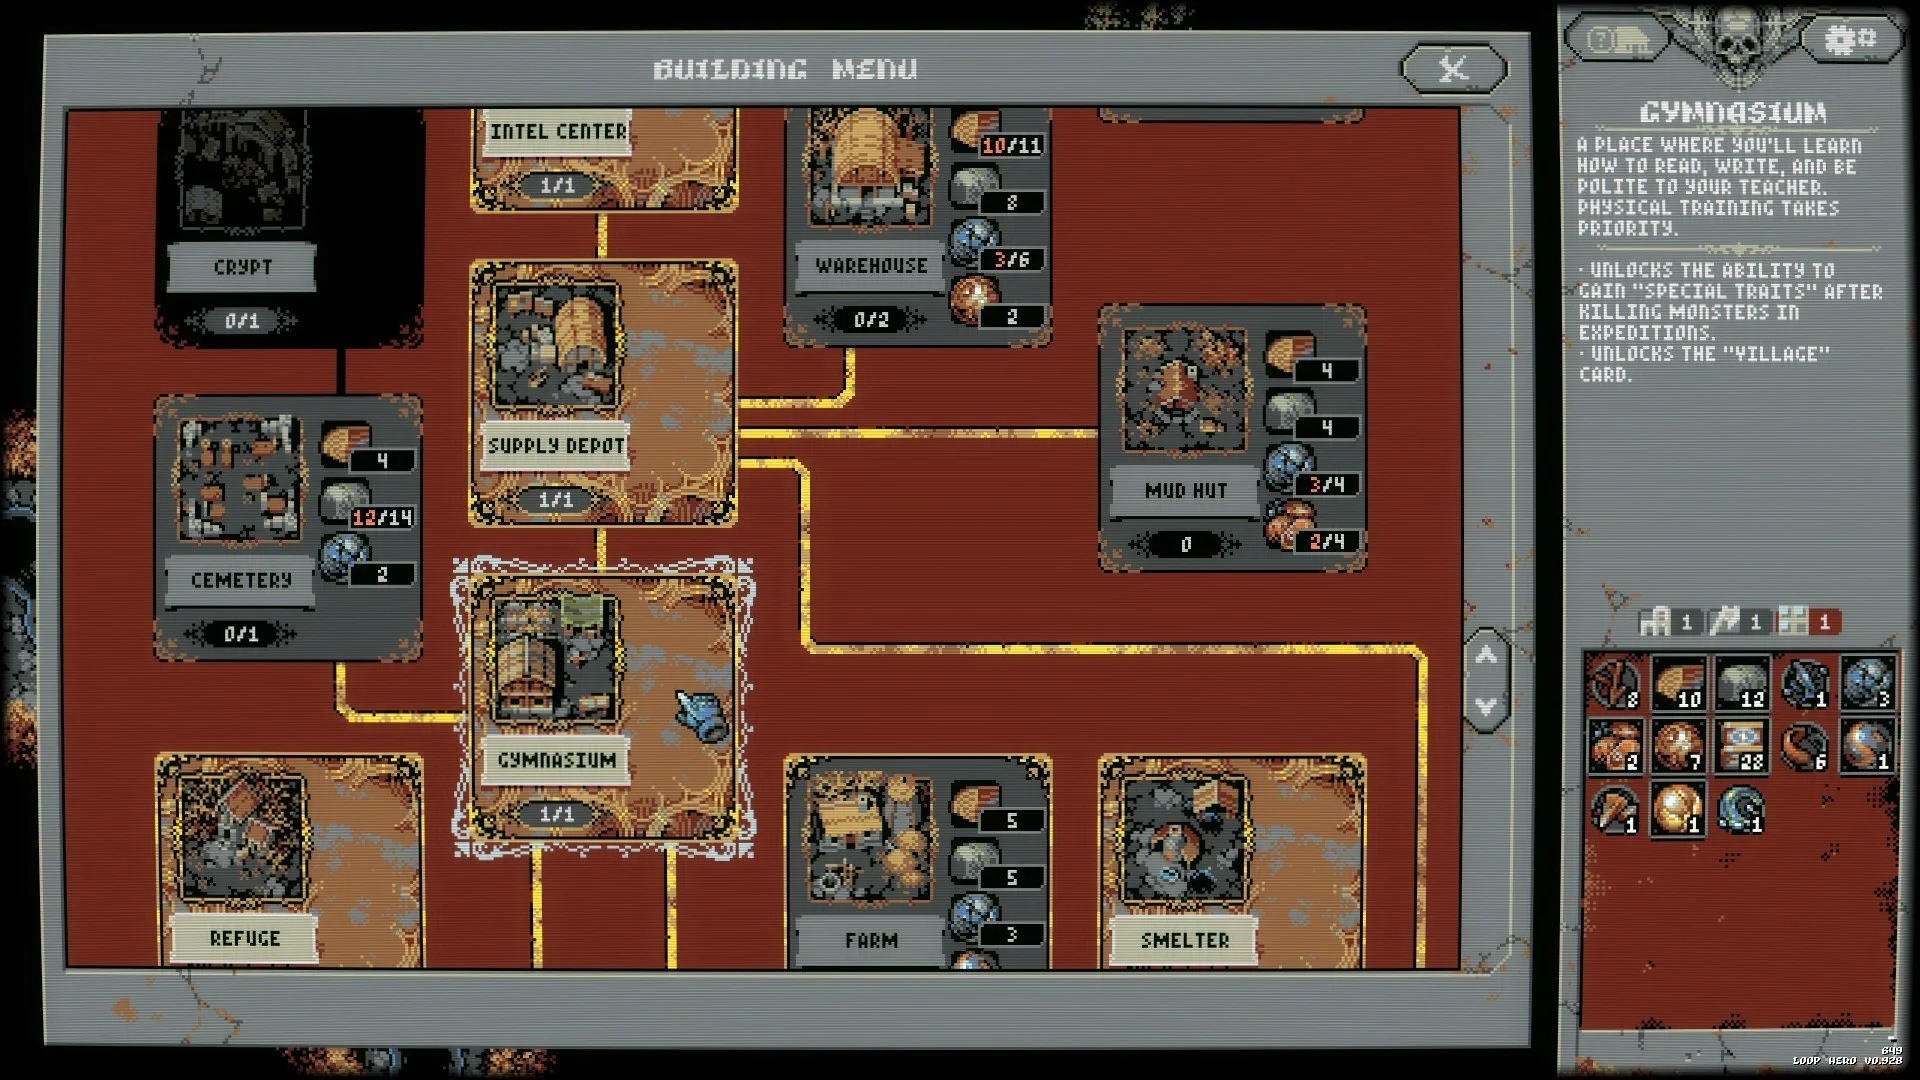
Loop Hero Building Menu showing Gymnasium and other structures with resource costs.
The Building Menu shows the available structures. The small numbers beside each resource icon show what a building needs and what your camp already has.
  1. On the camp screen, choose Build from the right-hand list. Do not choose Expedition yet; that starts the next run.
  2. In the Building Menu, select a structure to read its effect in the panel on the right. Compare each required resource with the number you have. The example screenshot shows Gymnasium selected; its description says it unlocks traits after monster kills.
  3. Build an available upgrade that helps with your current problem. Herbalist’s Hut unlocks healing potions when it becomes available. Gymnasium adds traits once its prerequisites and materials are met. If the building is greyed out, return from another expedition with the missing resource.

After building, choose Expedition on the camp screen. Your card choices and new camp benefits can make the next attempt easier without repeating the exact same route.

6. A first-run route you can follow without guessing

  1. Start an expedition and locate the bottom card row and the health bar. Place one landscape card on empty ground so you can see the placement preview.
  2. Let the hero win the first easy battle. Pause, inspect the new item at the right and equip a useful piece in the matching slot.
  3. Place only one road enemy card if fights are still comfortable. Watch what appears on that road square when the hero returns.
  4. After each circuit, compare current health with the amount lost on the last circuit. When another round looks unsafe, pause at the campfire and use the safe retreat control.
  5. Back at camp, open Build and check which building your gathered materials can actually pay for. Then start a fresh expedition with that upgrade.

If something still does not work

  • A card will not place: check whether it is a road, roadside or landscape card. Move it to that part of the map and look for the valid placement preview.
  • I cannot control the hero during a fight: walking and attacks are automatic. Pause and change equipment or card placement instead.
  • I lost many materials after leaving: you retreated away from a safe campfire exit. Check the lower-right control before confirming next time.
  • The building I want is unavailable: select it in Build and read its resource costs or prerequisite. A further expedition may be needed.
  • The boss appeared too early: every placed card moves the boss progress forward. On a new run, add cards more slowly and retreat with resources before a fight you cannot survive.

Get Pixel Twelve's biggest stories first.

Add as a preferred source on Google