Pixel Twelve
Kirby Air Riders Boost Charge: find B, drift and release a dash

How To

Kirby Air Riders Boost Charge: find B, drift and release a dash

A beginner-friendly visual guide to Kirby Air Riders Boost Charge on Switch 2: identify B, hold it into a corner, steer with the left stick and release for a Boost Dash.

Game: Kirby Air RidersVerified Sep 28, 2026
Guide Type
How To
Last Verified
Sep 28, 2026

Guide details

Overview

A beginner-friendly visual guide to Kirby Air Riders Boost Charge on Switch 2: identify B, hold it into a corner, steer with the left stick and release for a Boost Dash.

Watch

Official Trailer

Official demonstration

Kirby Air Riders Boost Charge demonstration

Seven-second official Nintendo UK clip showing the hold-and-release Boost Charge move.

Before the first turn: what is already moving?

Kirby Air Riders is a Switch 2 vehicle-action game. Your rider sits on a machine, such as the yellow star-shaped Warp Star shown above. The machine moves forward on its own. You do not hold a gas button. Tilt the left stick left or right to steer.

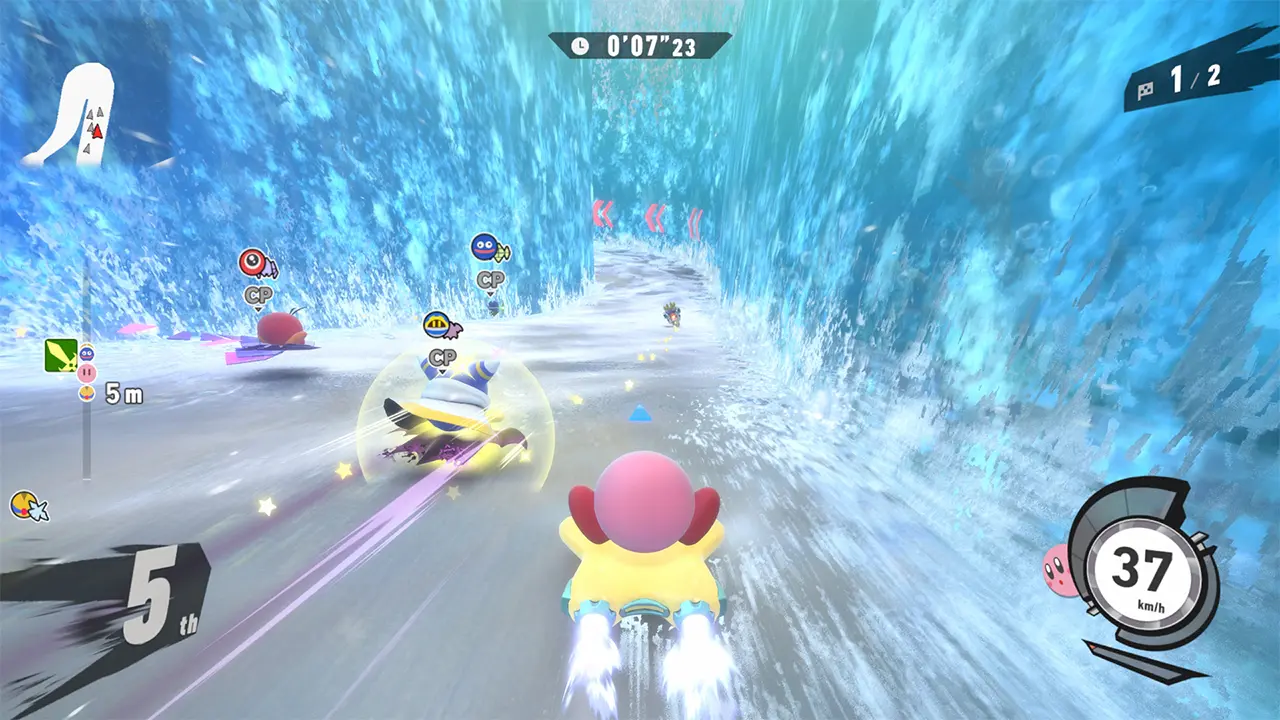
In the race screenshot above, your rider is near the bottom center of the screen. Look farther up the track for the bend ahead. The round dial at the lower right displays speed; it is not the button you press to charge.
1. Find the Boost Charge button

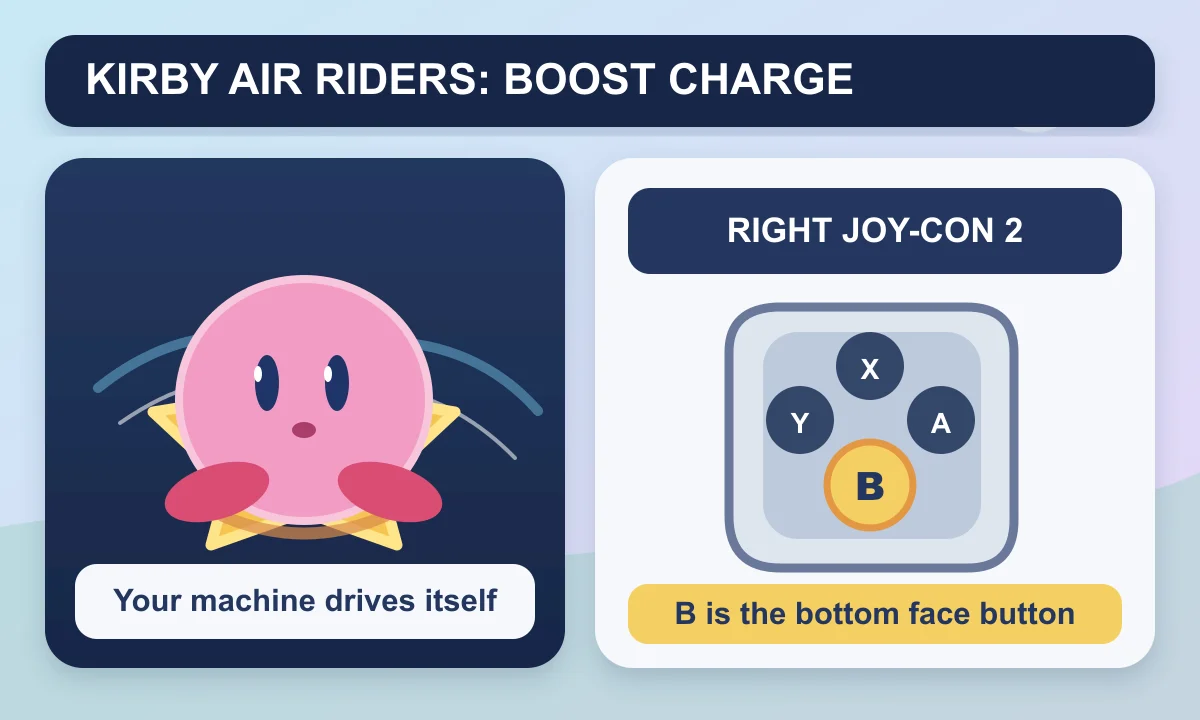
On the default Switch 2 controls, B is the lower button in the four-button group on the right Joy-Con 2. X is above it, Y is left, and A is right. The original Pixel Twelve diagram below shows the group so you do not have to guess which button Nintendo means.

Pixel Twelve original Kirby Air Riders-style control diagram showing Kirby on a yellow Warp Star beside the right Joy-Con 2 face-button layout, with the bottom B button highlighted.
Pixel Twelve diagram, not an in-game screenshot. On default controls, B is the bottom face button on the right Joy-Con 2.

If you use a controller with remapped buttons, follow the on-screen control prompt for Boost Charge instead of assuming its B is in that exact position.

2. Hold B as the corner begins

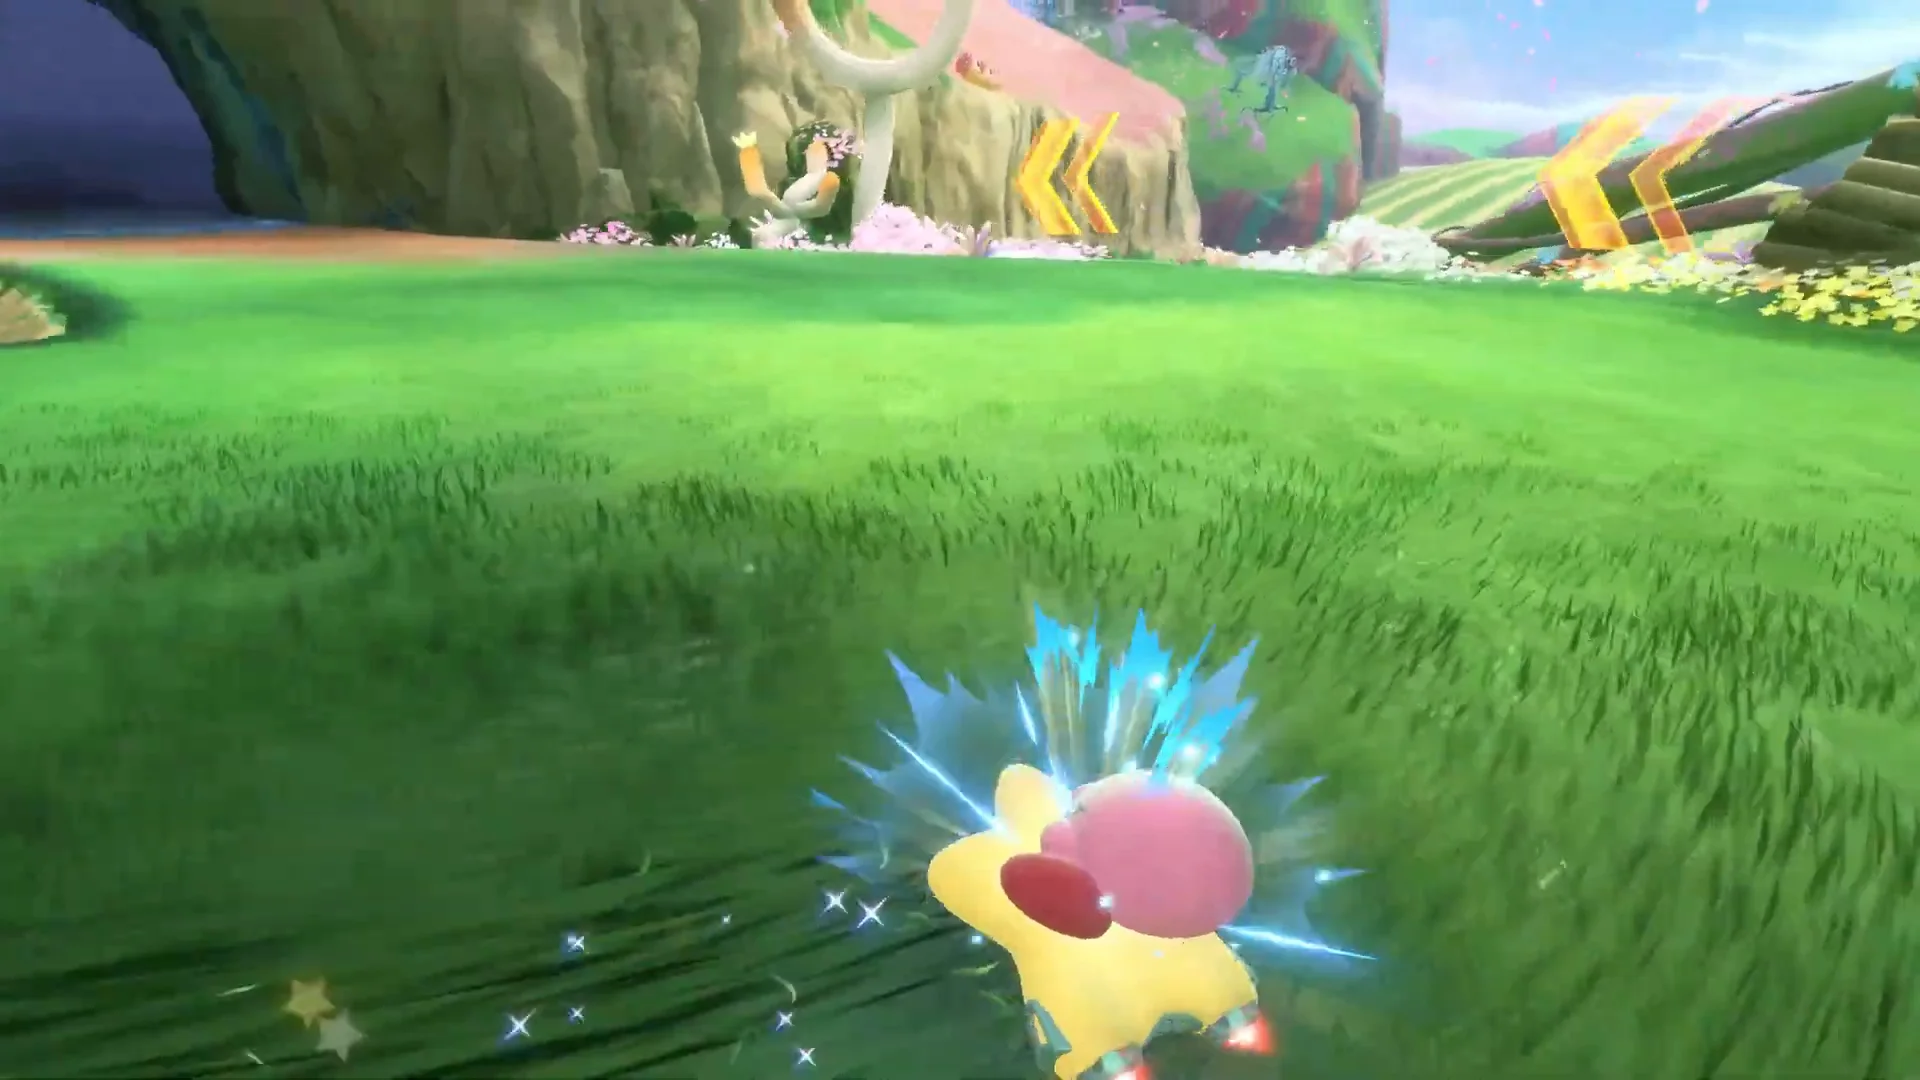
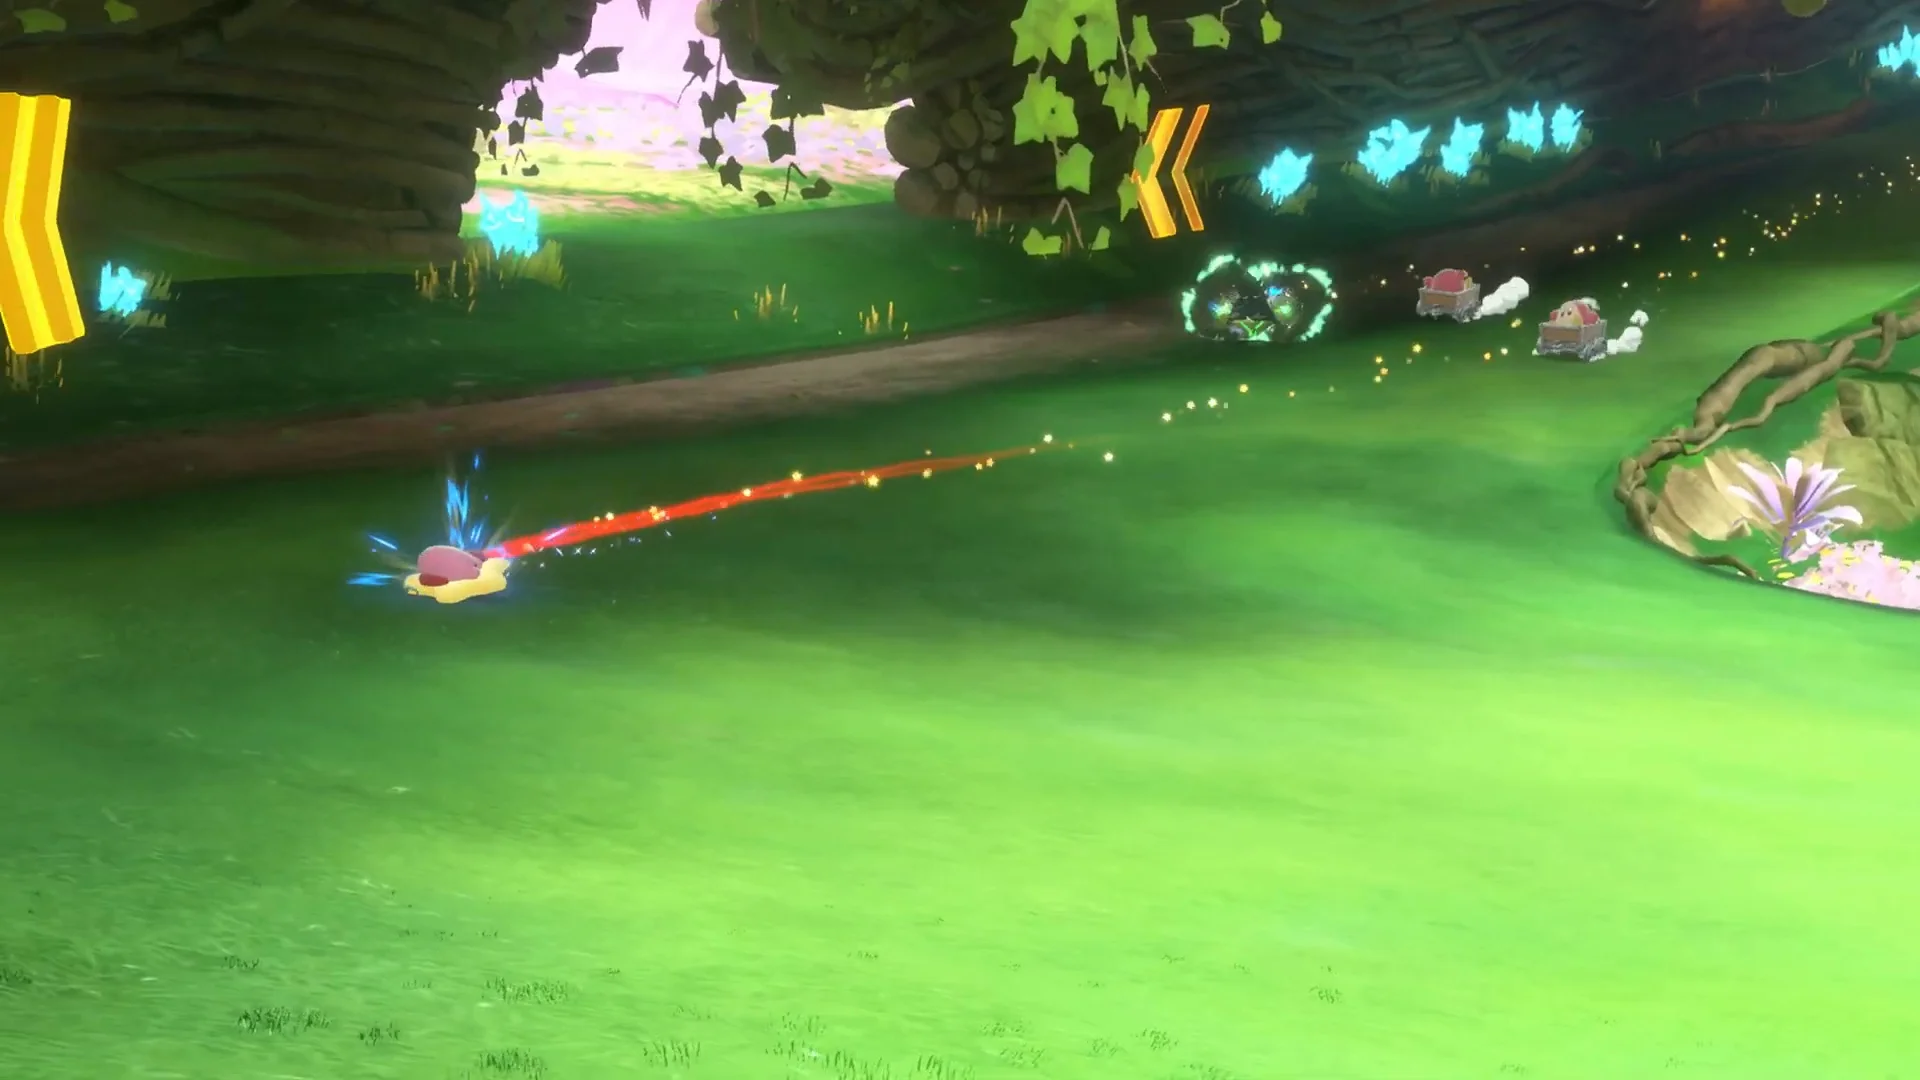
Look for a curve in the track. In the official video frame below, the yellow chevrons along the edge point into the bend. Before you reach it, press and hold B. Nintendo says the machine touches down, slows and starts storing a Boost Charge.

Official Nintendo UK Kirby Air Riders gameplay frame with Kirby on a Warp Star near yellow left-turn chevrons, blue charge sparks and other racers ahead.
Yellow arrows mark the turn. Kirby and the Warp Star are at lower left; the blue sparks show the charge starting.

While still holding B, tilt the left stick into the corner. This is the drift: you trade some speed now for a cleaner turn and a stronger exit. In the next frame, blue sparks gather around Kirby as the machine hugs the bend.

Official Nintendo UK Kirby Air Riders gameplay frame showing blue sparks around Kirby’s Warp Star during a left-hand drift.
Keep B held through the bend and steer left with the stick; the blue sparks make the charge easy to spot.

3. Release B when the road opens up

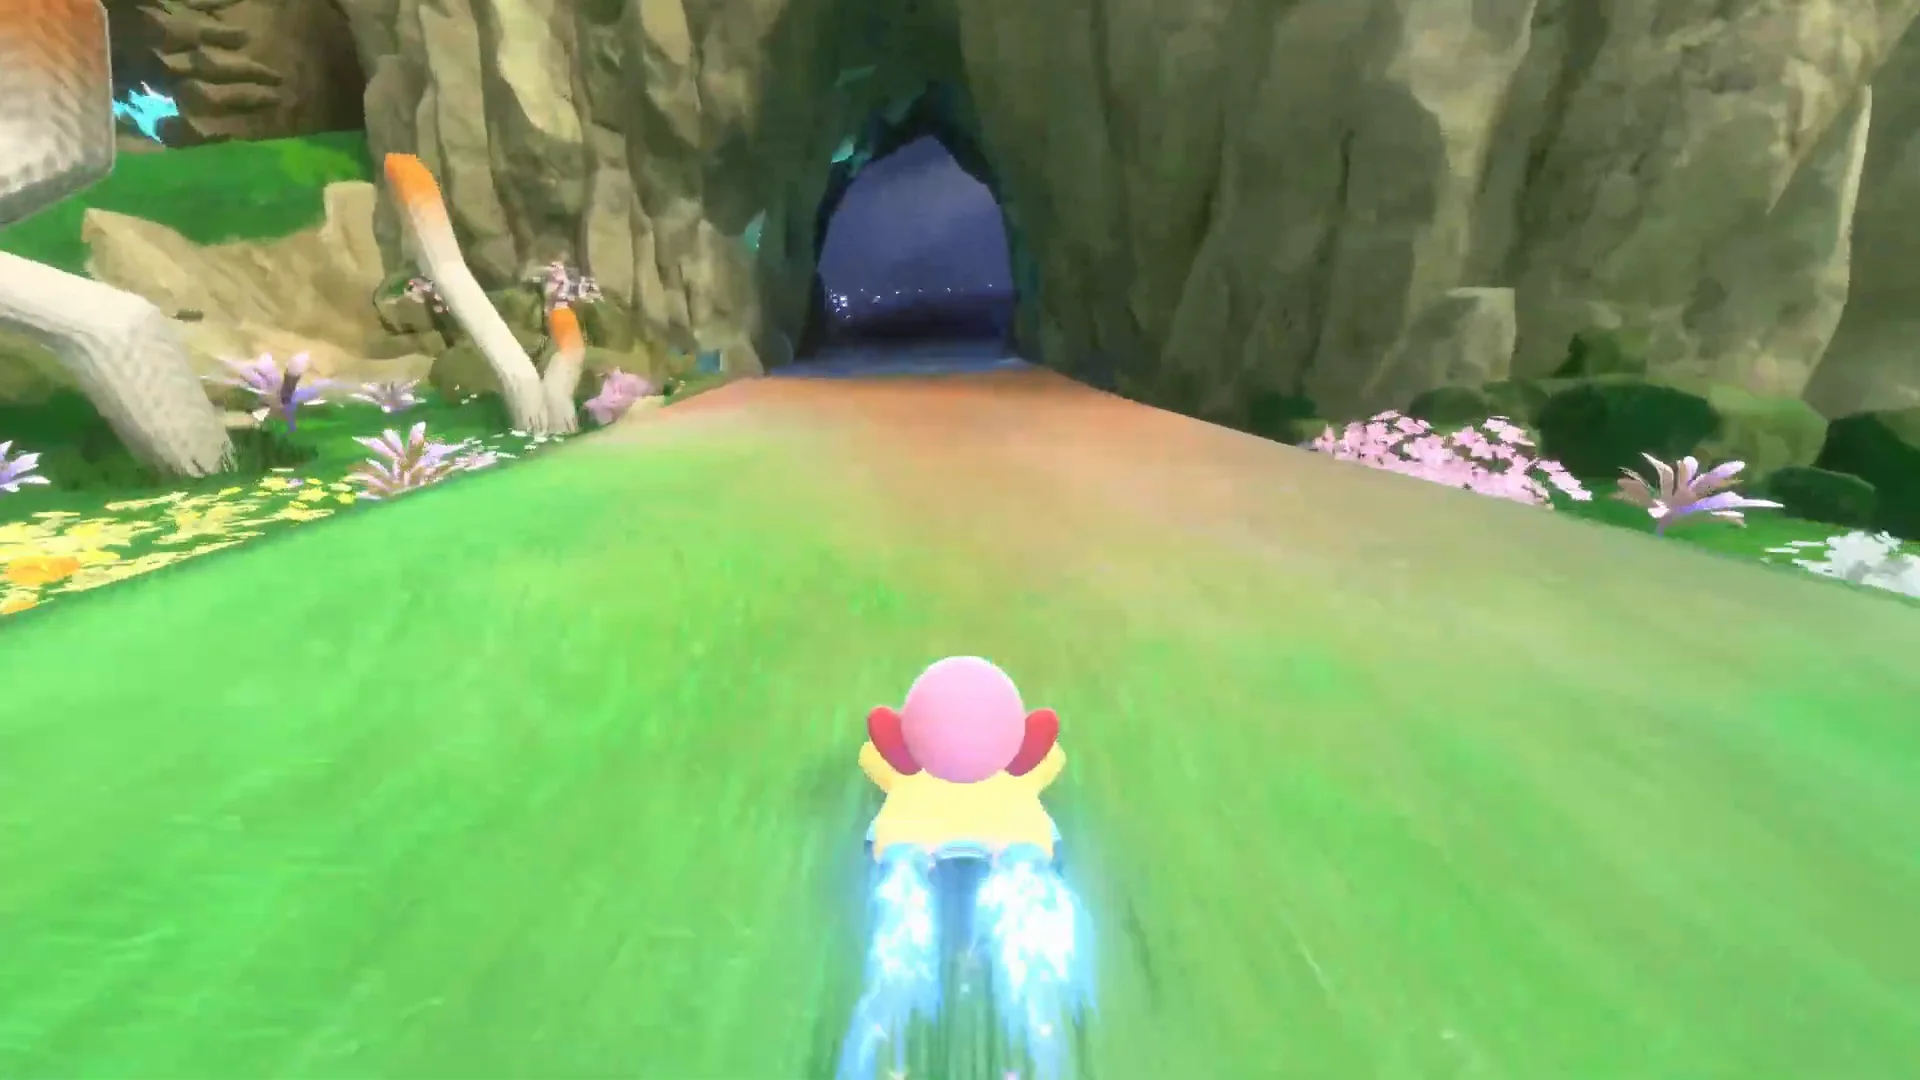
As the bend ends and you can see a clearer stretch ahead, let go of B. Releasing the button triggers the Boost Dash. The official frame below shows the difference: bright blue jets trail behind the Warp Star as it speeds away.

Official Nintendo UK Kirby Air Riders gameplay frame with bright blue boost jets behind Kirby’s Warp Star on the straight after a corner.
Release B after the turn. The blue jets behind the machine show the dash you earned.

The simple rhythm is approach a bend → hold B and steer → release on the exit. You can try that on another corner right away. Holding B forever is not the goal; the fast burst happens when you release it.

If you slow down but do not get the dash

First check the timing. Pressing B makes the machine brake and build a charge; the burst comes after you let go. If you release immediately, you may not have built much charge. Try holding through a visible turn, then release as the course straightens.

If you are learning, use the regular yellow Warp Star pictured in this guide so the same visual cues are easy to compare. Different machines have different handling. Nintendo also includes an in-game Lessons mode for practicing the basics, but you do not need to finish every lesson before trying this technique.

Get Pixel Twelve's biggest stories first.

Add as a preferred source on Google