Pixel Twelve
FTL First-Run Guide: Pause, Power, Targeting and Repairs

How To

FTL First-Run Guide: Pause, Power, Targeting and Repairs

A visual first-run FTL guide to the pause key, hull and shields, power bars, enemy rooms, crew orders and event choices.

By Nova RainesGame: FTL: Faster Than LightVerified Sep 30, 2026
Guide Type
How To
Last Verified
Sep 30, 2026

Guide details

Overview

A visual first-run FTL guide to the pause key, hull and shields, power bars, enemy rooms, crew orders and event choices.

1. Pause before choosing an action

FTL gives you time to think. Press Space during play to pause; the screenshot shows PAUSED above “Press SPACE to resume.” You can still give crew orders and adjust system power while the game is paused. Press Space again when you are ready to watch those orders play out.
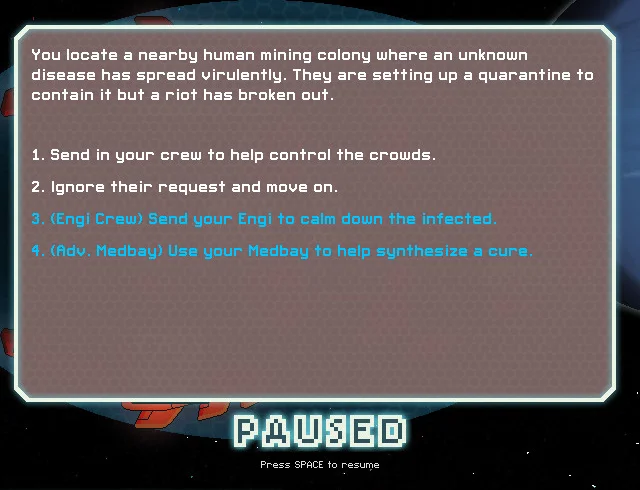
Closer view of the FTL event window with the PAUSED and Press SPACE to resume labels below it.
The PAUSED indicator and the Space-key reminder are legible beneath the event choices.

This is an event from one particular run, not the first event everyone receives. Use the pause habit whenever a fight, warning or choice presents more information than you can read at once.
2. Read the ship status, not just the enemy

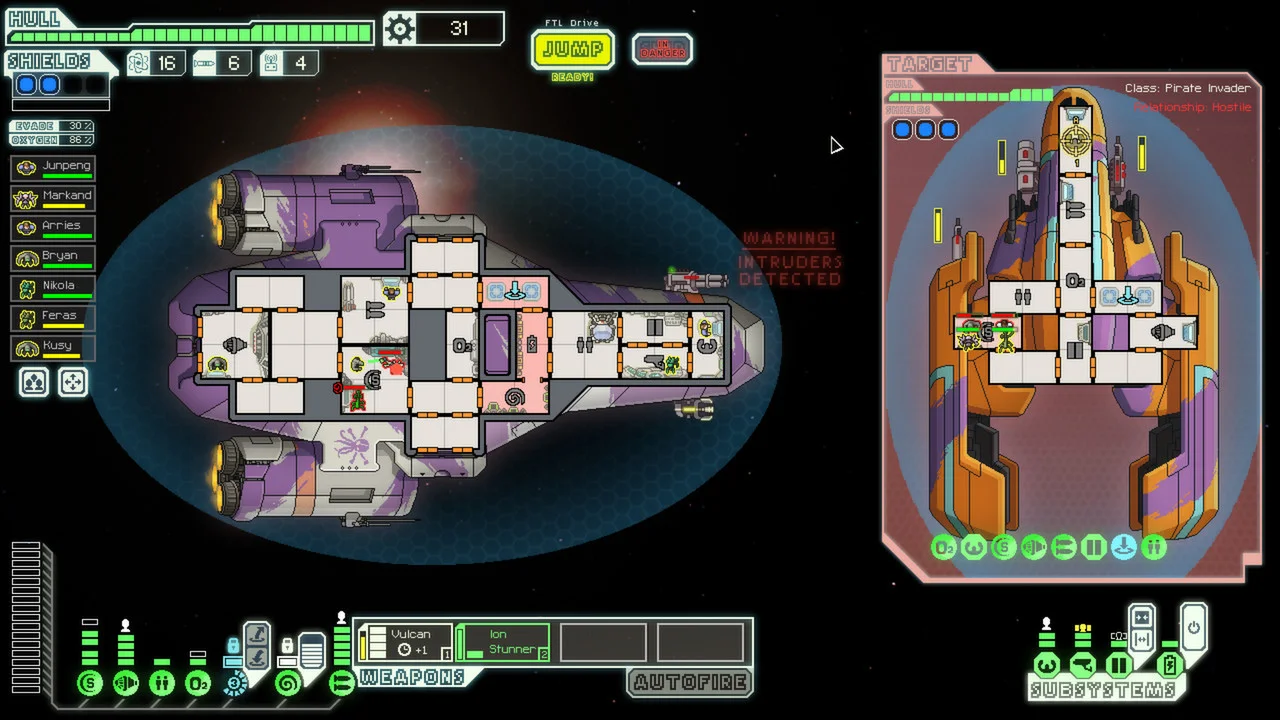
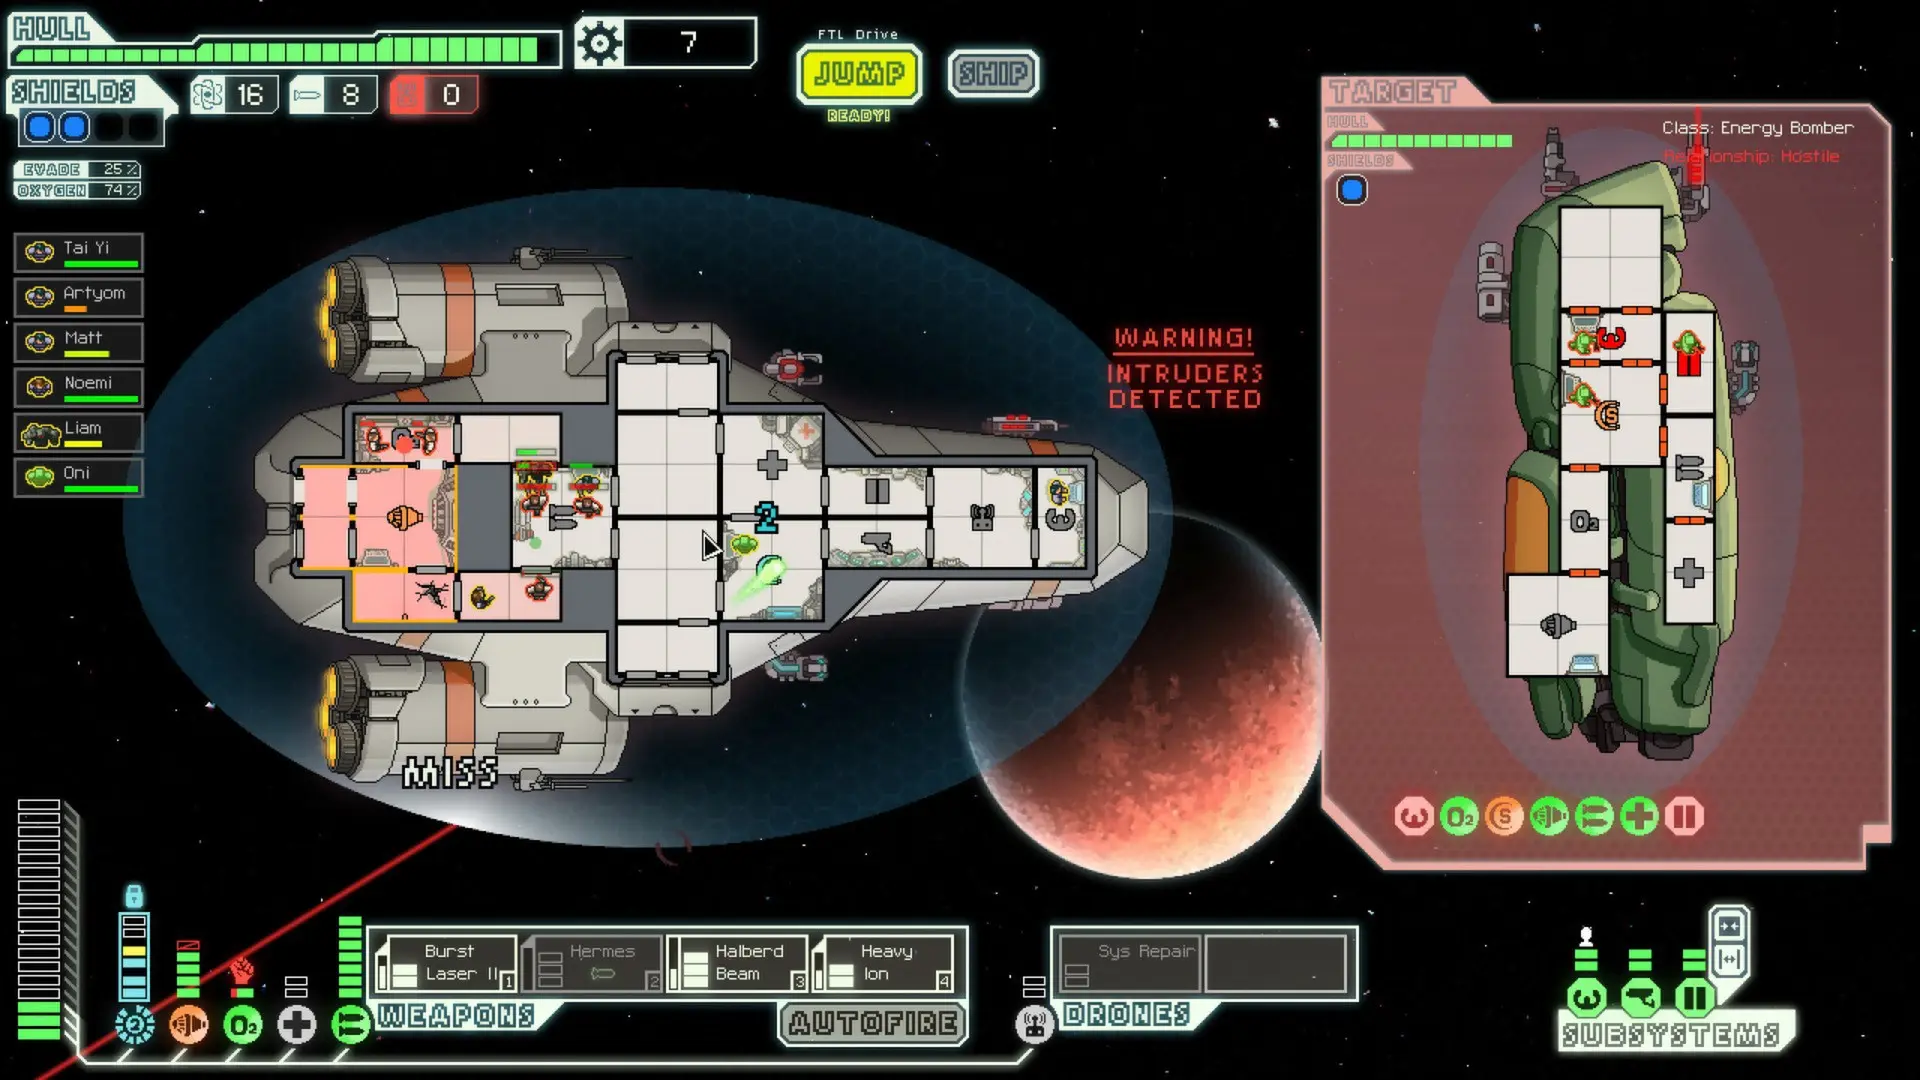
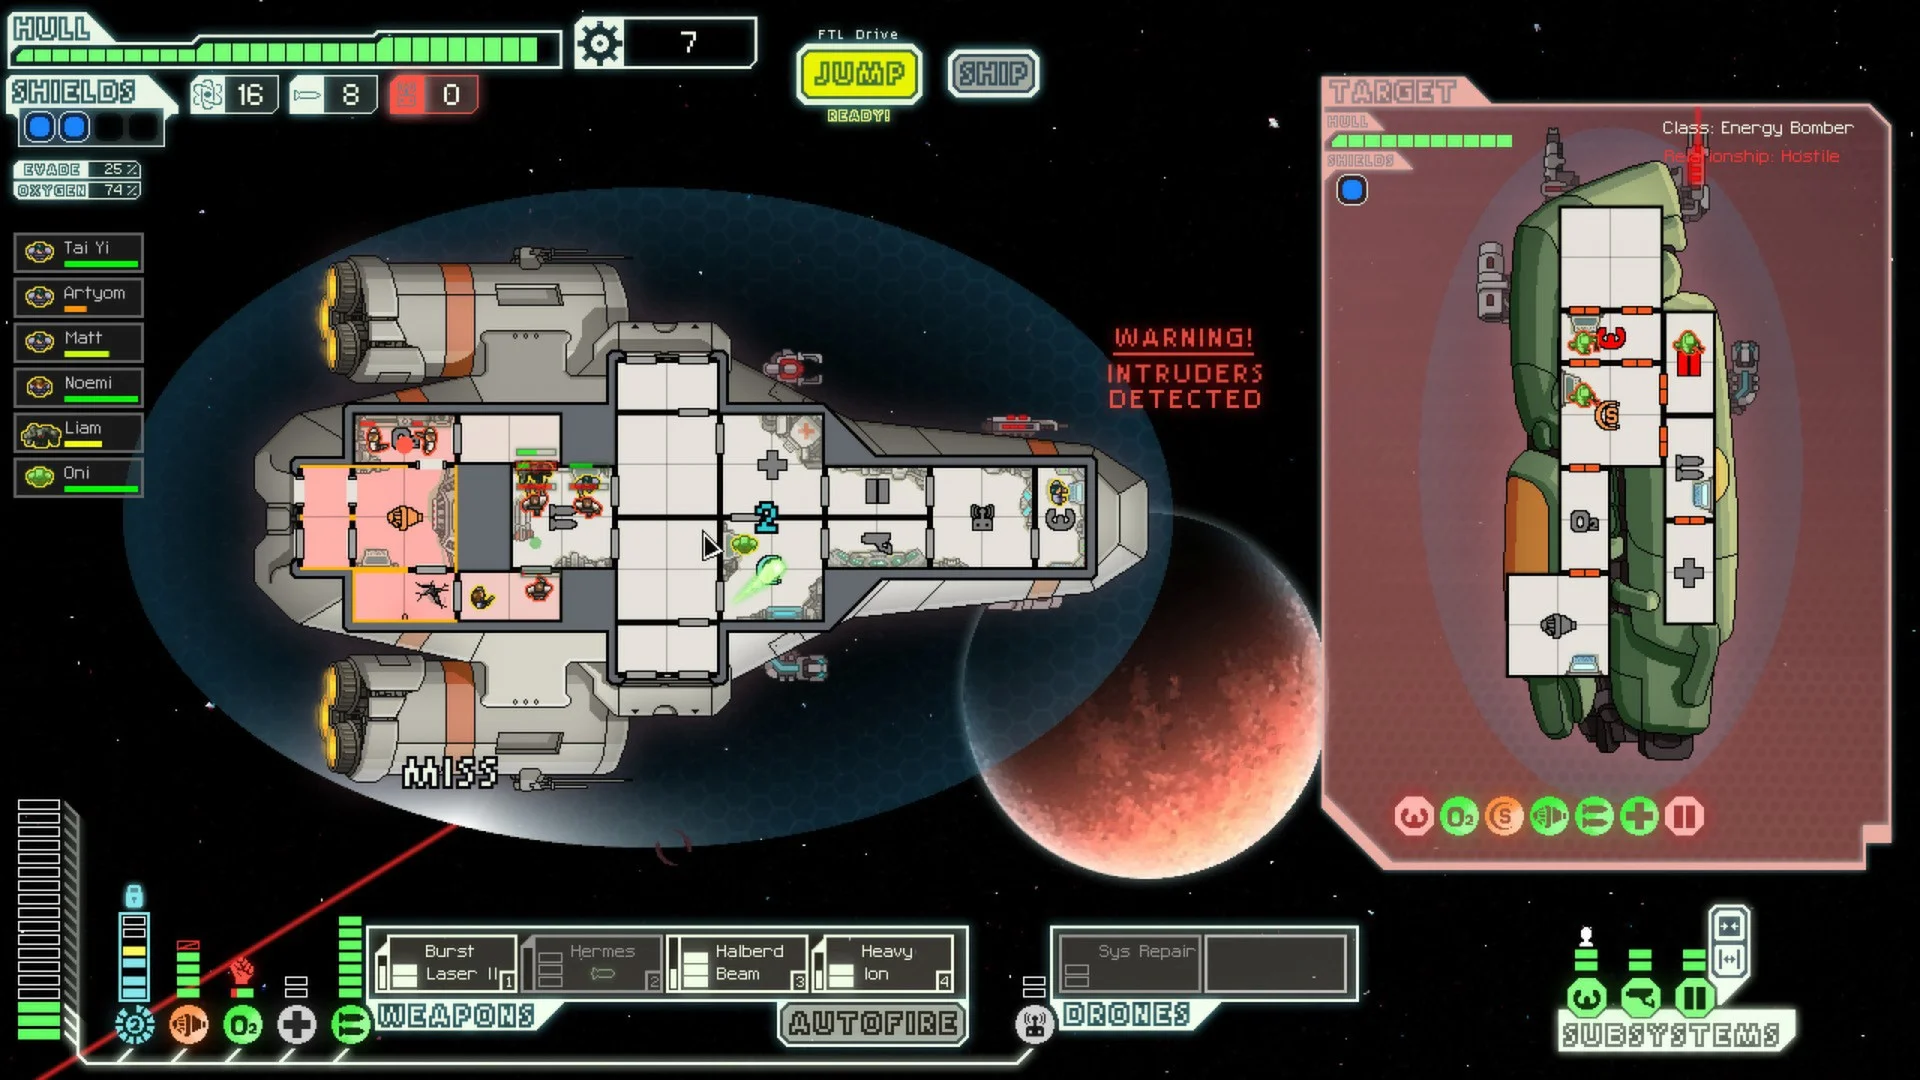
In the combat image, your HULL bar runs across the upper left and the blue SHIELDS pips sit beneath it. The smaller counters alongside show supplies such as fuel, missiles and drone parts; crew portraits and health bars descend down the left edge. Look at your ship in the center, the hostile target panel on the right and the WEAPONS and system-power bars along the bottom.

Full FTL combat interface: green hull at top left, shield pips, crew list, ship rooms, enemy target and weapons along the bottom.
Start with hull and shields, then scan crew, your rooms, the enemy and the weapons bar.

The captured ship has six crew and several weapons; a new run may look much simpler. The red INTRUDERS DETECTED warning belongs to this image, not every encounter. Do not mistake its numbers for starting resources.

3. Give equipment enough power before expecting it to work

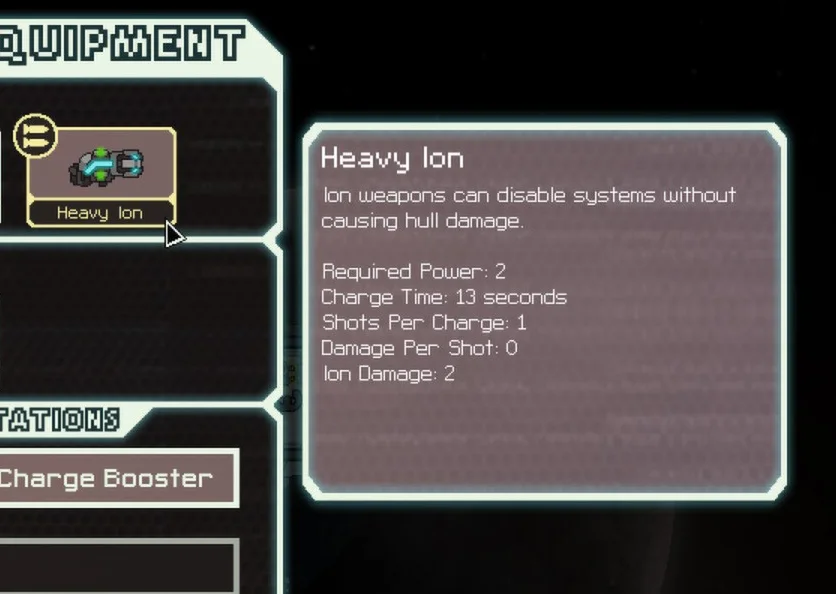
The EQUIPMENT view shows four installed weapons. Hovering Heavy Ion reveals Required Power: 2. Before a battle, compare that requirement with the power bars beside your own weapons. An installed weapon that is not powered will not charge and fire.

Closer view of the FTL Heavy Ion equipment tooltip reading Required Power: 2.
The Heavy Ion tooltip says Required Power: 2.

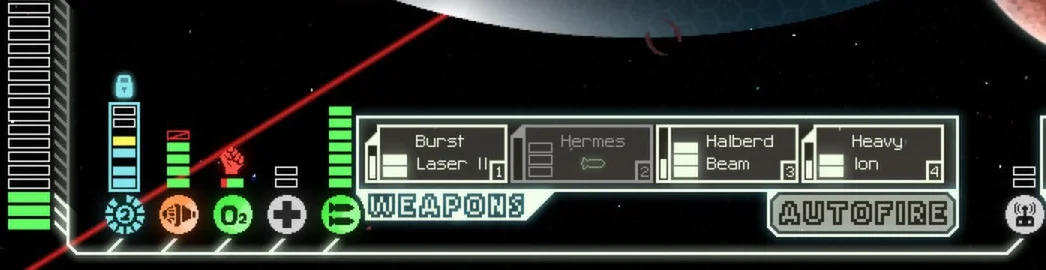
For the desktop interface, left-click a system bar to assign available reactor power and right-click to remove it. If the reactor is fully used, decide what you can temporarily depower before powering another system. Keep essential defenses in mind; moving all power away from shields just to start another weapon can leave your ship exposed. This screenshot is a later loadout, so use its labels to learn where to look, not as a build to copy.

Close view of the FTL lower-left system power bars beside the WEAPONS slots.
Lower-left bars show allocated system power; the WEAPONS slots sit immediately to their right.

4. Select a powered weapon, then choose an enemy room

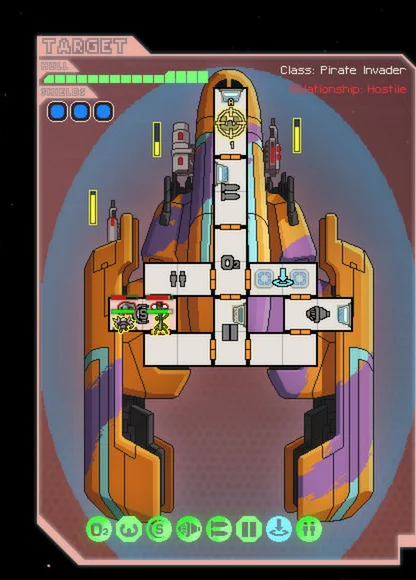
In combat, the WEAPONS strip is at the bottom and the hostile ship is in the TARGET panel on the right. After a weapon is powered, click its slot, then click the enemy room you want it to target. The targeting view below shows a room marked on the enemy ship. You can pause while choosing so the situation does not run away from you.

FTL combat image with WEAPONS bar below, enemy ship in the TARGET panel and a targeting mark over an enemy room.
Bottom: your weapons. Right: the hostile ship and its rooms.
Closer view of the enemy ship TARGET panel with a targeting mark on a room.
Close view: the enemy ship is divided into rooms that can be targeted.

Different weapons interact with shields differently. A laser can be blocked by active shield layers; missiles ignore those shields but spend ammunition. Do not fire simply because a weapon has charged. Check the enemy shield pips and your remaining missiles before committing a target.

5. Send crew to a problem room and watch their health

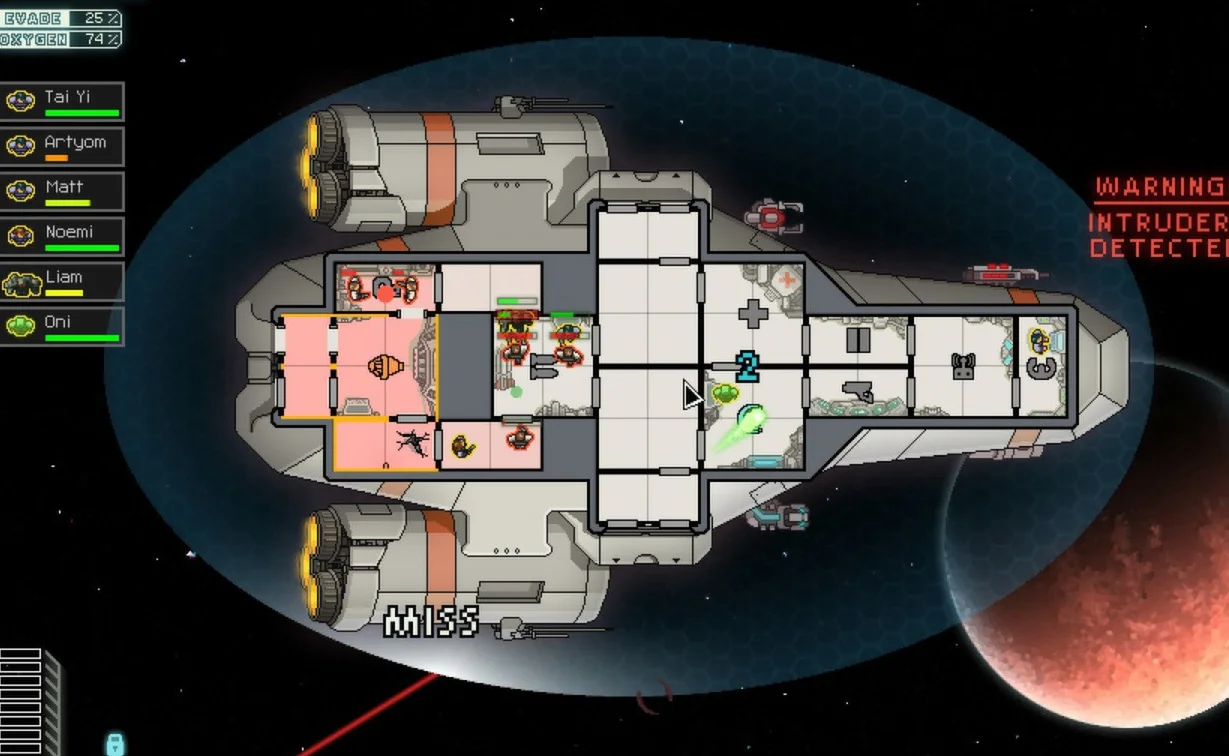
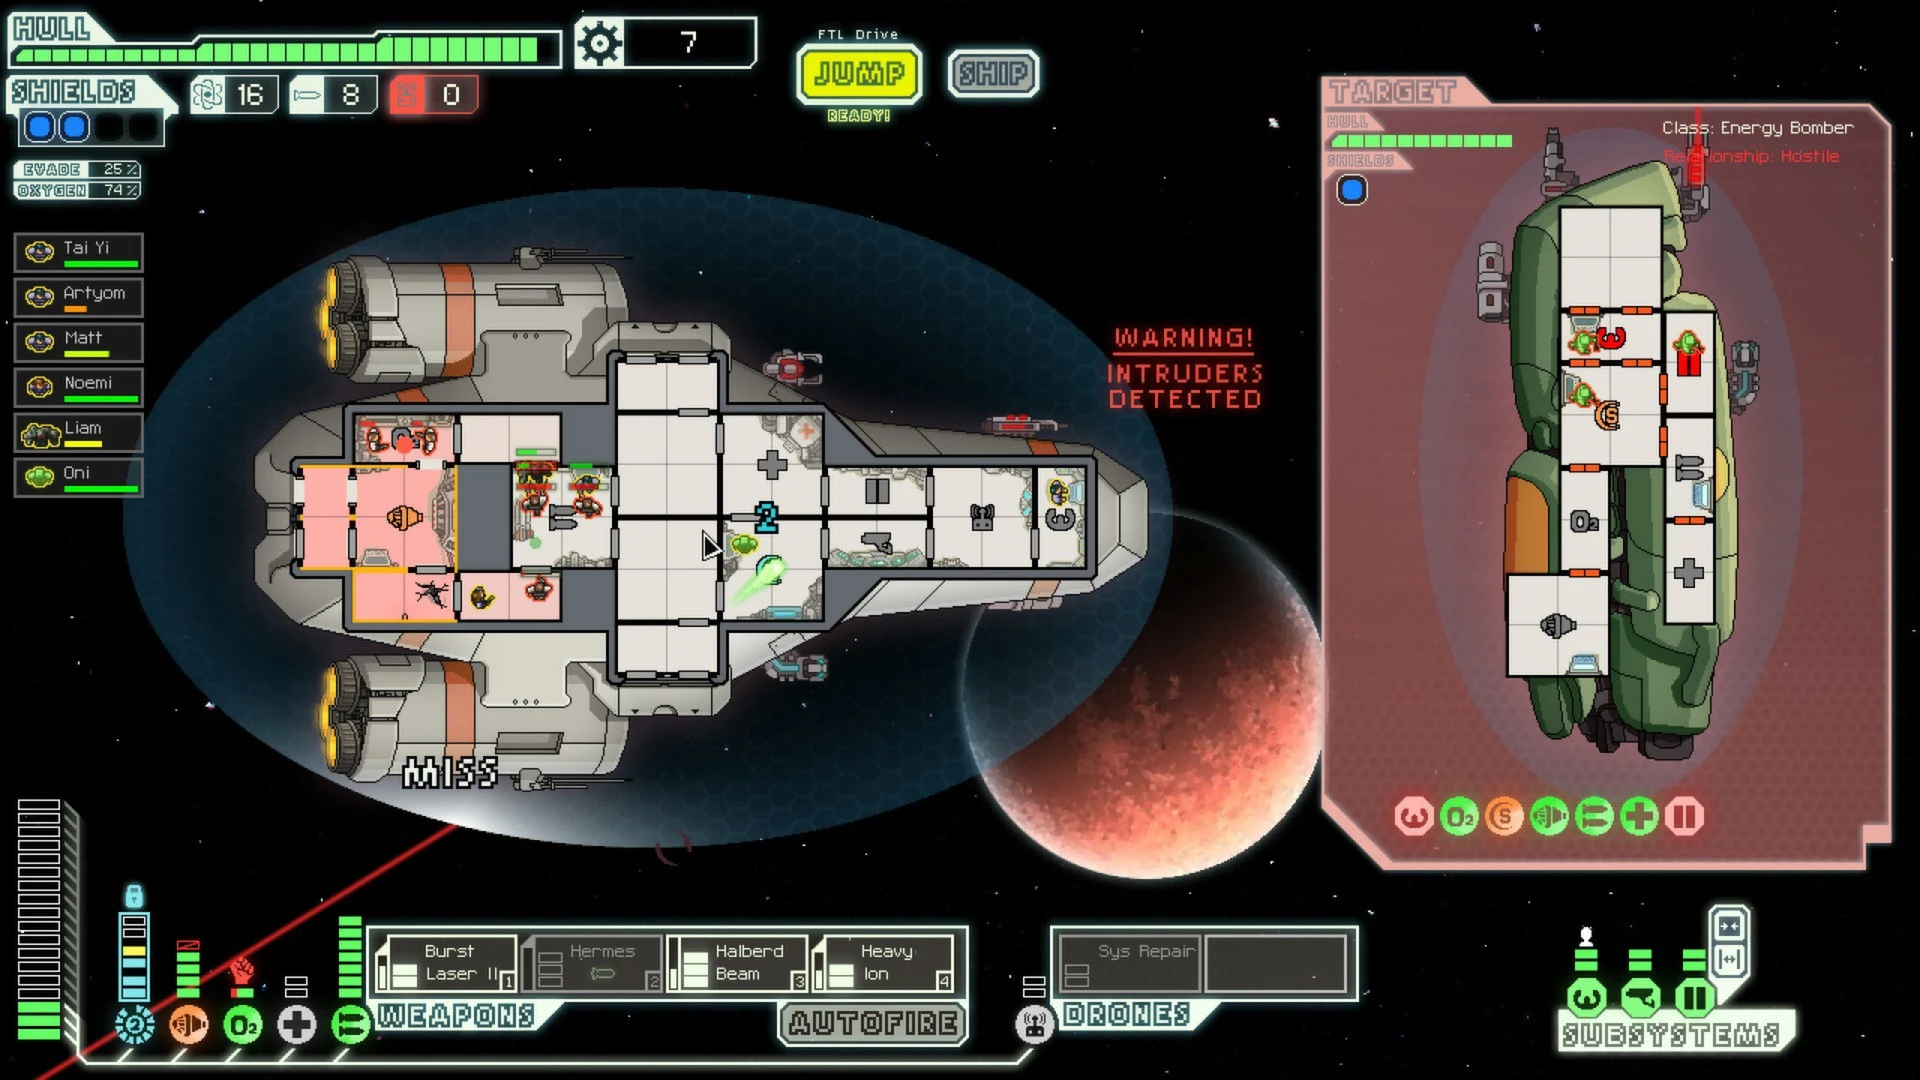
This image shows hostile boarders inside the player ship and a red INTRUDERS DETECTED warning. Pause, find the affected rooms and look at your crew health bars on the left. On desktop, select a crew member, then right-click a destination room to send them there. A crew member in a damaged system room will work on repairs when it is safe to do so; in a room with intruders, they may have to fight first.

Closer crop of the player ship with boarders in rooms and crew portraits along the left edge.
Read the room threat and crew health before sending someone across the ship.

The pictured warning is a boarding problem, not proof that every system is damaged. If a room is on fire, breached or low on oxygen, do not leave a wounded crew member there unattended. Unpause briefly to let the order progress, then pause again and reassess.

6. Read event conditions before the next jump

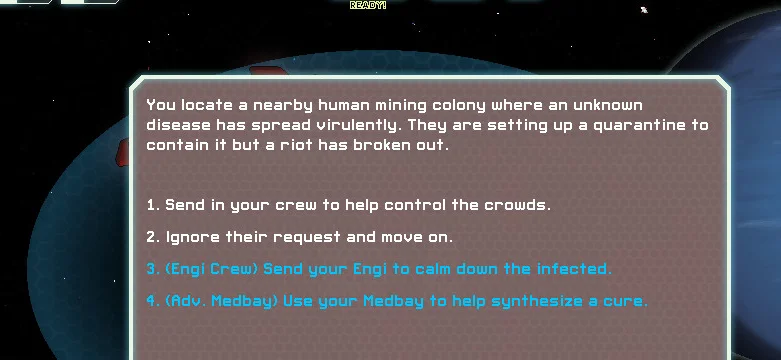
The mining-colony event offers numbered responses, including blue options linked to an Engi crew member and Advanced Medbay. Those blue lines are available because of that captured ship’s crew and equipment; they are not universal choices or guaranteed outcomes. Read the full event, compare each option with what your ship actually has and then select deliberately.

FTL event panel with numbered choices; two blue choices require Engi Crew or Advanced Medbay.
The blue conditions are specific to this run; your own list may differ.

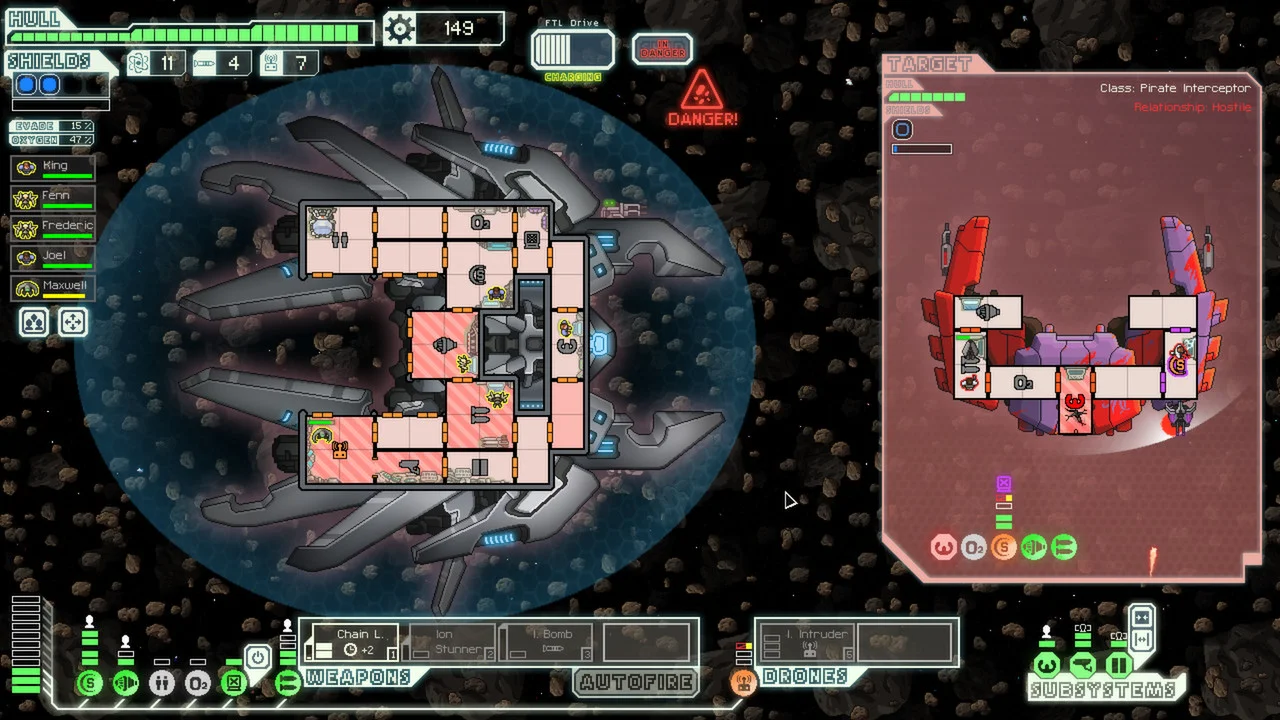
When the event is resolved and the FTL drive is ready, use JUMP to choose another reachable beacon. In the next combat screenshot, the drive is still charging while a DANGER warning is active. A jump is a route decision, not a substitute for checking the ship. Before leaving, check hull, crew health, oxygen and whether anyone is still in danger.

FTL fight amid asteroids with an enemy ship, a DANGER warning and the FTL drive charging.
The drive is charging in this dangerous encounter; reassess before selecting a route.

Get Pixel Twelve's biggest stories first.

Add as a preferred source on Google