Pixel Twelve
Downwell Beginner Guide: Read the Screen, Use Gunboots and Survive Your First Run

How To

Downwell Beginner Guide: Read the Screen, Use Gunboots and Survive Your First Run

A first-run guide to Downwell with five official gameplay screenshots: find your character and HUD, steer, fire Gunboots, collect gems and read shop offers.

By Eugene PickettGame: DownwellVerified Sep 27, 2026
Guide Type
How To
Last Verified
Sep 27, 2026

Guide details

Overview

A first-run guide to Downwell with five official gameplay screenshots: find your character and HUD, steer, fire Gunboots, collect gems and read shop offers.

First, find yourself and the four parts of the screen

Downwell looks busy for the first few seconds because you are falling while the screen scrolls. Start by finding the small white person in the tall black opening at the center. That is you. The red and white shapes below are walls, ledges, gems or enemies; the broad black areas outside the shaft are not a path you can run across.
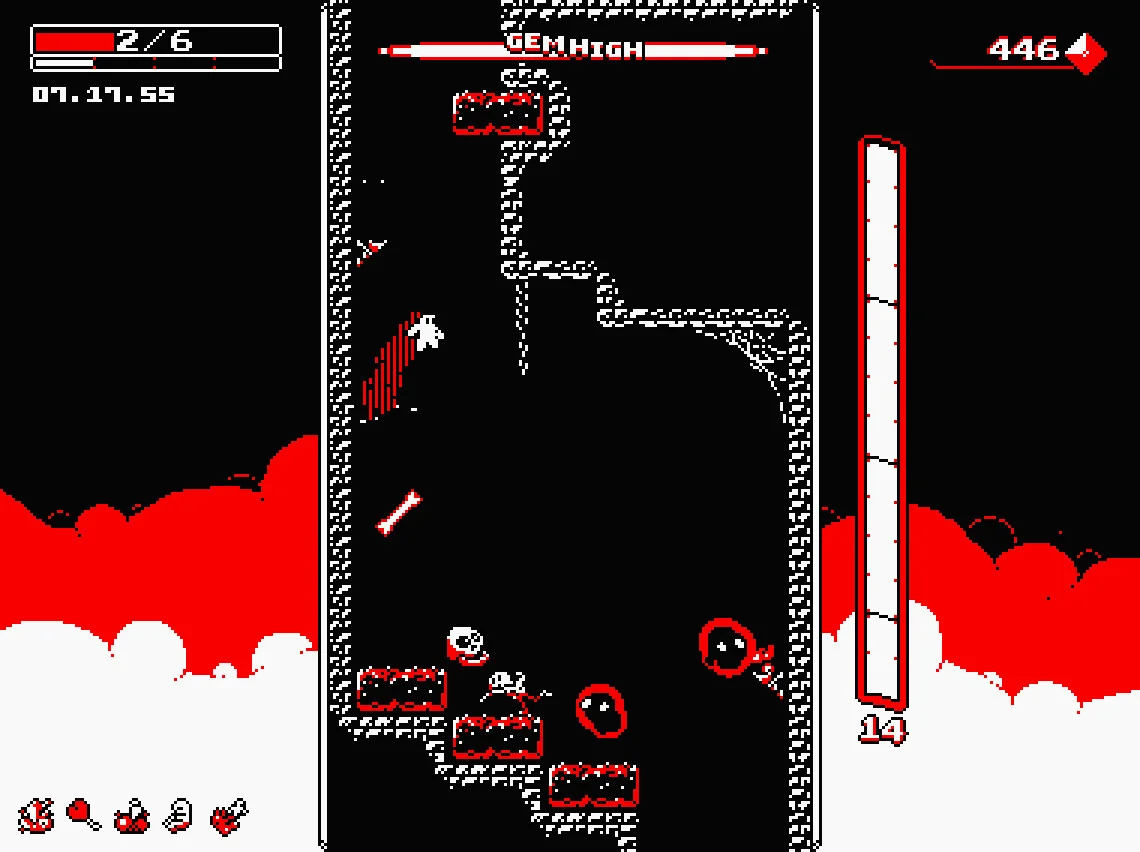
Downwell screenshot: white player character near the middle of a narrow shaft, health 2/6 in the upper left, gem money 446 in the upper right, and a tall charge bar at the right.
Use the real screen as a map: your character is in the center; health is top left; gem money is top right; the tall bar on the right is your Gunboots charge.
  • Top left: the large fraction, such as 2/6 here, is your current health out of the maximum. If the first number reaches zero, the run ends.
  • Top right: the number beside the red diamond is your collected gems. Shops price items in gems.
  • Right edge: the tall red-outlined bar and its number show how much charge your Gunboots have for firing during a fall.
  • Top center: a weapon name or the GEMHIGH label may appear. You do not need to chase that label on your first try; learn to stay alive first.

Your first goal is not a high score. Keep the white character visible, watch the space below it and glance at health after each dangerous drop.
Learn the same button on the ground and in the air

The basic controls have one useful twist. On the standard PC keyboard layout, move sideways with the left and right arrows or A and D. Space jumps when you are standing on a ledge, but it fires the Gunboots downward when you are in the air. If you use a controller, phone or remapped keys, check the control display in your game rather than copying PC labels blindly.

  1. While standing safely, tap left and right and watch the white character move across the ledge. Do not walk off until you can tell which side is clear.
  2. Press the action button while on the ledge to jump. Watch the character rise briefly, then begin falling again.
  3. While airborne, tap the same action button. The shot travels below your feet, so line up over the space you want to hit. Firing also slows your descent for a moment.

It helps to tap rather than hold on your first run. Short bursts give you a moment to see the next enemy or ledge. The Gunboots have limited charge, shown on the right, so a long burst can leave you without a shot before you reach a safe landing.

Choose a path before dropping past enemies

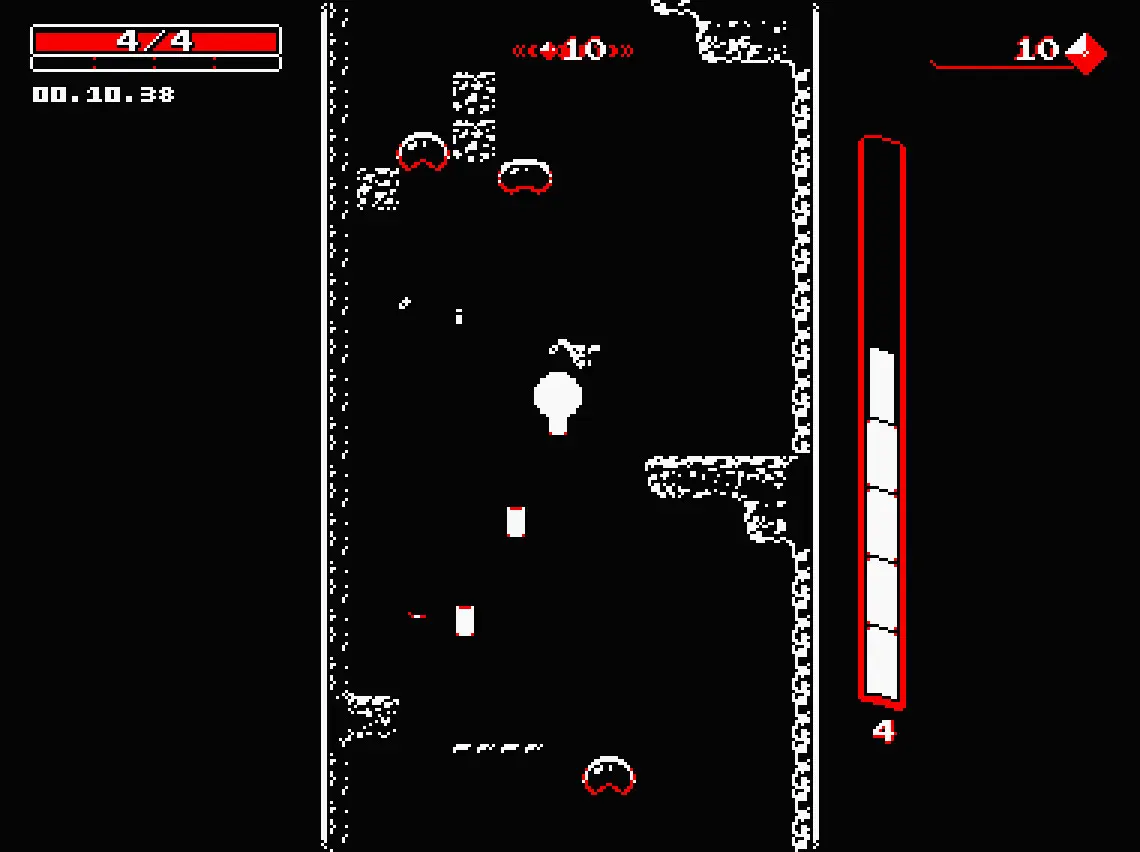
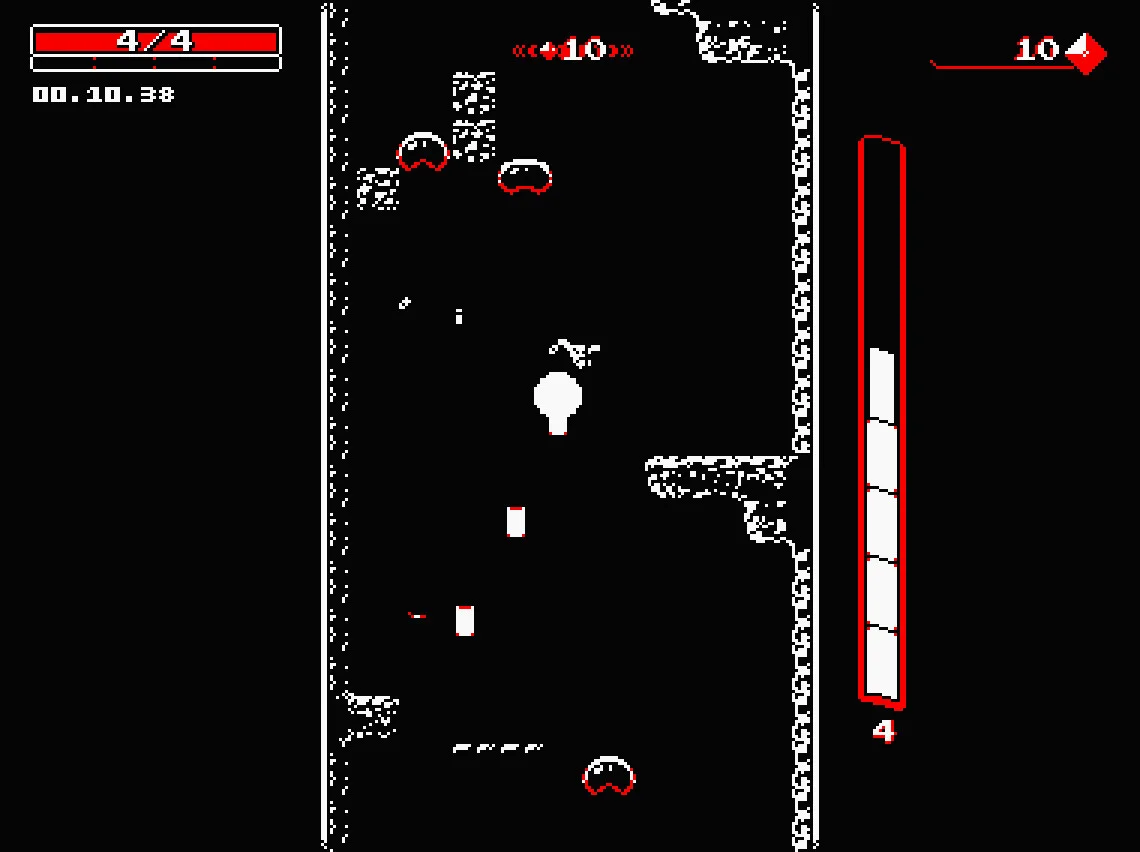
Downwell screenshot: the white character falls in the middle of a black shaft with several red-edged enemies above and below; health 4/4 is shown top left.
Look one character-length below the white figure. The safest space is a gap between enemies, not necessarily a red gem near the wall.

The well is a narrow vertical corridor. Because the view keeps moving, it is easy to focus on a gem and miss the creature directly beneath you. Look below your character first. Red-outlined creatures and rough ledges are easier to spot against the black background if you pick one side of the shaft at a time.

  1. Before you move sideways, find a gap under the white figure. If an enemy is directly underneath, steer toward clear air or fire down while you still have charge.
  2. If a solid ledge is coming up, decide whether to land there. A landing gives you a short pause to look ahead and refills Gunboots charge, but you should check that the surface is clear.
  3. After a landing, look at the right-hand charge bar, then plan the next small drop. You do not have to dive from the top of the screen to the bottom in one move.

Health is more valuable than one risky gem. If the path to a red diamond crosses an enemy, leave the diamond and take the open route. You can find more gems later in the same run.

Use Gunboots to control your fall, not just to attack

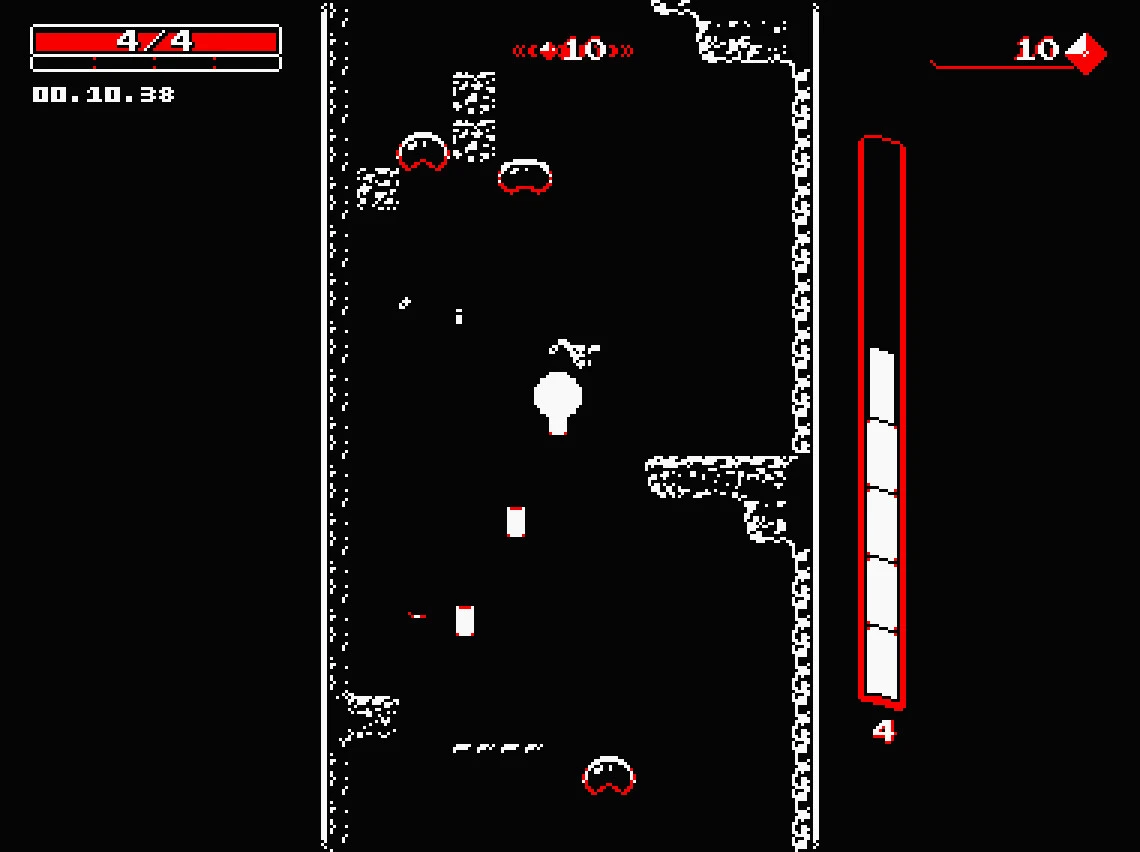
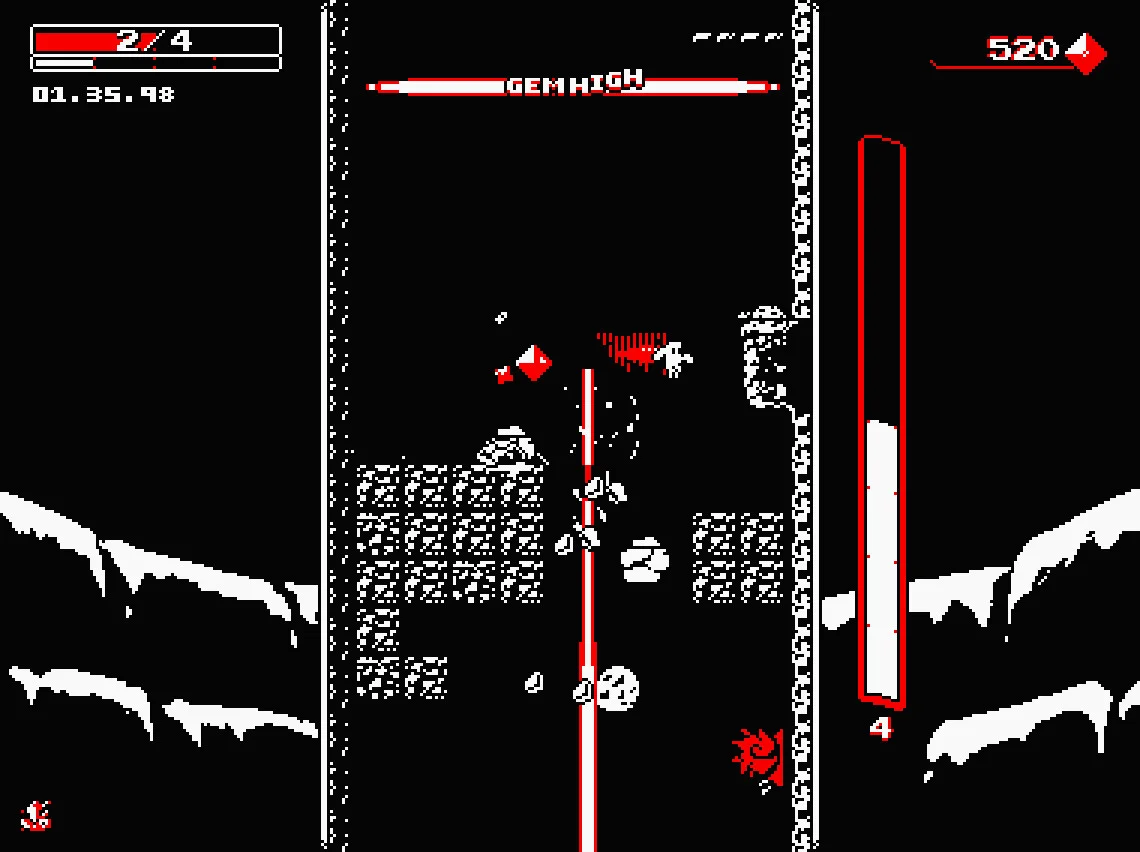
Downwell screenshot: a narrow red Gunboots shot runs downward through the central shaft; the charge bar is visible at the far right.
The shot leaves the character’s boots and travels down. Point yourself over the threat first, then use a short burst.

The shot does not go toward whichever enemy looks closest. It goes downward from where your feet are. If a creature is to your left, steer over it before firing; if the space beneath it is crowded, you may be safer moving around it. This is why the game feels different from a usual side-scrolling platformer.

  1. Find the white character and the red-outlined charge bar on the right. If the number is low, plan to land rather than assume you can fire through a whole group.
  2. Move until the target or a breakable object is below your boots. Tap the action button while airborne. Check where the red shot actually goes.
  3. When the charge is almost spent, steer to a clear ledge. Landing refills it. Then look below again before your next jump.

Some weapons fire in different patterns, so the exact shape of a shot can change. The same decision still works: check your position, check charge, and leave room to land. A shot can slow your fall, but it does not turn the shaft into a place where you can hover forever.

Read gems and the GEMHIGH bar without getting distracted

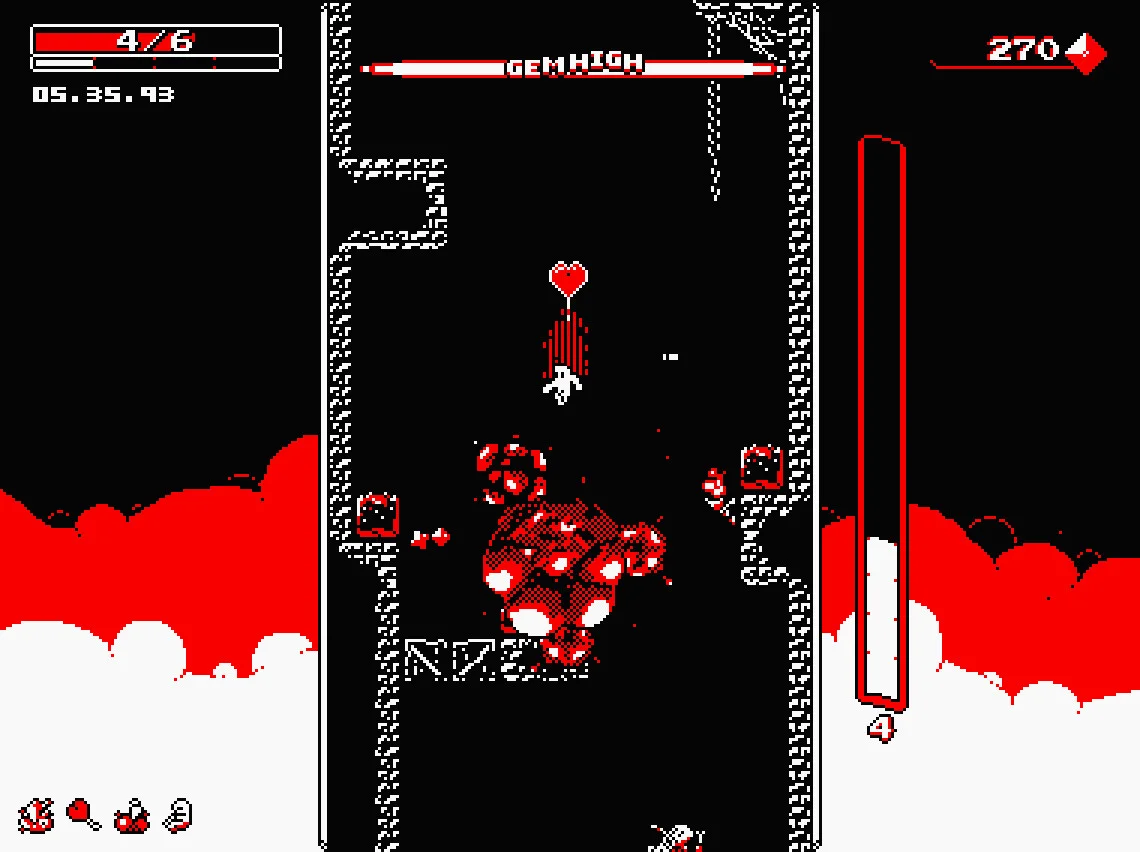
Red diamond-shaped gems are money. The total appears at the upper right, beside a little red diamond. This is the number to compare with a shop price. The game can also display GEMHIGH across the top when you gather gems quickly; that is a temporary bonus state, not another health bar. You do not need to keep the bar full to survive your first level.

Downwell screenshot: a red GEMHIGH strip is across the top, gem money is at top right, and the white character is above a large red enemy.
GEMHIGH is the horizontal strip at the top; your gem total is the number at the upper right. Neither is a reason to drop into the large enemy below.
  • If the red diamond is in open air beside your route, collect it as you pass.
  • If the diamond is directly over a dangerous creature, secure a landing or a safe firing angle first.
  • If you lose track of the character while watching the GEMHIGH bar, look back to the white figure in the central shaft. The bar can wait.

A run can give you several chances to spend gems. You do not have to pick up every single one. Learning the path and keeping health for a later shop will help more than taking a hit for a small amount of money.

How to read a shop before spending

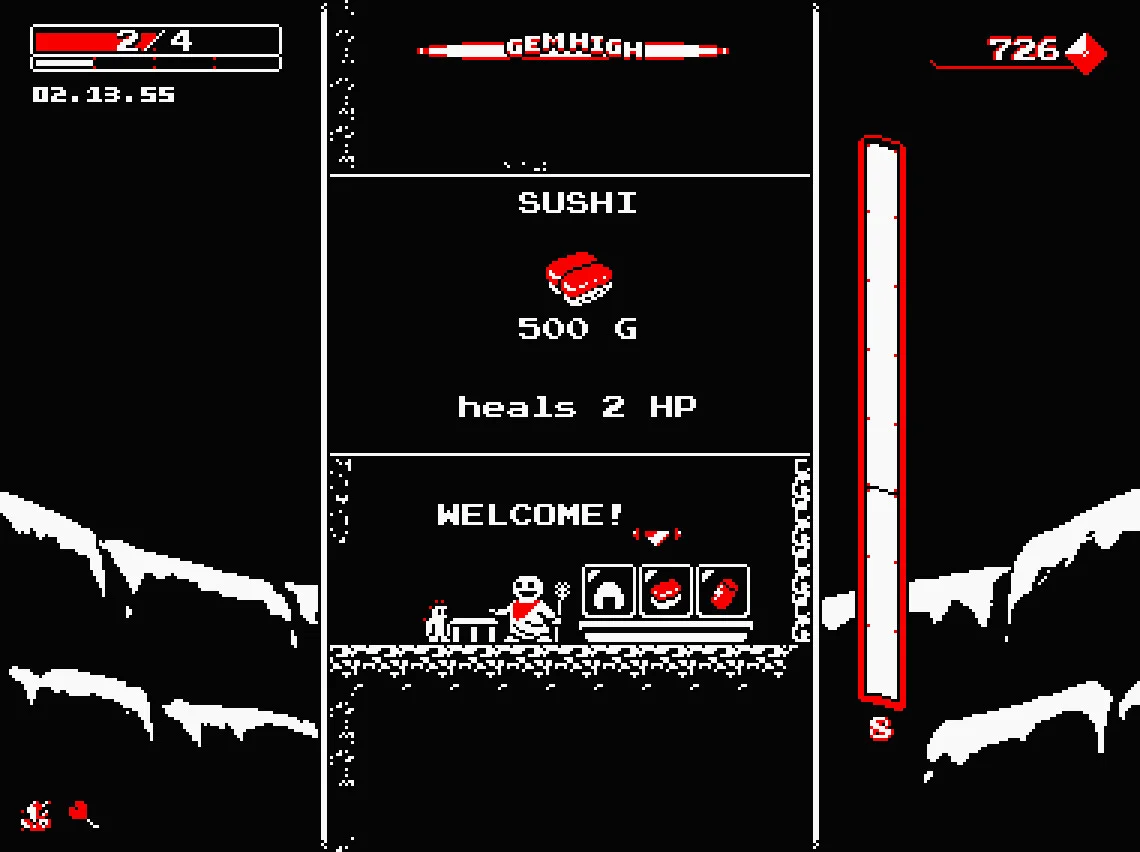
Downwell shop screenshot showing the words SUSHI, 500 G and heals 2 HP above the shopkeeper and three small item icons.
This real offer says SUSHI, costs 500 G and heals 2 HP. Compare 500 with the gem number at the upper right before choosing it.

When you enter a shop room off the well, stop moving and read the offer. The example in the screenshot is SUSHI. The big 500 G is its price, and the line below says it heals 2 HP. This exact offer is only an example: a different shop or run can show a different item. The three little icons near the shopkeeper are things you can look through, not three health bars.

  1. First look at your health in the upper-left corner. Are you missing health, or are you already full?
  2. Next read the item name, its gem price and the effect line in the middle of the shop screen. Do not decide from the picture alone.
  3. Now compare the price to the gem total at the upper right. If you have enough and the effect helps your current problem, follow the on-screen selection prompt to buy it. If not, save the gems and continue.

A shop is a choice, not a required stop. On a low-health run, a clearly labeled heal may be worth more than a flashy item whose effect you do not understand yet.

What changes on the next attempt

Downwell changes its level layout between runs. If you die and restart, the exact ledge and shop positions may not repeat. What stays useful is the small routine you just learned: locate the white figure, check health, check Gunboots charge, look below, take a short fall, then decide about gems or a shop. That routine is more reliable than memorising a screenshot as a map.

You can find different Gunboots weapons and choose upgrades between levels. Read the name or effect shown by the game before choosing one. A new weapon can feel unfamiliar for a few drops because its shot pattern may be different, so use the next safe ledge to test it. Do not assume the weapon in one screenshot is the one every run begins with.

The screenshots in this guide show later moments as well as an early shop. Their health totals, gem totals and exact enemies are examples, not numbers you must match. If your screen shows 4/4 while a picture shows 2/6, the position of the health display still tells you where to look.

A simple plan for your first run

  1. At the top of the well, find the white character and read the health fraction at top left.
  2. Tap left and right on safe ground. Jump once, then tap the action button in the air so you can see the downward shot.
  3. After each short descent, look beneath the character. If the next stretch is crowded, move toward a gap instead of chasing a gem.
  4. Watch the tall Gunboots charge bar on the right. Land on a clear surface before you run out of shots.
  5. Collect easy red gems, but compare the upper-right total with a shop price only when you actually reach a shop.
  6. At a shop, read the item name, price and effect. Buy for a problem you have now, especially missing health, rather than pressing a button because an icon looks exciting.

If you die, you have still learned where to look. Downwell is built around trying again with a fresh layout. The win on your first few attempts is being able to read the screen quickly enough to make one safe choice at a time.

Quick answers when something feels wrong

  • The Gunboots do not fire: check the charge bar on the right. If it is empty, aim for a safe landing to refill it.
  • You jumped instead of firing: you were on the ground. The action button changes from jump to fire once you are airborne.
  • You keep losing health: watch the gap below the white character, not only the gem total. Make a short landing when the path is unclear.
  • You cannot buy the shop item: compare the upper-right gem total with the price followed by G in the shop.
  • Your screen does not match the screenshot exactly: layouts and items change between attempts. Use the position of each display, not the example numbers.

Get Pixel Twelve's biggest stories first.

Add as a preferred source on Google