Pixel Twelve
DOOM Eternal Beginner Guide: Health, Armor, Ammo and Upgrades

How To

DOOM Eternal Beginner Guide: Health, Armor, Ammo and Upgrades

A visual first-hours guide to DOOM Eternal’s Glory Kill, Flame Belch and Chainsaw resource loop, movement, Cacodemon weak point and upgrade screens.

By Mason CarterGame: DOOM EternalVerified Sep 24, 2026
Guide Type
How To
Last Verified
Sep 24, 2026

Guide details

Overview

A visual first-hours guide to DOOM Eternal’s Glory Kill, Flame Belch and Chainsaw resource loop, movement, Cacodemon weak point and upgrade screens.

Start here: what the game is asking you to do

Choose Campaign if you want the story. You see the world through the DOOM Slayer’s eyes, and most fights happen in arenas full of moving enemies. DOOM Eternal expects you to move and take supplies from enemies during the fight, not wait behind a wall for your health or ammunition to refill.

This guide uses action names such as Glory Kill and Dash, not a single button list: buttons differ between PC, console and custom layouts. If an action is unfamiliar, pause the game, open Settings, then Controls, and find that action’s current binding. The game also shows a tutorial prompt when you first gain an ability. You do not need to know every weapon before trying the three actions below.
1. Learn the three ways to refill your supplies

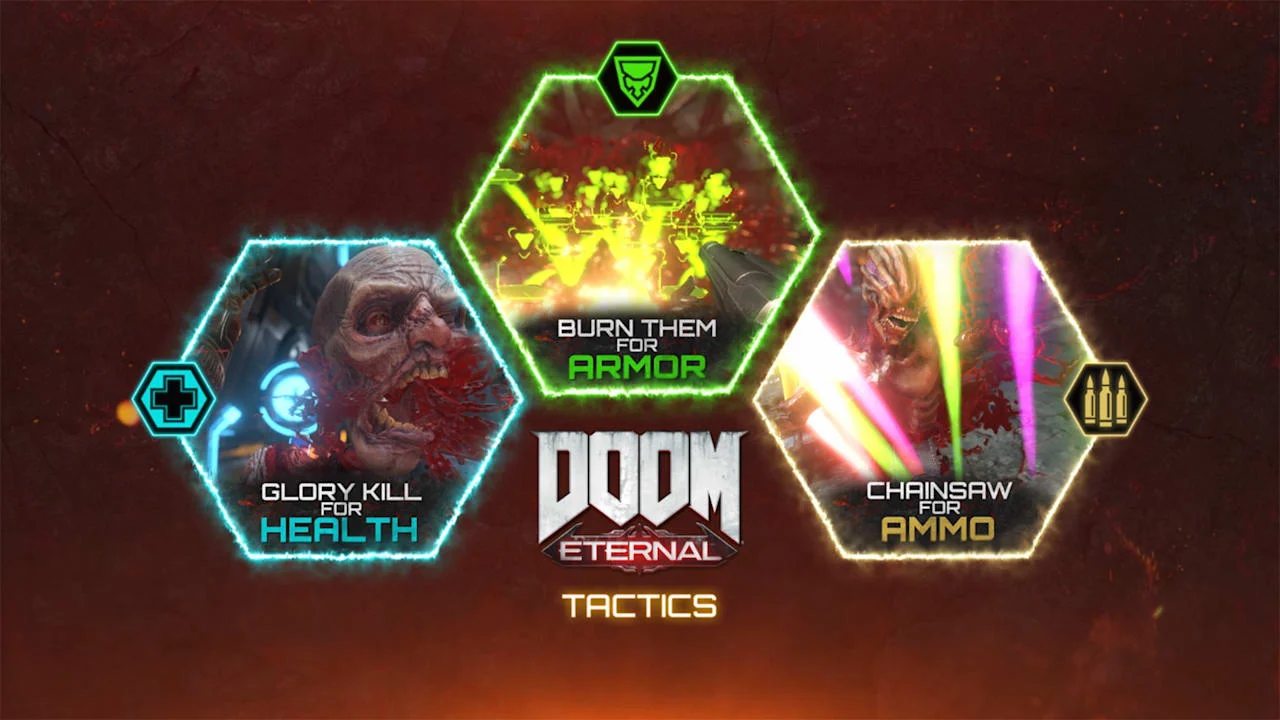
Official DOOM Eternal diagram with Glory Kill for health on the left, burning demons for armor in the middle, and Chainsaw for ammo on the right.
Read the diagram left to right: Glory Kill = health, Flame Belch on enemies = armor, Chainsaw = ammo. These are three different actions, not three names for the same attack.
  1. Need health? Damage a smaller demon until it begins to flash and stagger. Move close and use the Glory Kill/Melee action. Look for the health pickups that appear after the finishing move.
  2. Need armor? Once Flame Belch has been unlocked, use the shoulder-mounted flame on enemies and damage them while they burn. Pick up the armor pieces they drop. Just shooting an unburned demon does not give the same armor reward.
  3. Need ammo? Find a smaller demon and use the Chainsaw action while you have fuel. Collect the ammunition that spills out. If it will not start, check your fuel rather than repeatedly shooting an empty gun.

These abilities arrive through the opening campaign, so do not hunt for a missing ability before the game gives it to you. If your current fight lacks one of them, use the tools you already have and return to this loop after its tutorial appears.

2. Pick a safe target before a big demon corners you

One large red flying Cacodemon fills the left side; two thin zombies stand on the ground below it.
The floating one-eyed Cacodemon is the big threat. The two thin zombies below it are easier targets to weaken for a Glory Kill or Chainsaw when you need supplies.
  1. Scan the arena for a smaller zombie before you focus only on the largest enemy. In the image, one stands at the lower-left and another is close to the middle of the floor.
  2. Keep space between yourself and the large demon. If you need health, weaken one small enemy until it flashes, then close the gap for a Glory Kill. If you need ammunition instead, use the Chainsaw on a small enemy with fuel available.
  3. After collecting the pickups, move again. The large enemy is still active; a refill is a chance to keep fighting, not a pause button.

A strong target may require more Chainsaw fuel than a small one. When the Chainsaw refuses to work, do not assume the game is broken: check the fuel and choose a smaller target.

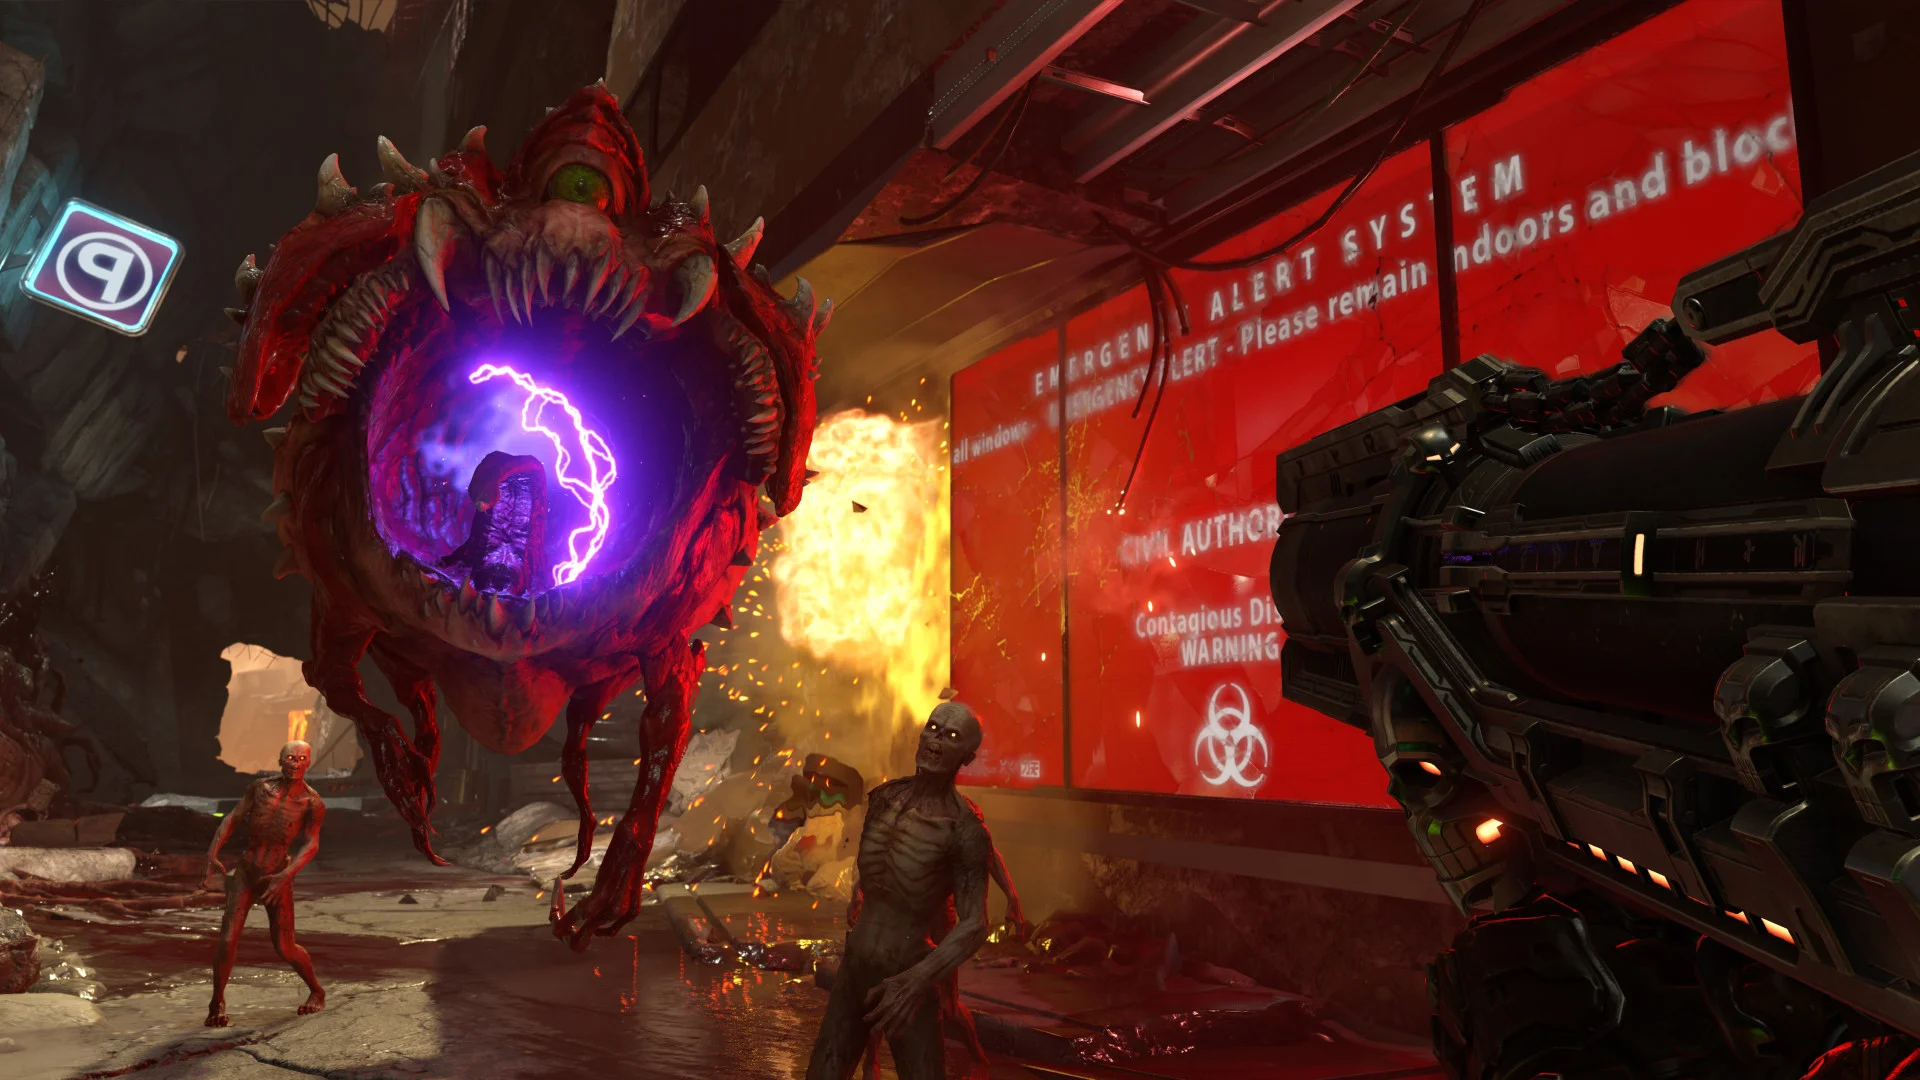
3. Use the Cacodemon’s open mouth, not just its body

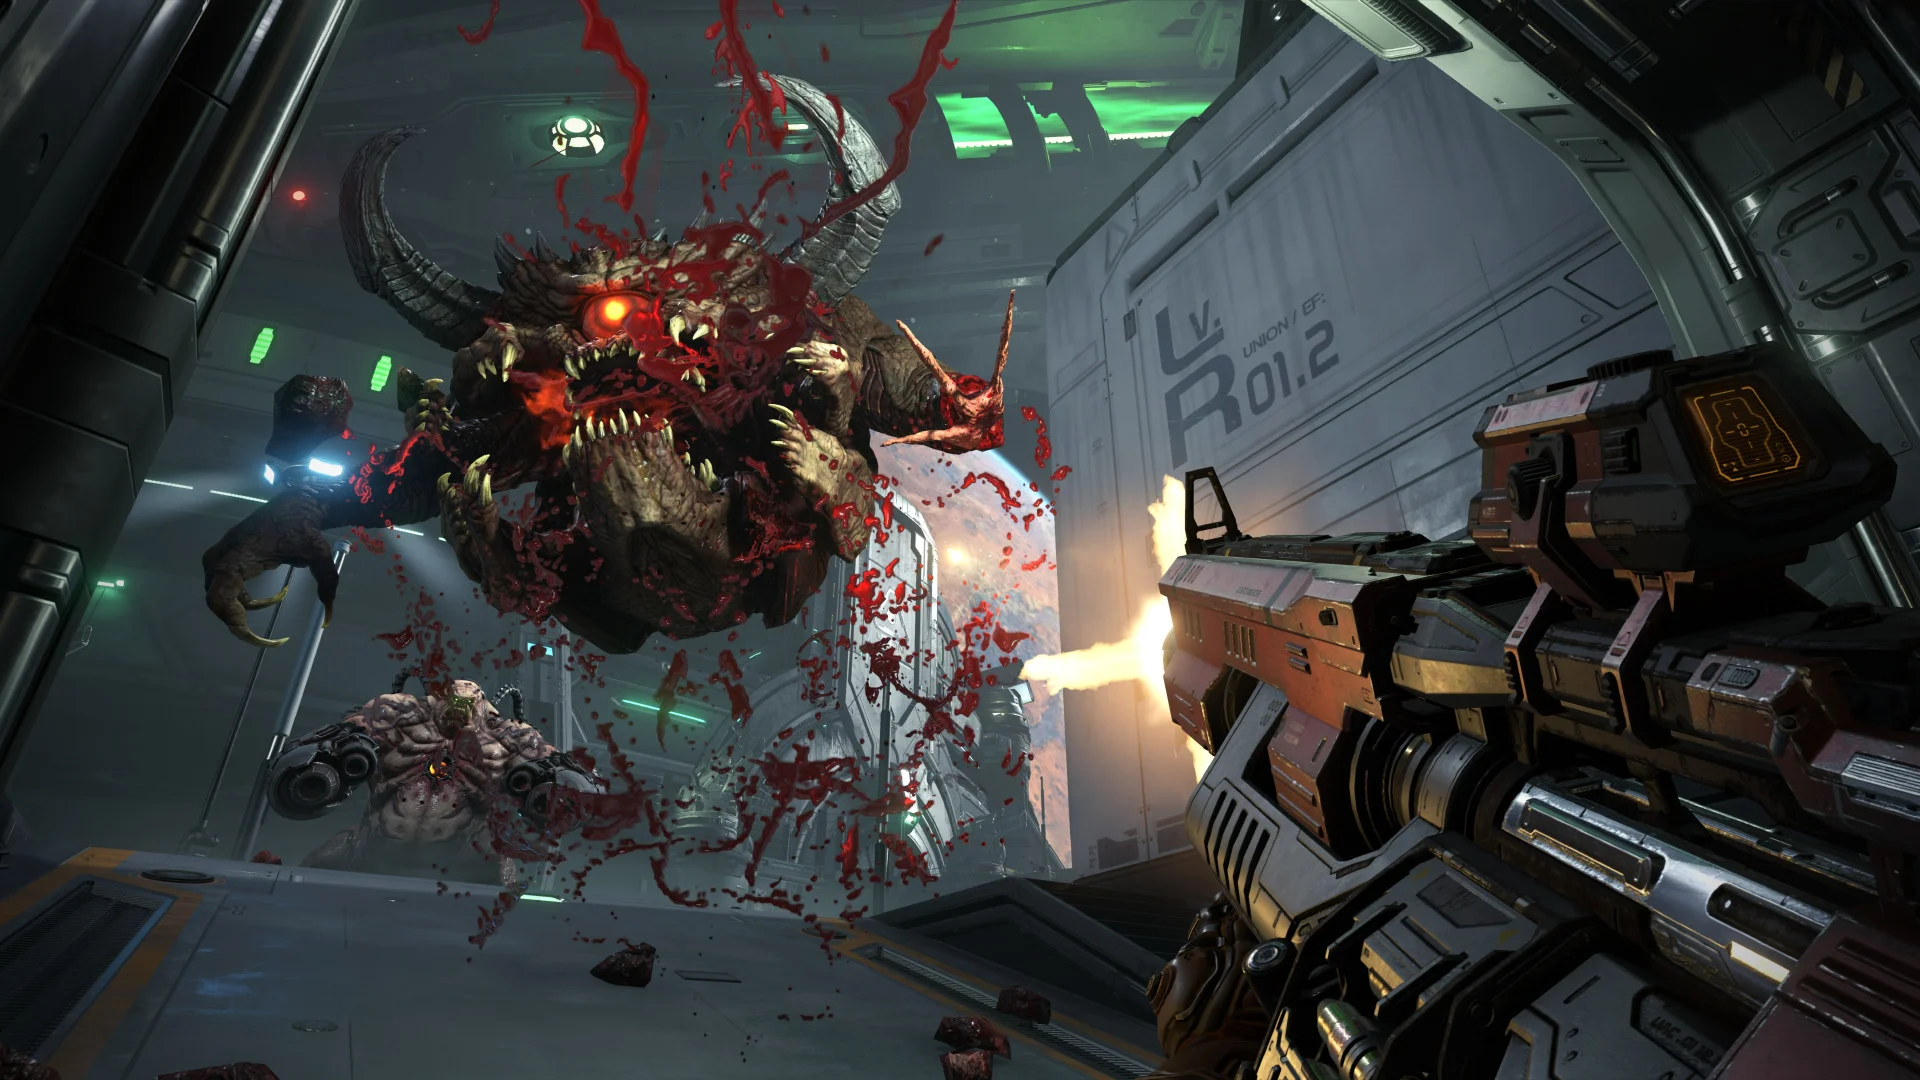
A red floating Cacodemon opens its wide mouth in front of the player’s gun.
Look at the floating demon’s huge open mouth. Once you own the Combat Shotgun’s Sticky Bomb mod, aim the explosive into that opening to stagger this type of demon.

A Cacodemon is the round, floating red demon with one eye and a mouth wider than its body. The official id Software guide points to a specific answer: the Combat Shotgun’s Sticky Bomb mod. This is a weapon attachment, not the ordinary pellet shot.

  1. When you have unlocked Sticky Bomb, select the Combat Shotgun and activate that mod. Watch for the Cacodemon to face you with its mouth open.
  2. Aim the launched explosive into the mouth, then use the opening while the demon is staggered. If you only have the basic shotgun, keep moving and use your other attacks until you gain the mod.

The screenshot shows what to recognise; it is not a promise that every Cacodemon stands in the same spot. Look for the shape and mouth, not the red room behind it.

4. Dash across a gap only after the ability unlocks

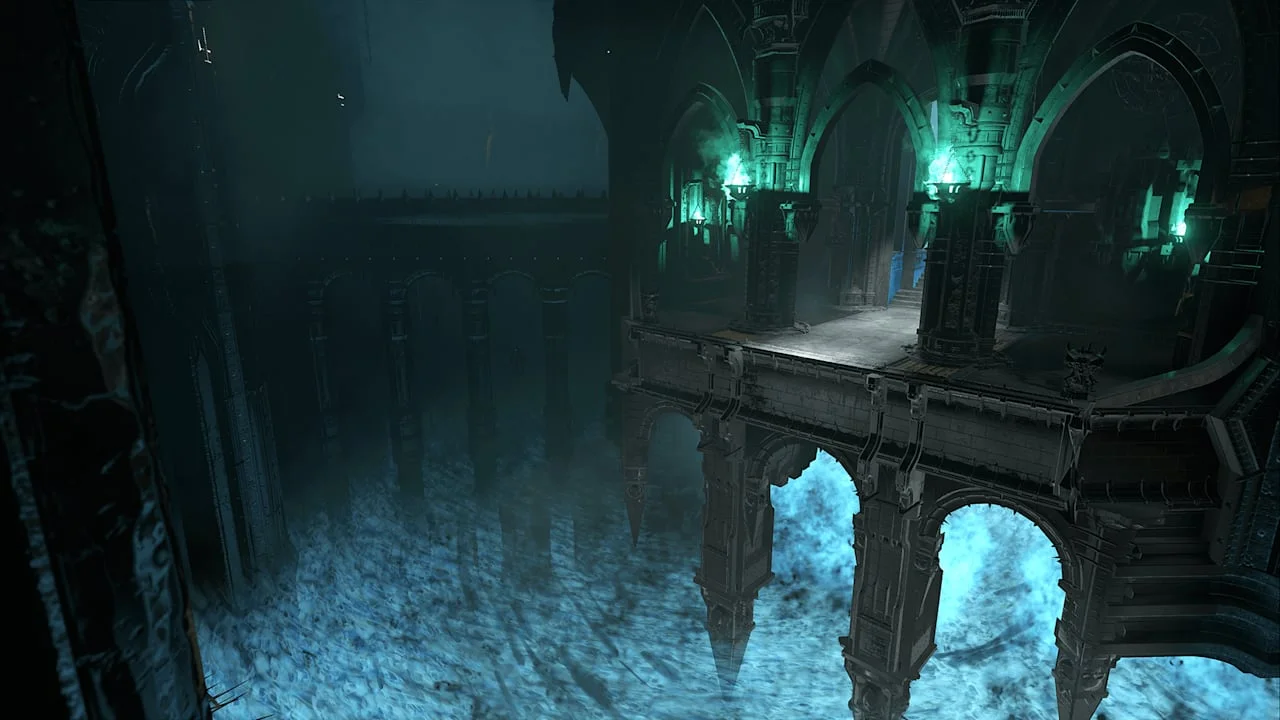
DOOM Slayer faces a gap between broken platforms in a ruined level.
The broken platform and far ledge show the kind of gap Dash helps cross. Aim toward the ledge, jump, then Dash in midair after the campaign grants the ability.
  1. Look for a clear landing ledge across the gap. Do not jump toward a wall with no visible place to grab.
  2. Once the Dash tutorial appears, move toward the edge, jump, and use Dash in the direction of that ledge. Dash works in the air as well as on the ground.
  3. You can Dash twice quickly, then must wait for it to recharge. Some later routes include a Dash Refill that resets the count, but a beginner can first practise crossing a single gap.

In combat, the same movement helps you sidestep projectiles and reposition. If a gap seems impossible early on, check whether the story has actually given you Dash yet.

5. Find weapon mods and upgrades in the Arsenal tab

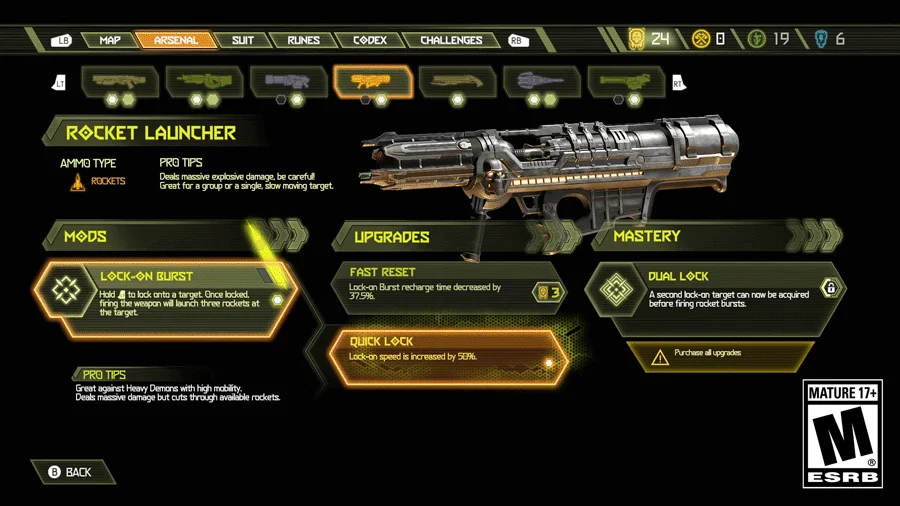
DOOM Eternal pause menu with Arsenal highlighted at the top, weapon icons beneath it, Mods on the left, Upgrades in the center and Mastery on the right.
Open the in-game menu and choose ARSENAL at the top. Select a weapon icon below; its MODS, UPGRADES and MASTERY panels are laid out left to right.
  1. Pause and open the in-game menu. At the top, find the row labeled MAP, ARSENAL, SUIT and RUNES. Choose ARSENAL, the orange-highlighted tab in the screenshot.
  2. Choose a weapon from the picture icons directly below the tabs. The large picture and name in the middle confirm which weapon you selected.
  3. Read the MODS panel on the left for attachments, then the UPGRADES panel in the center for improvements you can buy with Weapon Upgrade Points. MASTERY on the right is a later goal tied to mod challenges or tokens.

An attachment can change what the weapon does, not merely make a number larger. If a guide says “Sticky Bomb,” check that the Combat Shotgun has that mod selected before trying the Cacodemon trick.

6. Tell Suit perks from Sentinel Crystal upgrades

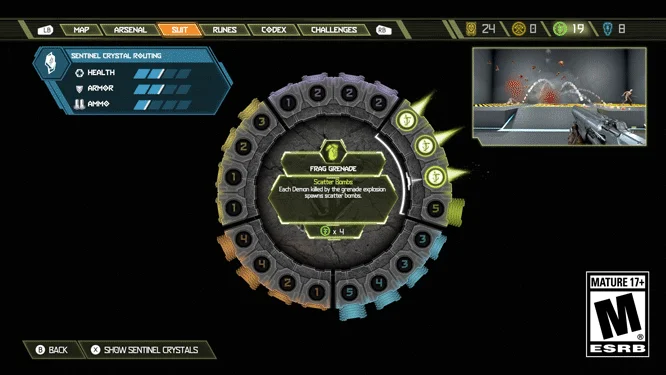
DOOM Eternal menu with Suit highlighted, a circular perk wheel in the center and Health, Armor and Ammo bars on the upper-left.
The SUIT tab is at the top. The wheel in the center holds Praetor Suit perks; the Health, Armor and Ammo bars at the upper-left show Sentinel Crystal progression.
  1. Open the same in-game menu and move one tab to SUIT. In the screenshot it is highlighted in orange. The round set of icons in the center contains Praetor Suit perks, including movement and equipment categories.
  2. Spend a Praetor Suit Point only after reading the perk text in the middle of the wheel. The screenshot’s center describes a Frag Grenade perk; choosing another icon changes that description.
  3. Do not confuse those points with Sentinel Crystals. Crystals are pickups found in levels that strengthen your health, armor or ammo capacity. The three labeled bars on the upper-left show that progression.

Runes are a separate tab beside SUIT. You collect them in levels and equip a limited number at a time. When you reach that system, open RUNES and read the options before assuming every Rune is active at once.

7. Put the actions together in a real arena

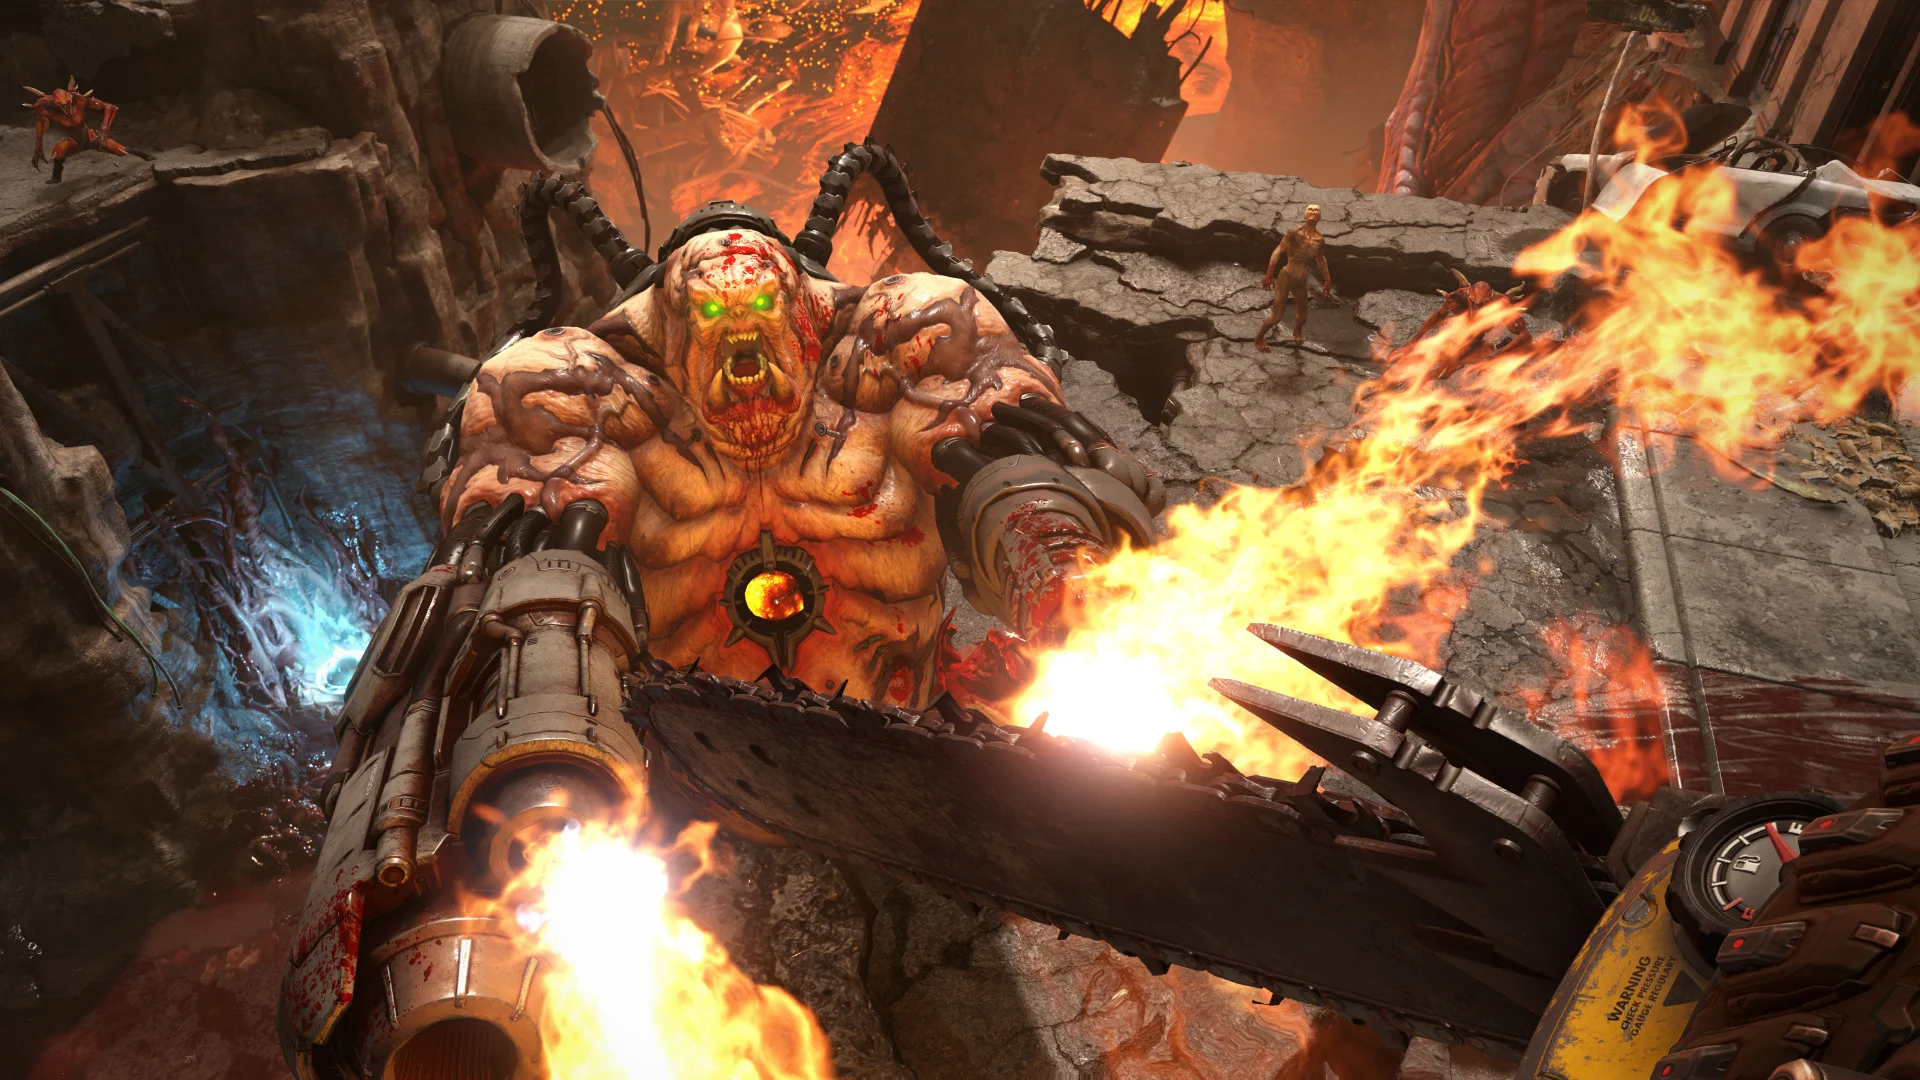
Large Mancubus with arm cannons and a stream of fire stands in front of several smaller zombies.
The huge Mancubus and its arm cannons are the danger here. The smaller zombies farther back can be used for health or ammo; the visible fire is the Mancubus attack, not the player’s Flame Belch.
  1. Locate the big demon first. This one has a bulky body and two arm cannons: a Mancubus. Notice the smaller zombies behind it and the stream of fire coming toward the camera.
  2. Move out of the fire’s path instead of standing in front of its arm cannons. Use a smaller enemy for a refill if health or ammo is low; burn an enemy with your own Flame Belch when armor is the problem.
  3. Return your attention to the big demon after collecting the pickups. Use Dash to break its aim once that ability is unlocked. Repeat the supply loop whenever you are running out of a resource.

Do not mistake every flame in a screenshot for Flame Belch. Here the fire comes from the demon’s arm; the Flame Belch is the Slayer’s own shoulder-mounted action.

Quick fixes when the first hours feel impossible

  • My health keeps falling: choose a smaller demon, weaken it until it flashes, then use Glory Kill. The payoff is health, so you do not need to wait for a hidden health box.
  • I have no armor: after Flame Belch unlocks, burn an enemy, damage it while it burns, then collect the armor pieces. A normal kill is not the same action.
  • I am out of ammo: try the Chainsaw on a small demon and check its fuel. Large targets can require more fuel.
  • A weapon upgrade does not seem to work: open ARSENAL, select the correct weapon picture, and confirm the intended MOD is equipped. UPGRADES and MASTERY are different panels.
  • I cannot cross a wide gap: make sure Dash has unlocked, find the landing ledge, jump and use Dash in the air. Allow the two charges to reset before the next attempt.

Get Pixel Twelve's biggest stories first.

Add as a preferred source on Google