
Pixel Twelve
XCOM: Enemy Unknown Beginner Guide: Move, Dash and Read Cover

How To

XCOM: Enemy Unknown Beginner Guide: Move, Dash and Read Cover

A screenshot-led XCOM: Enemy Unknown beginner guide to blue movement tiles, yellow dashing range and cover shields.

By Nova RainesGame: XCOM: Enemy UnknownVerified Sep 30, 2026
Guide Type
How To
Last Verified
Sep 30, 2026

Guide details

Overview

A screenshot-led XCOM: Enemy Unknown beginner guide to blue movement tiles, yellow dashing range and cover shields.

What this screen is showing

This is the 2012 XCOM: Enemy Unknown, not XCOM 2. The screenshot is a real official PC image from a later mission, so its soldier, weapon and support vehicle are examples—not equipment you are promised in the opening tutorial. The useful parts for a first-time player are the selected soldier, the movement grid and the shield marks beside cover.
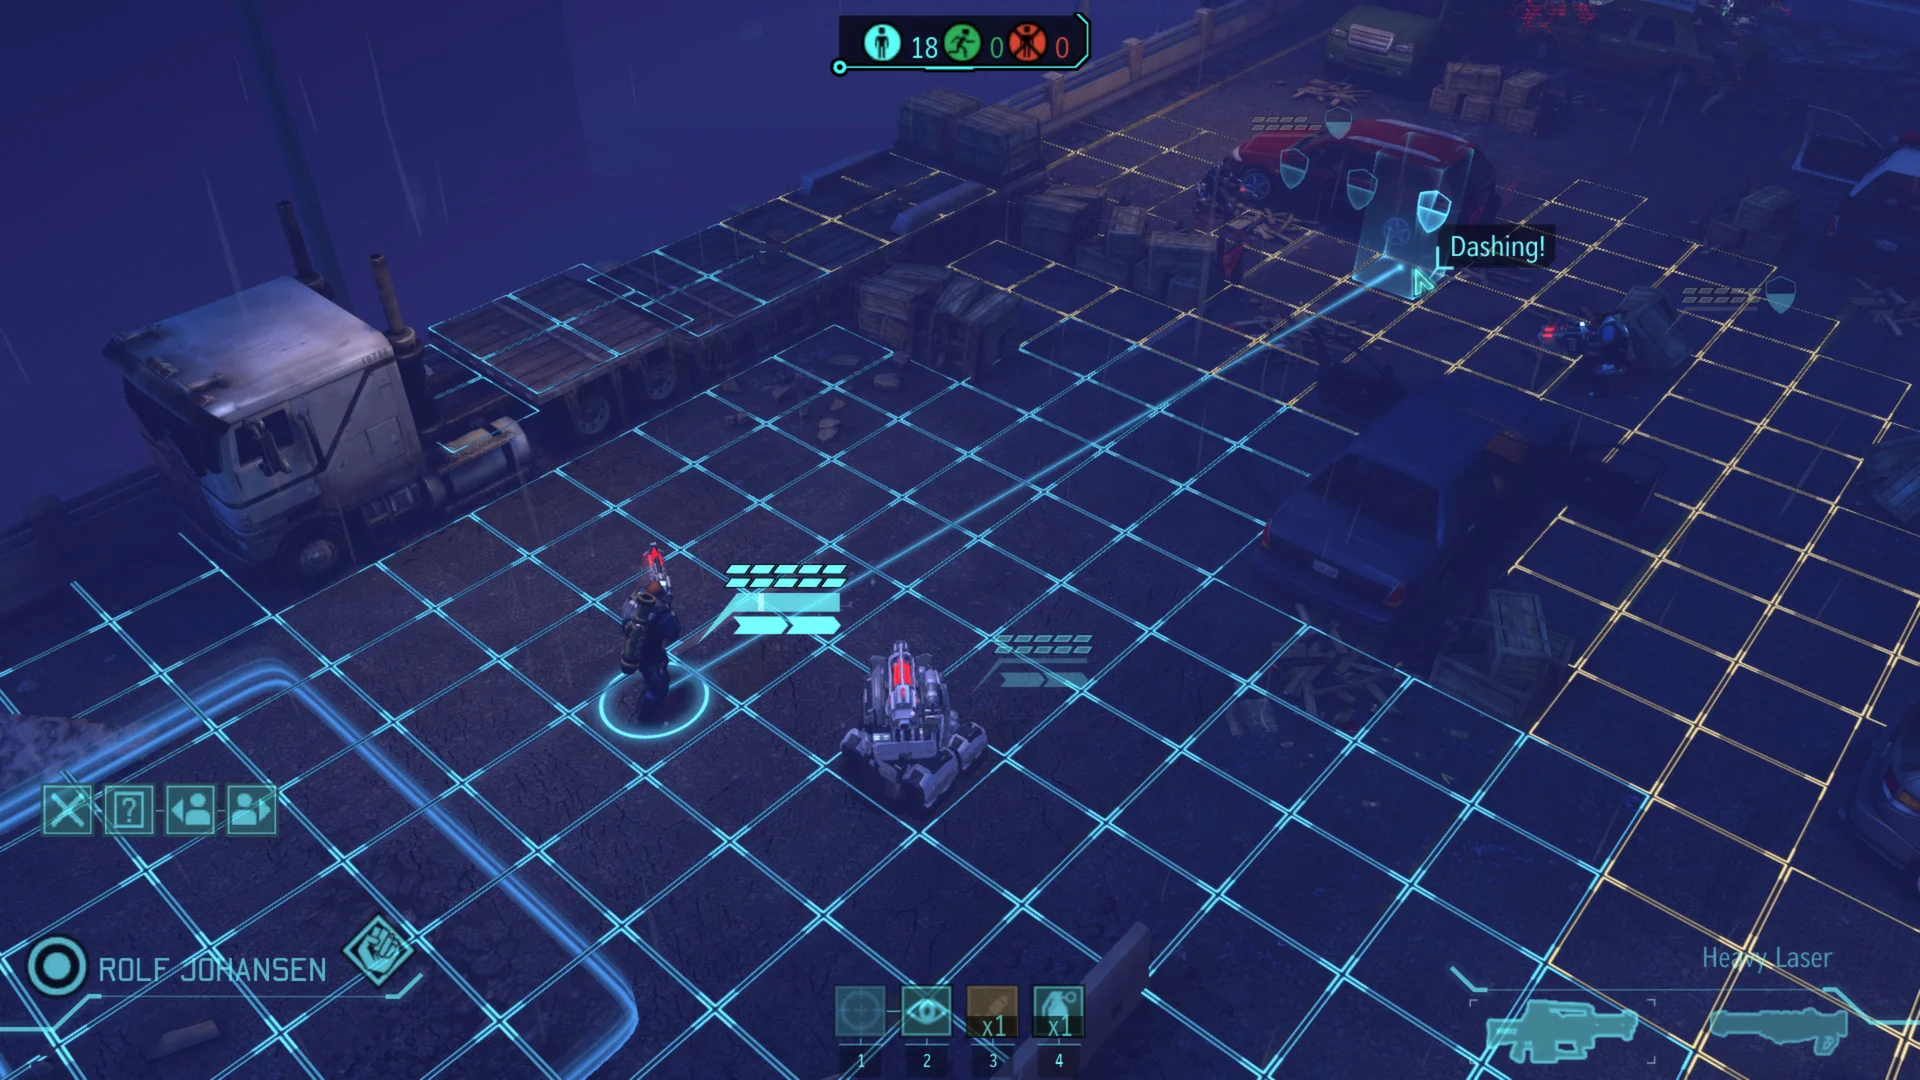
Official XCOM: Enemy Unknown tactical screenshot: a selected soldier stands in blue movement tiles, yellow tiles extend to the right, and shield marks appear near a red car.
Start at the blue ring around the soldier. The yellow area on the right is farther away; the shield marks sit around the red car.

Before you click a destination, pause over it. The preview tells you whether that spot is a normal move or a dash. You can make this decision one soldier at a time; there is no need to move the whole squad at once.
1. Blue move or yellow dash?

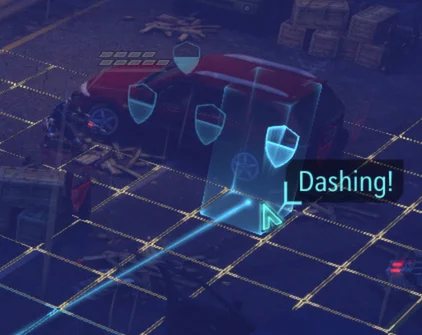
The selected soldier is near the lower-left part of the image. Blue outlined tiles are within a shorter move. The yellow outlined tiles reach farther, and the word “Dashing!” appears near the selected destination. The official PC manual says a soldier normally has two movement points per turn; dashing uses the available movement at once.

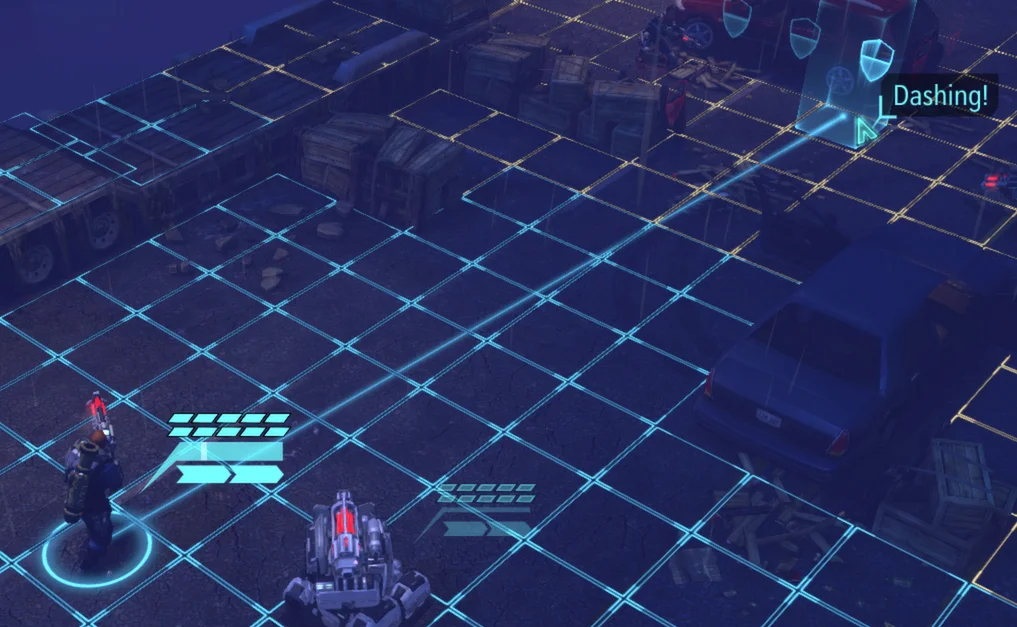
Close crop of the same official screenshot showing the selected soldier, blue short-move grid and yellow dash grid near the red car.
Same screenshot, closer view: blue for the shorter move, yellow for the longer dash. “Dashing!” is visible near the far destination.

If you want to move and still consider a shot or Overwatch, first aim for a blue destination. A dash gets you farther, but do not count on firing afterward. The exact action buttons vary by platform and bindings; choose the action shown by your own game HUD rather than copying a key from a screenshot.

2. Read the shield before choosing a tile

The small shield shapes around the car mark possible cover positions. A full shield means high cover; a half shield means low cover. The official manual says high cover protects more than low cover, while low cover is still better than standing in the open. A yellow shield on your unit warns that an enemy is flanking that position.

Close crop of the official XCOM screenshot showing blue shield cover icons along the cars beside the yellow dash area.
Look for the shield icon by the destination—not just for a nearby wall or car.

Cover is not a promise of safety. Check where visible enemies stand before moving: a barrier helps most from the side it faces. If the shield turns yellow because the soldier is flanked, look for a different angle instead of assuming the car will protect them.

3. Make one careful turn

Try this order on your next mission: select one soldier and find their blue ring; hover a blue tile next to cover; look for the shield; check enemy positions; then commit the move. If an action is still available, decide whether a shot or Overwatch is more useful. Repeat with the next soldier only after you understand the first position.

Choose a yellow dash when the extra distance is worth giving up the remaining movement and other actions for that soldier. If a useful cover tile is inside the blue area, you usually gain more options by stopping there first. This is a decision rule, not a fixed route through every map.

If the colors or controls look different

Make sure you opened XCOM: Enemy Unknown rather than Enemy Within or XCOM 2. This guide uses the original PC manual and an official PC screenshot; a console version or changed control scheme may show different button prompts. Follow the on-screen move preview, and use the full screenshot above to find the blue grid and shield shapes before relying on the close crops.

The screenshot shows advanced gear because it is a later mission. You can use the movement and cover lesson with starting soldiers. For the larger campaign—mission selection, research and equipment—see the linked game profile. This page stays focused on one tactical decision: where a soldier should stop this turn.

Get Pixel Twelve's biggest stories first.

Add as a preferred source on Google
