
Pixel Twelve
Thumper Beginner Guide: Thumps, Turns, Red Bars and Your First Boss

How To

Thumper Beginner Guide: Thumps, Turns, Red Bars and Your First Boss

Learn what to watch on the track, when to tap or hold the action button, how to survive turns and bars, and what to do when a boss pattern repeats.

By Ryan CooperGame: ThumperVerified Sep 26, 2026
Guide Type
How To
Last Verified
Sep 26, 2026

Guide details

Overview

Learn what to watch on the track, when to tap or hold the action button, how to survive turns and bars, and what to do when a boss pattern repeats.

What is Thumper, and what should you watch?

You are the small silver beetle at the bottom of the screen. It races forward automatically on a narrow track. Your job is to react to shapes moving toward it. You are not steering freely through a world: most of your early decisions are about timing a button press or leaning into a bend.

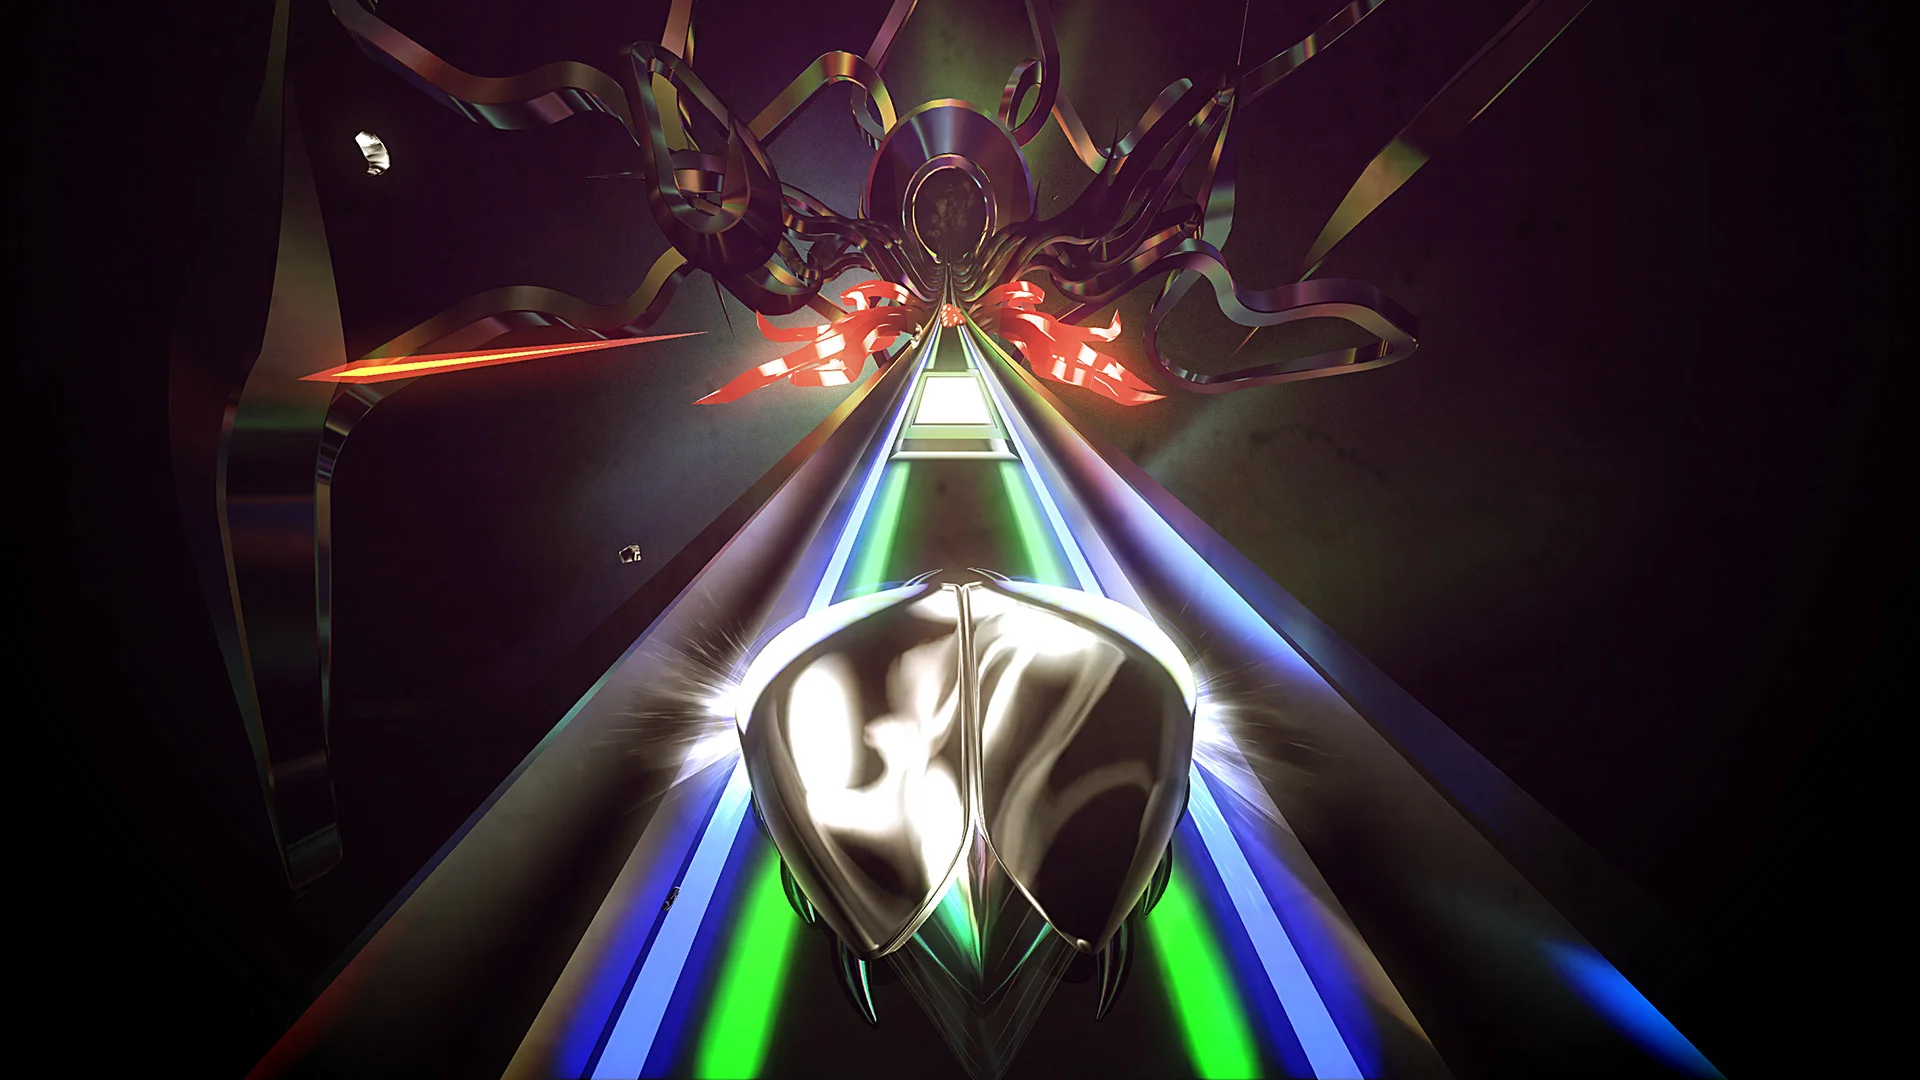
Official Thumper screenshot: a silver beetle in the foreground and a long track ahead under a blue flare.
The real game view. Your beetle is near the bottom; look up the track to see the next shape coming.

Start with the first available level and follow the short prompts the game puts on screen. Drool says the basic actions are taught in those in-game tutorials. If the first few seconds feel loud or fast, focus on the center of the track just ahead of the beetle, not the flashing scenery at its sides. You can play on a normal monitor or TV; a VR headset is optional.
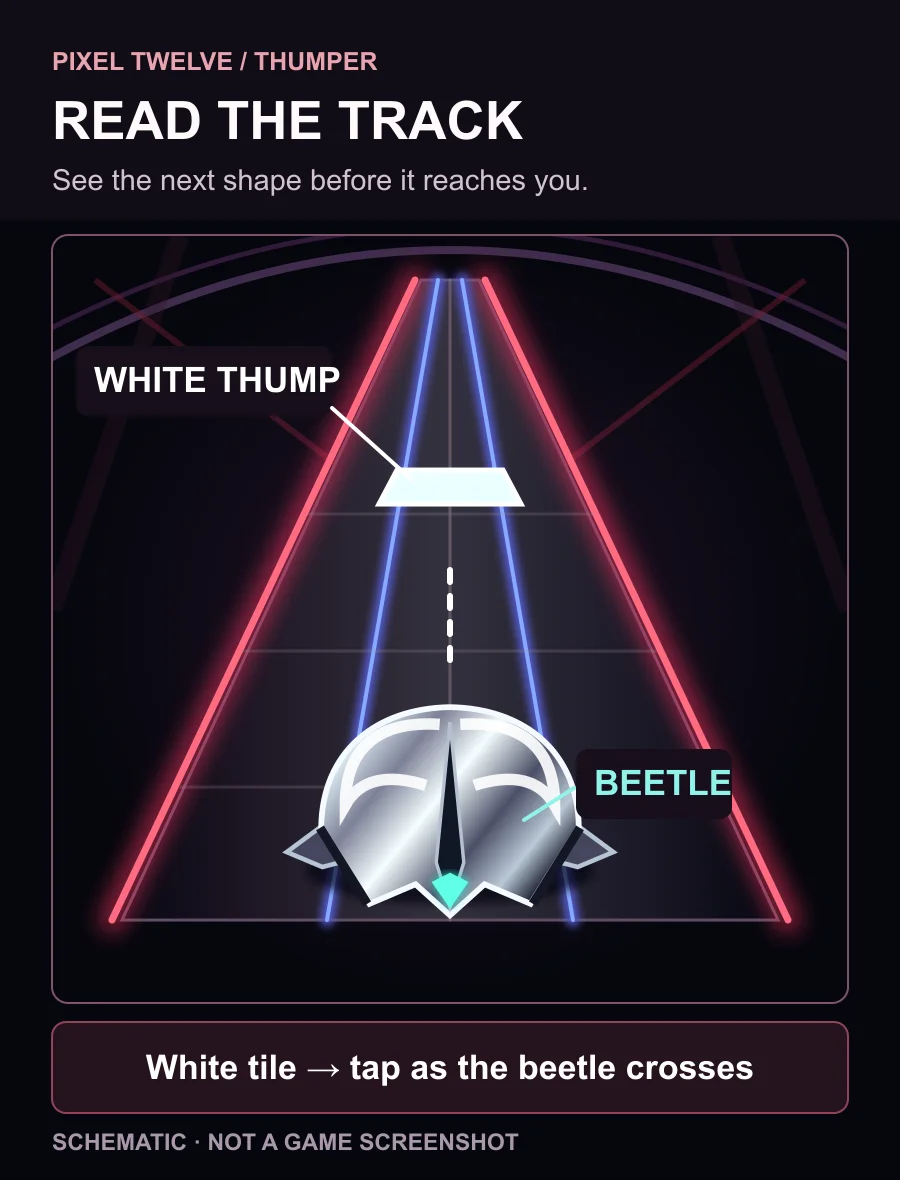
Original Pixel Twelve diagram showing the beetle at the bottom of a track and a white rectangular tile ahead.
Teaching diagram, not a screenshot. This is where to look: the next white tile approaches the beetle from up the track.

Find the action button and movement control

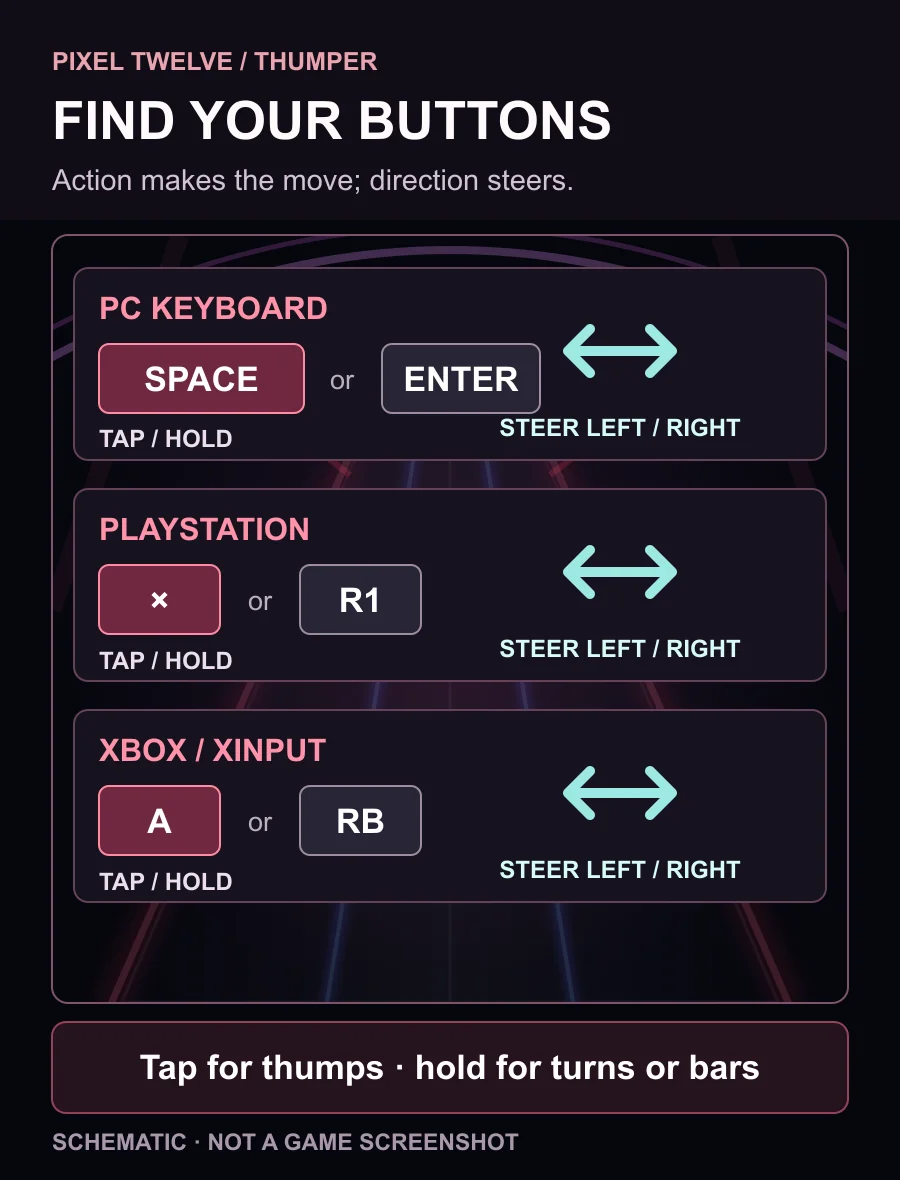
The official manual calls the button used for thumps, turns and slides the primary action. Below, “tap” means a quick press and release; “hold” means keep it pressed while the obstacle passes. You can use either of the listed action buttons for your device.

Portrait control chart from the official manual: PC Space or Enter and WASD or arrows; DualShock 4 X or R1 and stick or D-pad; Xbox A or RB and stick or D-pad.
Teaching chart, not a screenshot. Find your device first, then remember its action and movement inputs.
  • PC keyboard: Space or Enter is action; WASD or the arrow keys provide movement. For a left bend, hold Space or Enter and press left (A or left arrow).
  • DualShock 4: X or R1 is action; the left stick or D-pad provides direction. For a left bend, hold X or R1 and push left.
  • Xbox/XInput controller on PC: A or RB is action; the left stick or D-pad provides direction. For a left bend, hold A or RB and push left.

Drool recommends a traditional controller on PC, but the manual includes keyboard controls. If you remapped buttons in the game, use the label shown by your own control settings instead of the defaults above.

1. Hit the white rectangular thumps

Official Thumper screenshot with a pale rectangular thump tile ahead of the silver beetle on a straight track.
Real gameplay: the bright white rectangle on the track is a thump cue. It gets closer as the beetle moves.
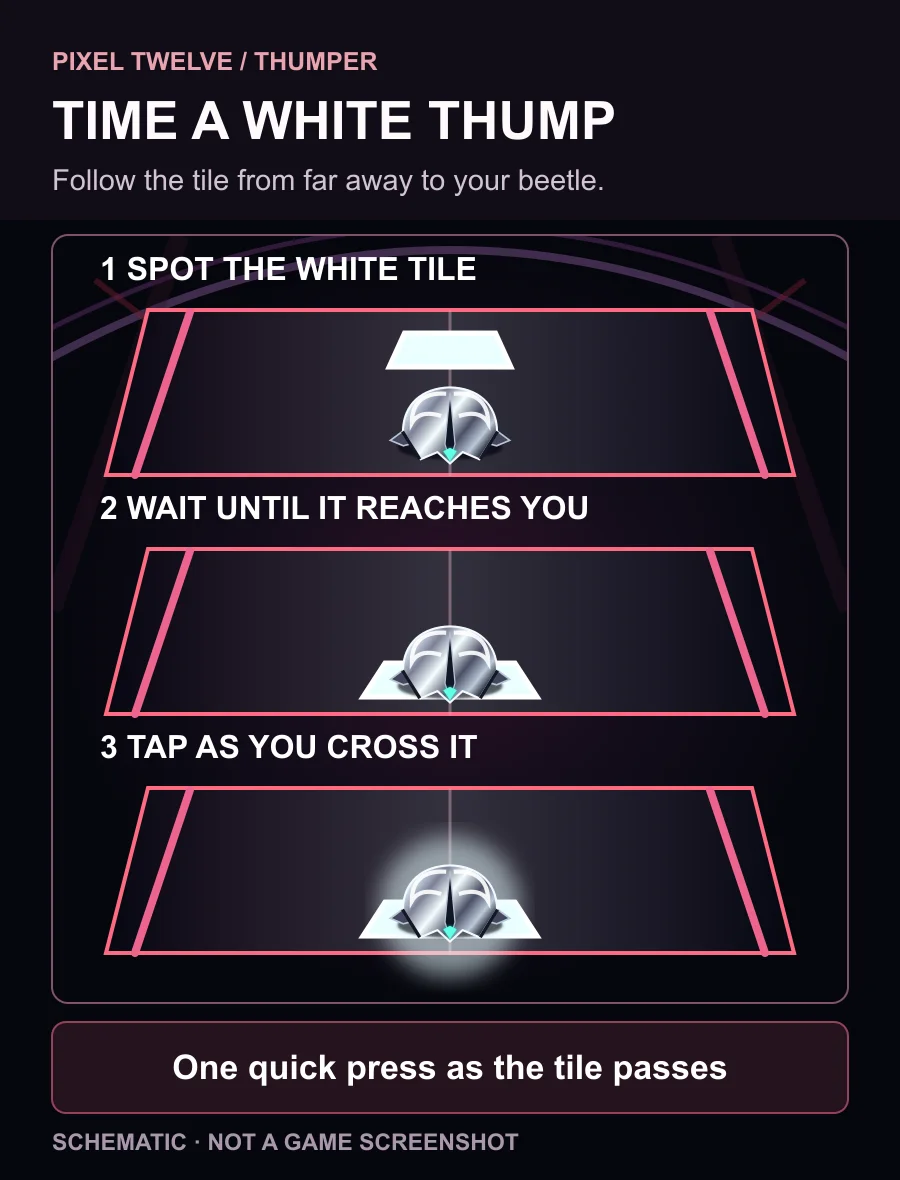
  1. Look along the middle of the track for a white rectangular tile. At a distance it is small; it grows as it comes toward the beetle. This is the basic thump, not a menu icon or a decoration in the background.
  2. Wait until the beetle reaches the rectangle, then tap your action button once: Space or Enter on keyboard, X or R1 on DualShock 4, A or RB on Xbox/XInput. Try to match the impact sound and the moment your beetle crosses the tile.
  3. If you press while the tile is still far ahead, you acted early. If it has already passed beneath the beetle, you acted late. On the next attempt, watch the distance between the front of the beetle and the near edge of the white rectangle. Move your press slightly later or earlier rather than pressing many times at random.
Three-stage Pixel Twelve diagram showing a white rectangle approach a beetle, reach it, and trigger a quick action-button tap.
Teaching diagram, not a screenshot. Spot it, wait until it reaches the beetle, then tap once.

The useful habit is to look ahead, then act at contact. You can use the music as a clue, but a first-time player will learn the timing faster by watching a clear white tile and the beetle together.

2. Bank into a left or right turn

Official Thumper gameplay screenshot of the silver beetle entering a curving neon track.
The real track can bend. Read the direction of the path before the beetle reaches the corner.
  1. Look for the track itself curving left or right. A turn is not another white thump, so a quick action-button tap alone is not enough. Start reading the bend while it is still ahead, before the beetle reaches its corner.
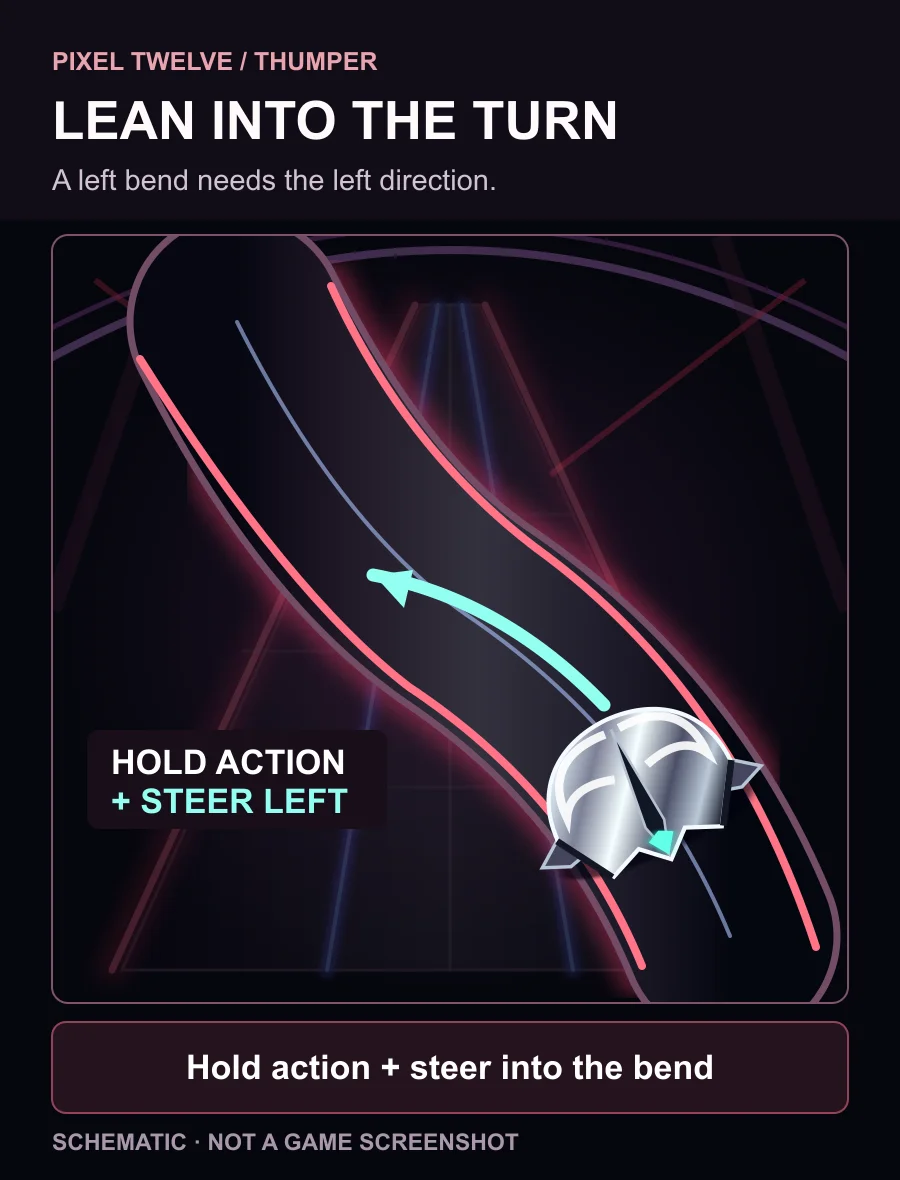
  2. Hold the action button and press or push toward the bend with your movement control: left for a left bend, right for a right bend. Keep holding while the beetle travels through the turn. On keyboard that means Space or Enter plus A/left arrow or D/right arrow; on a controller, hold the action button and push the left stick or D-pad in the turn’s direction.
  3. If you collide, first check the direction you pressed. Then check that you held the action button instead of tapping it. Repeating the same corner with the correct hold and direction is more useful than trying to speed through it.
Original Pixel Twelve track diagram bending left, with a beetle at the near end and the instruction to hold action and press left.
Teaching diagram, not a screenshot. This example bends left; reverse the direction for a right bend.

The manual also describes a “perfect turn” for scoring: you push the stick at the last moment while holding action. Do not chase that bonus yet. Survive an ordinary turn first, then tighten your timing when the route feels familiar.

3. Slide beneath a red bar

  1. Watch for a red bar crossing the width of the track ahead. It is not the white rectangle you tap. The colour and shape tell you to prepare a different move.
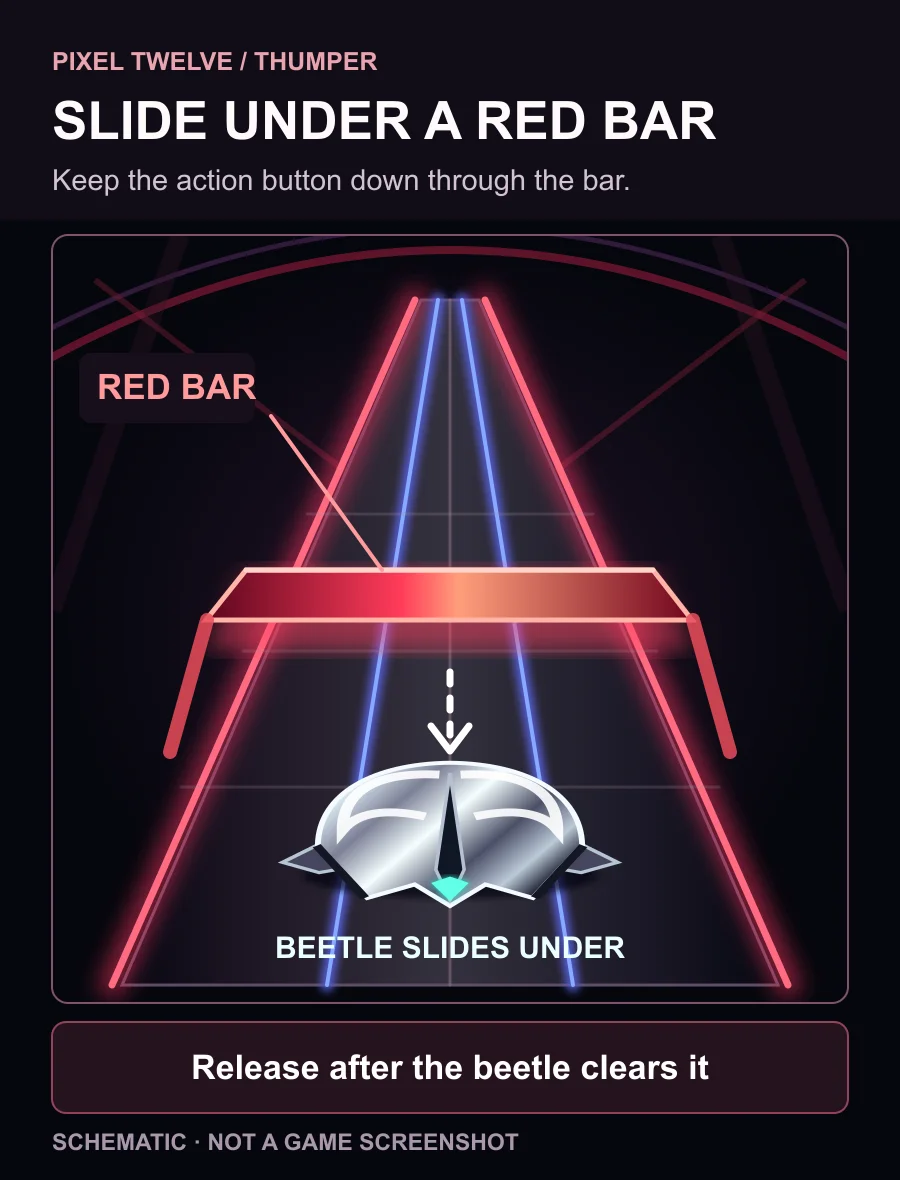
  2. Hold the action button as the beetle approaches the bar. Keep it held while the beetle passes underneath; the hold makes it slide. You do not need to add a left or right input for a straight red bar.
  3. Release after the beetle is clear, then look forward for the next cue. If you hit the bar, ask whether you tapped quickly instead of holding or released before the beetle passed through it.
Pixel Twelve diagram of a red bar across the track ahead of the beetle and an instruction to hold action until past it.
Teaching diagram, not a screenshot. Red horizontal bar = hold action to slide through it.

White rectangle: tap at contact. Red bar: hold through it. That difference solves two of the most common early mistakes. The same action button does both jobs; the length of the press changes.

When the game starts mixing cues

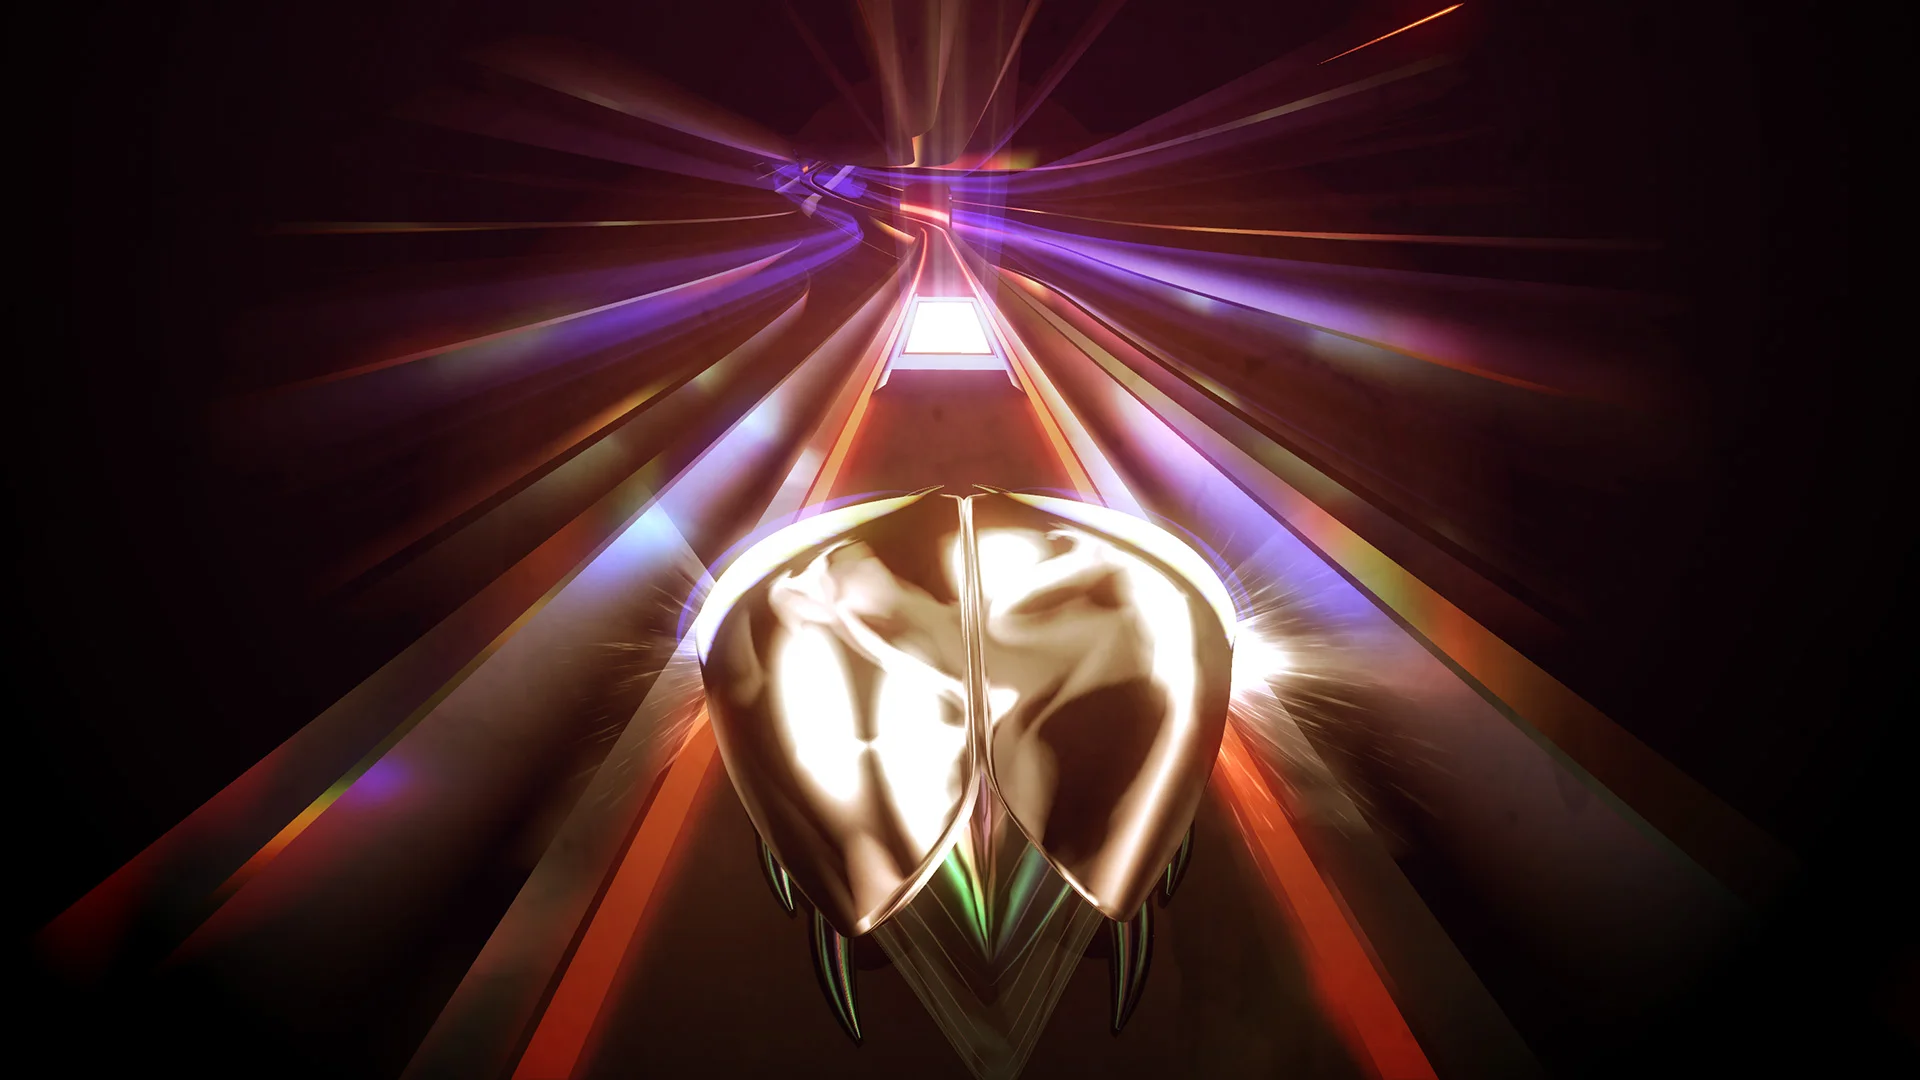
Official Thumper gameplay screenshot with the silver beetle close to a bright white thump tile.
Even when the effects get brighter, find the next track shape before choosing a button press.

After the tutorial isolates each move, cues appear closer together. Read only the next obstacle: a white rectangle needs a timed tap, a bend needs action held with left or right, and a red bar needs action held to slide. You do not have to memorise a long sequence on the first attempt. Do the shape in front of you, then look forward again.

A helpful reset after a mistake is to say the next cue out loud: “white tile, tap”; “left turn, hold and left”; “red bar, hold.” That keeps you from using the previous obstacle’s move on the new one. When you replay a section, notice whether the same two cues occur in the same order; that is information you can use on the next pass.

How the first boss pattern works

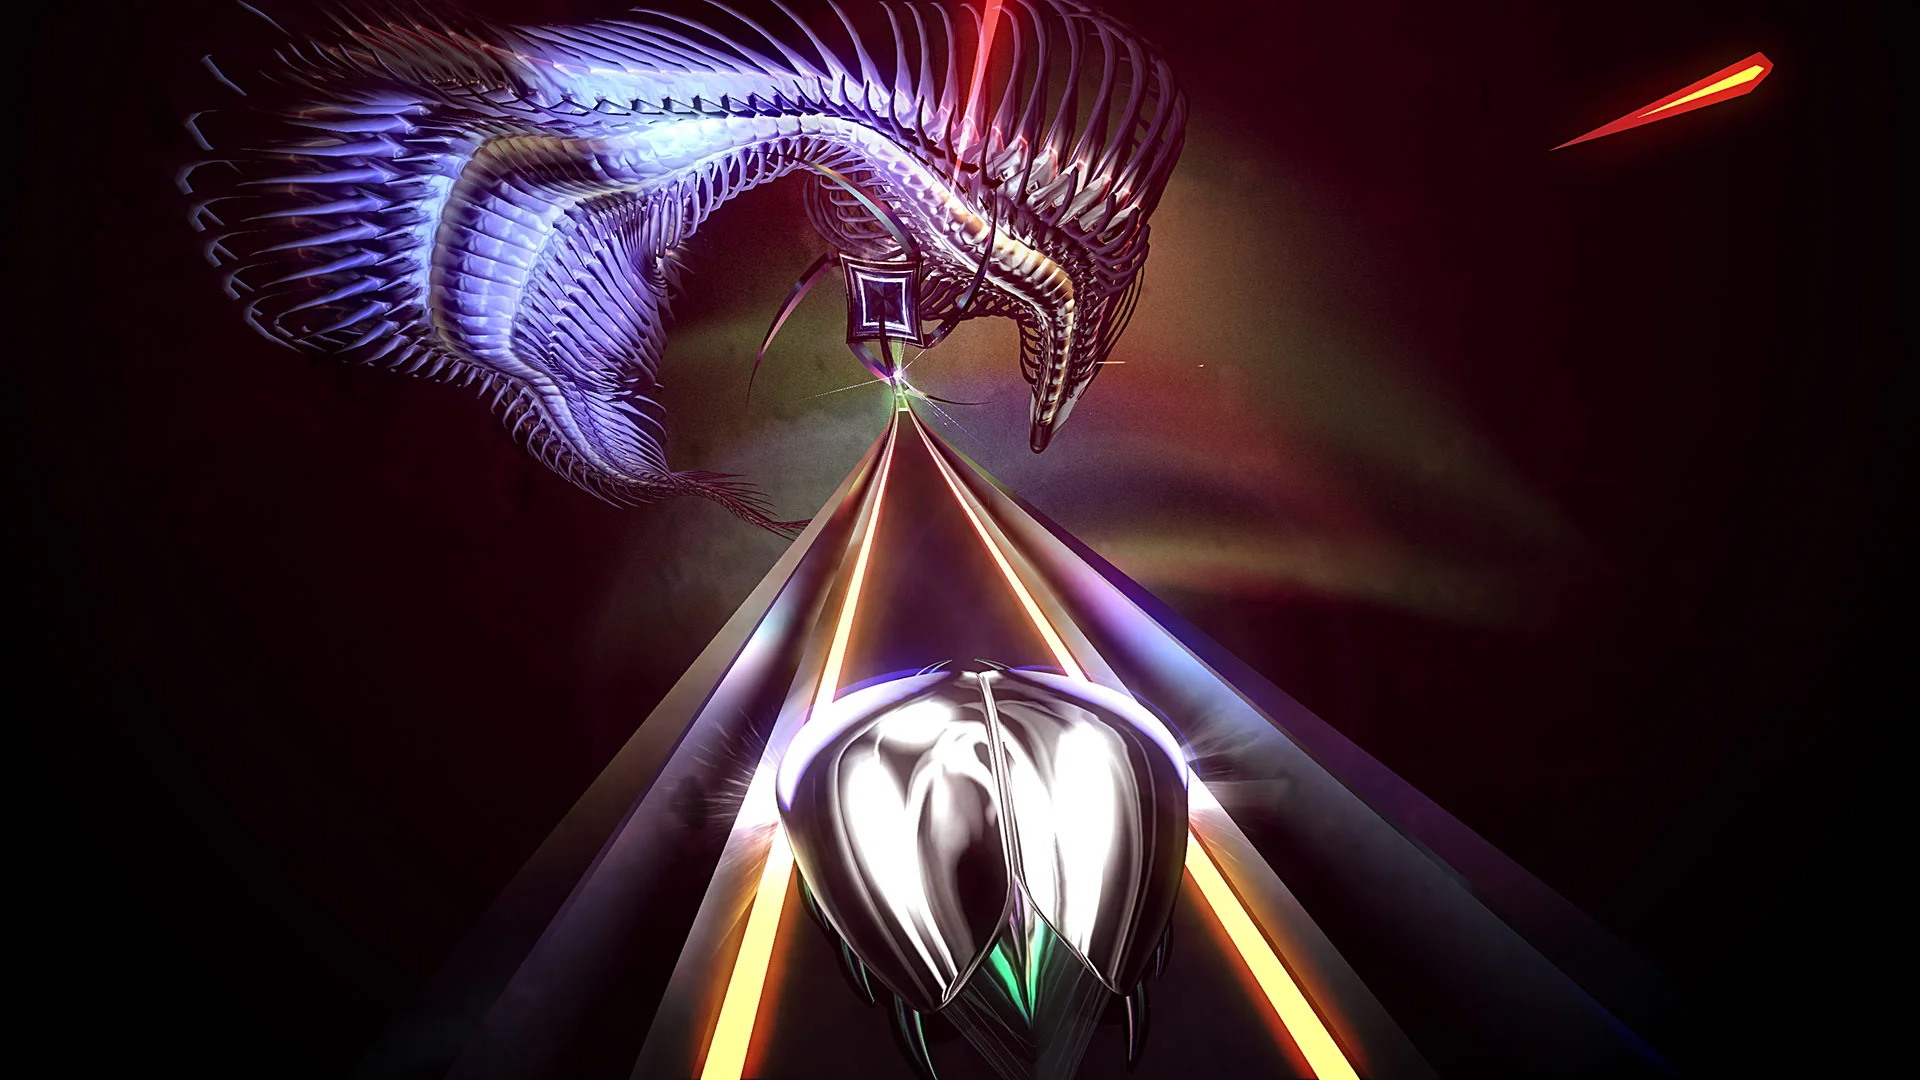
Official Thumper screenshot of a large skull-like boss looming above the track.
A boss is far ahead at the end of the route. Keep reading the near track cues rather than staring at its face.
  1. When a large creature fills the distance, do not ignore the track to watch it. Continue hitting the white thumps, taking turns and sliding under bars. The boss is a destination; the immediate shapes still tell you what to do.
  2. The official manual says a boss pattern loops until you perform it perfectly enough to fire the green energy weapon. If the same sequence returns, that does not mean the game failed to advance. It is giving you another chance at that pattern.
  3. Use each loop to learn one trouble spot. If a white tile was missed just before a bend, focus on that pair next time. Watch for the green energy attack after a clean sequence; it signals that the pattern worked and the boss took a hit.

Bosses later in the game add new demands, so this is only a first-boss routine. The important early lesson is that repeating a pattern is normal and a clean run through its track cues is the way forward.

Damage, quick restart and the difference between finishing and ranking

If the beetle takes damage, watch its protective shell and keep playing when the game allows it. A missed scoring cue and a crash are not the same thing. Do not quit a run solely because you missed one white thump; finishing the section still teaches you what comes next. The manual says some bonus-thumps can restore a lost shell, but you can learn those optional scoring routes later.

Need to restart the current level? The official manual lists L1 on DualShock 4, LB on Xbox/XInput, or R on a PC keyboard to bring up the Quick Restart menu during a level. These are menu shortcuts, not the buttons you use to hit a thump.

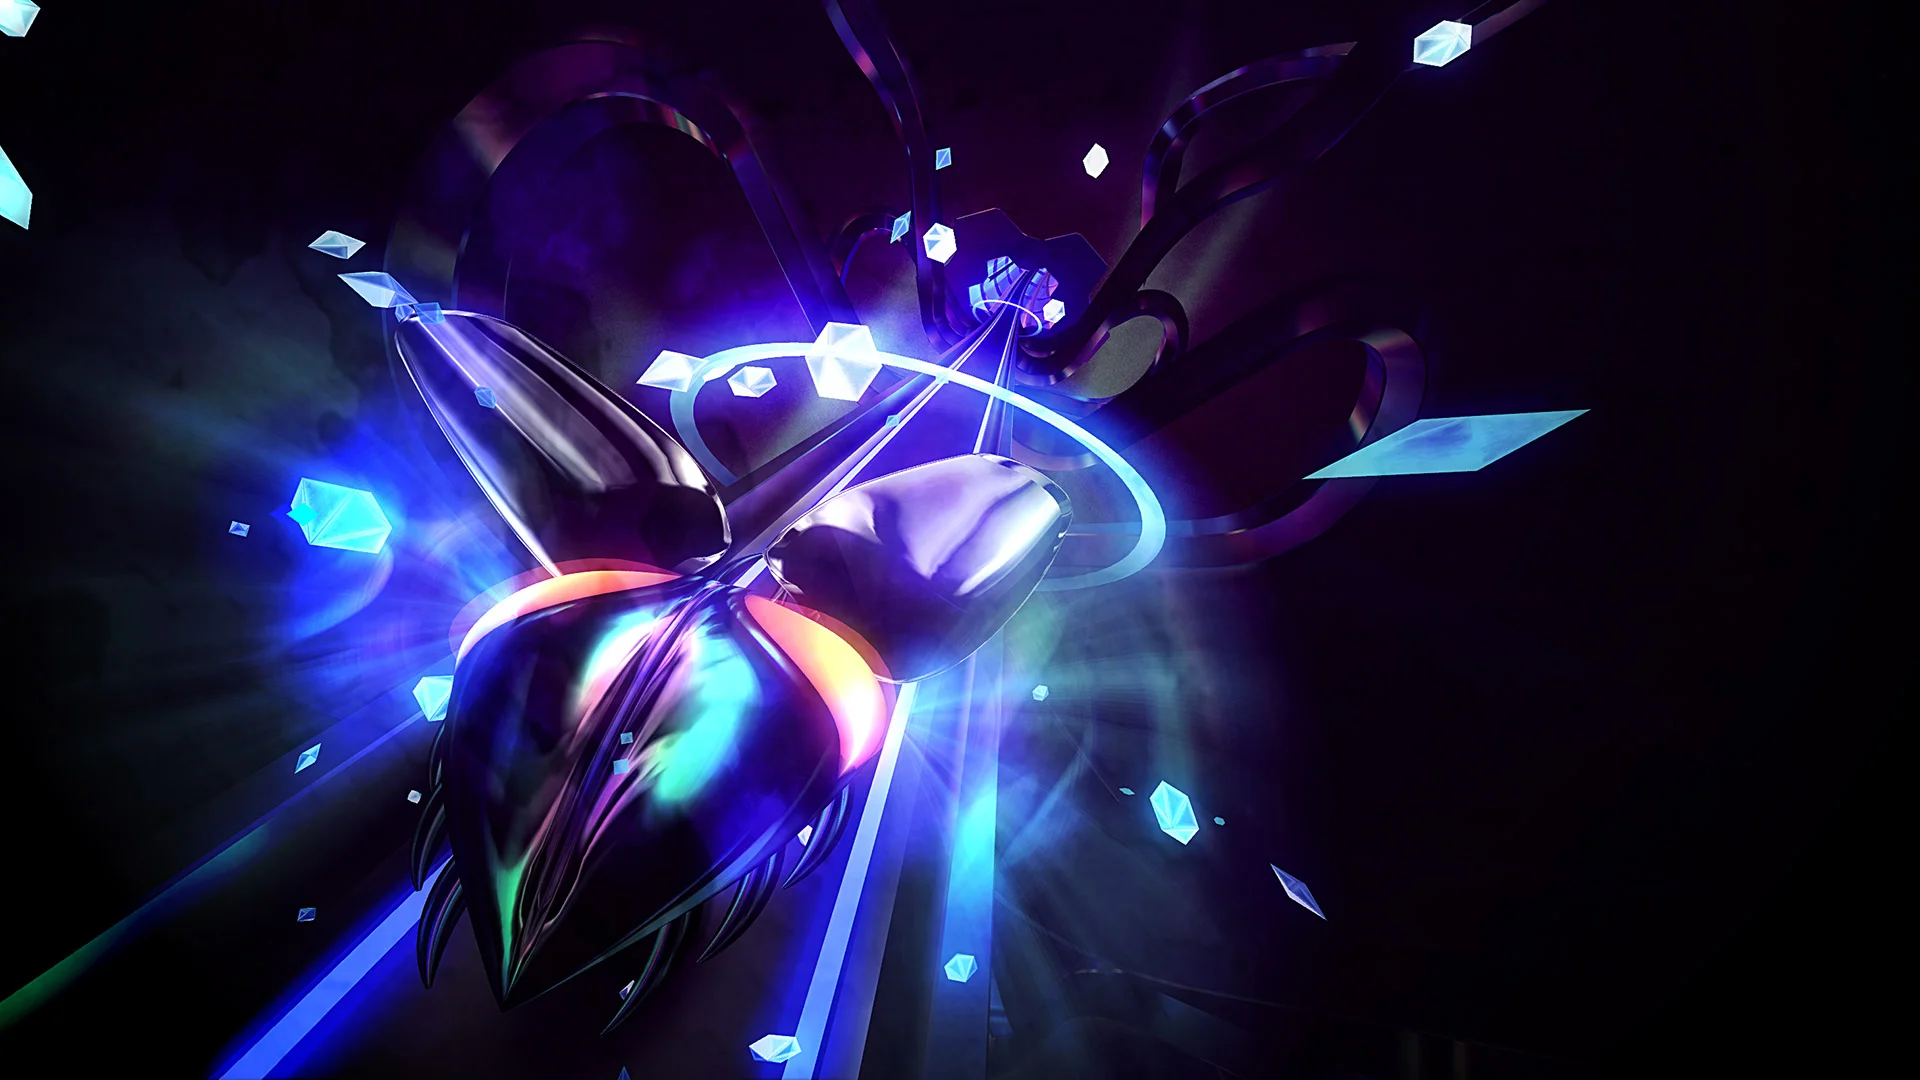
Official Thumper screenshot with blue shards and gems around the metal beetle.
Blue gems are points. Collecting more and avoiding damage helps a rank, but learn survival before chasing a perfect score.

Each sub-level receives a C, B, A or S rank. To improve it, the manual recommends hitting thumps, sliding into red bars, avoiding damage and turning cleanly. You do not need an S to understand the level. First finish it; then replay a short section to fix one specific mistake. That is a more manageable goal than trying to do every move perfectly on the first run.

Moves you will learn later, not on the first screen

The manual describes jumping by hitting a thump while holding up, then holding the action button while airborne to travel farther. Pressing down in the air makes the beetle pound. From Level 3, some boss shields require a pound shockwave. From Level 4, new lane-switching situations appear. These moves matter, but they do not have to be learned before you can recognise the first white thump, bend or red bar.

If a new obstacle appears, read the game’s tutorial prompt and identify its shape before copying a move from a later-level video. A prompt asking for up or down is your clue that the game is teaching a new action. Play+ is an even harder mode unlocked after Level 3, so do not use its high-speed examples to judge your first ordinary run.

One-screen quick reference

  • Silver beetle near the bottom = you. Watch the track ahead of it.
  • White rectangular tile = tap action as the beetle reaches it.
  • Left or right bend = hold action and steer into that direction.
  • Red bar across the track = hold action to slide underneath.
  • Boss sequence repeats = learn the missed cue and make a cleaner loop.
  • R on keyboard, L1 or LB on controller = open Quick Restart menu during a level.

If one cue is still hard to recognise, scroll back to its official screenshot and the labelled diagram beside that step. Look at the shape first, then at the button. That little order makes the speed feel less overwhelming.

Get Pixel Twelve's biggest stories first.

Add as a preferred source on Google